Jiggle Bones
Introduction
Jiggle bones are a simple way to give physical, dangly attributes to your models. They have various usages including simulating hair and rope, forming solid hinge-based objects, and also have organic applications such as simulating breasts and fat.
This page covers how to set up your bones in Maya and implement them as jiggle bones in-game. Knowledge is still fairly limited on this topic, but the below guide should help you understand the basics of jiggle bones for you to experiment and have fun.
The fundamental and theoretical approach to bones and rigs are quite consistent across modelling packages.
This page does not cover in detail modelling, rigging, skin binding, or implementation.
The assumption is that:
You know how to create and manage addons and projects in s&box.
You know how to import your 3d asset into ModelDoc and get it in-game.
You have set up the skeleton for your model and it is rigged, whether that is a creature, a simple prop with dangly parts, or a clothing item for Terry. The character rig from Terry’s model (citizen_2022-10-31.fbx) is what we will be using throughout this page, so if you are simulating bones on Terry’s clothes (zippers, frilly parts, etc), you’re especially in luck, but the same knowledge applies to simpler props.
If it is a piece of clothing for Terry, you have properly bound it to Terry’s skin and it synchronises with Terry’s joints, bones, and movements. Check out Danduw's video for more information on garment creation.
For the Maya parts, make sure you've got some experience using the software. You can also apply the same techniques in Blender.
Contents
This tutorial will cover applying two jiggle bones to two different things: a zipper on a boot, and a pair of fake breasts.
If you want to skip adding bones then head straight to implementation.
There is also a short list of examples from Valve from other Source games to give you an idea of how they are made.
This page should hopefully cover you for most other applications of jiggle bones. The article gives you a general foundation for you to go and experiment. Jiggle bones can give some very interesting and dynamic results.
One thing to remember is this: jiggle bones take a long time to tweak. You will likely not achieve the desired effect for your jiggle bones immediately. Additionally, you are at the mercy of a physics engine. This means it can be hard to control your jiggle bones, and clipping is often present. However, thanks to the proactive nature of Source 2, we can edit the jiggle bones using ModelDoc’s GUI to see the effect immediately after recompiling your model.
Terminology refresher
Vertex weights
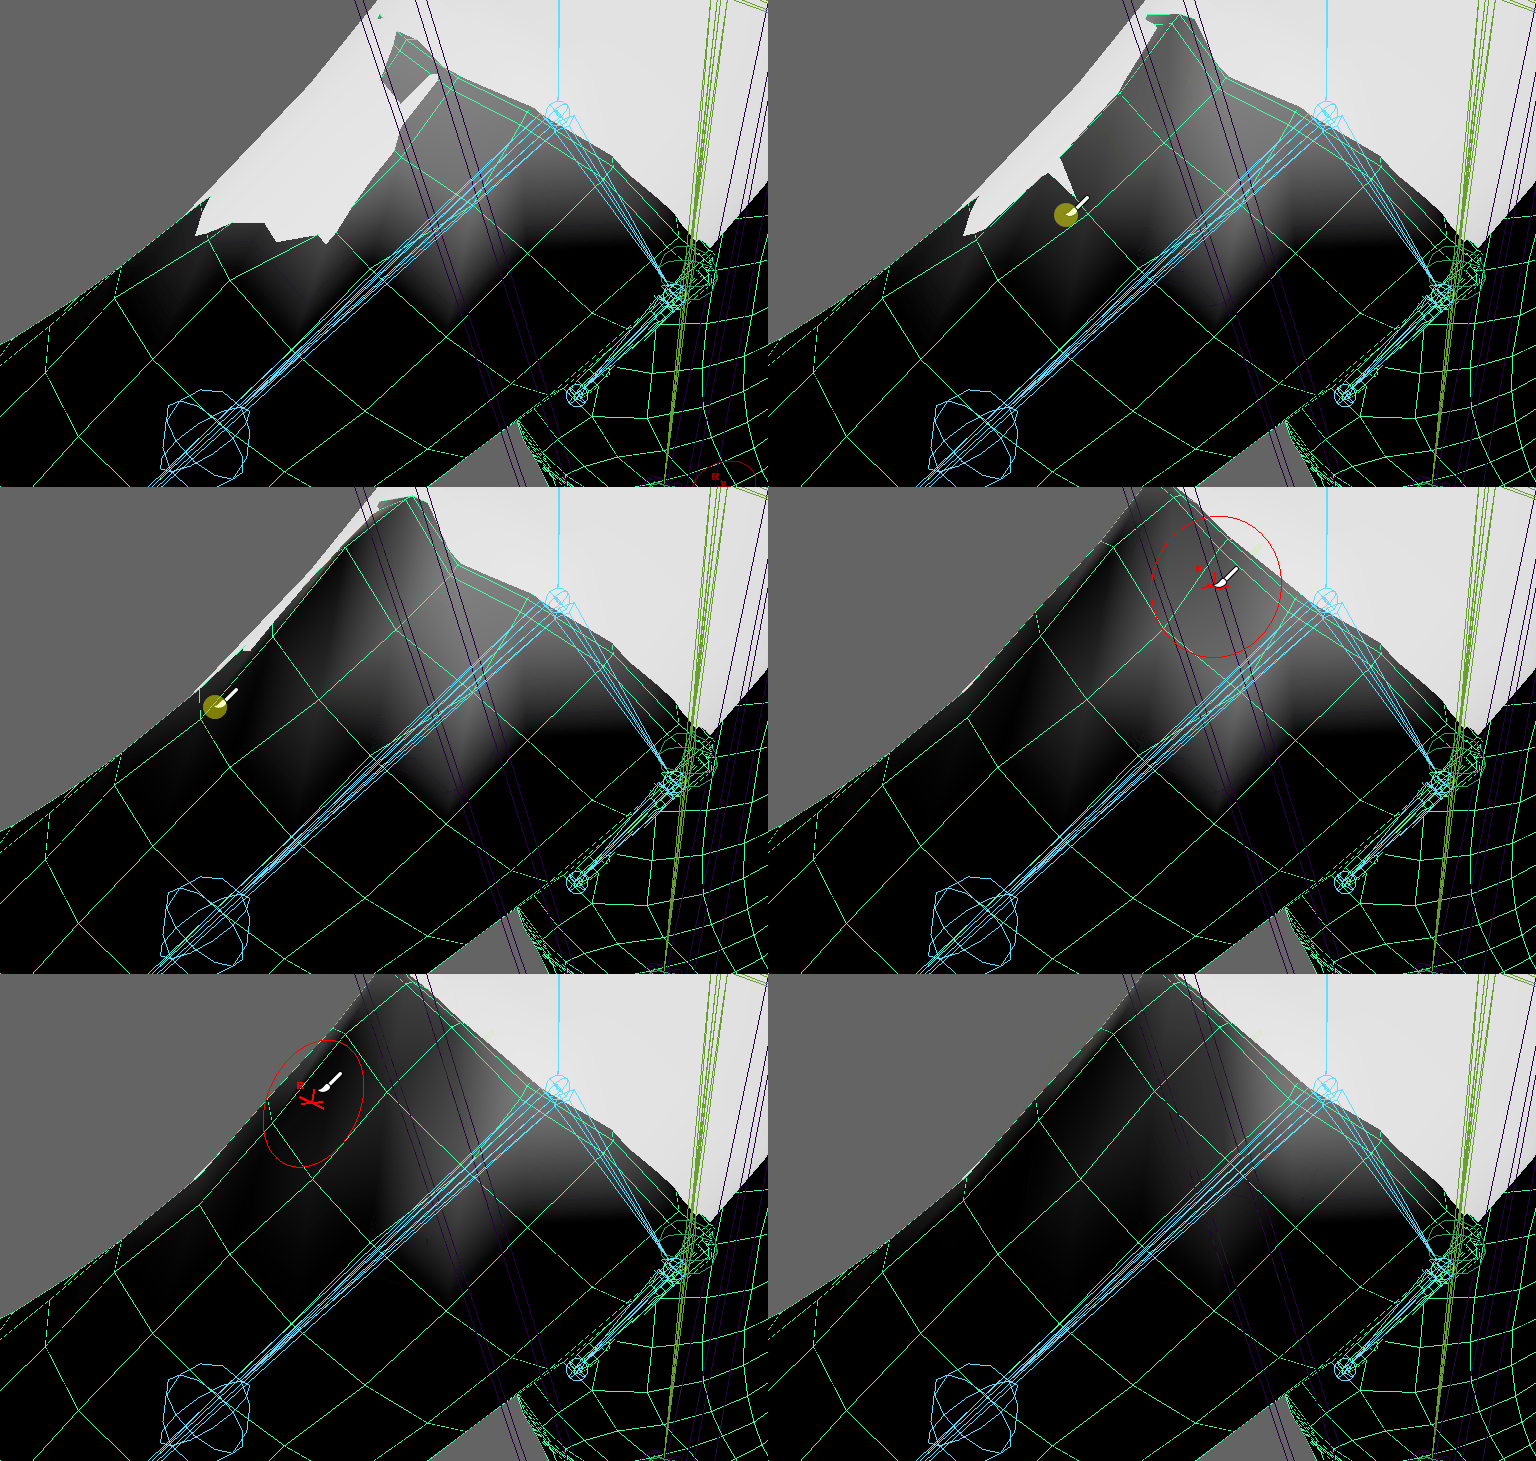
Every model is made up of vertices (the corner points of a mesh.) Source 2 needs to know which vertices will be affected by which bone so it can accurately simulate the physics effects upon each vertex. The process to mark these vertices is called vertex weight painting. In Maya, the whiter the vertex, the more that vertex will be influenced by that bone. Notice how when we paint vertices black, we can save a bad case of clipping, as we reduce the influence upon that bone by removing the white paint.
Influences
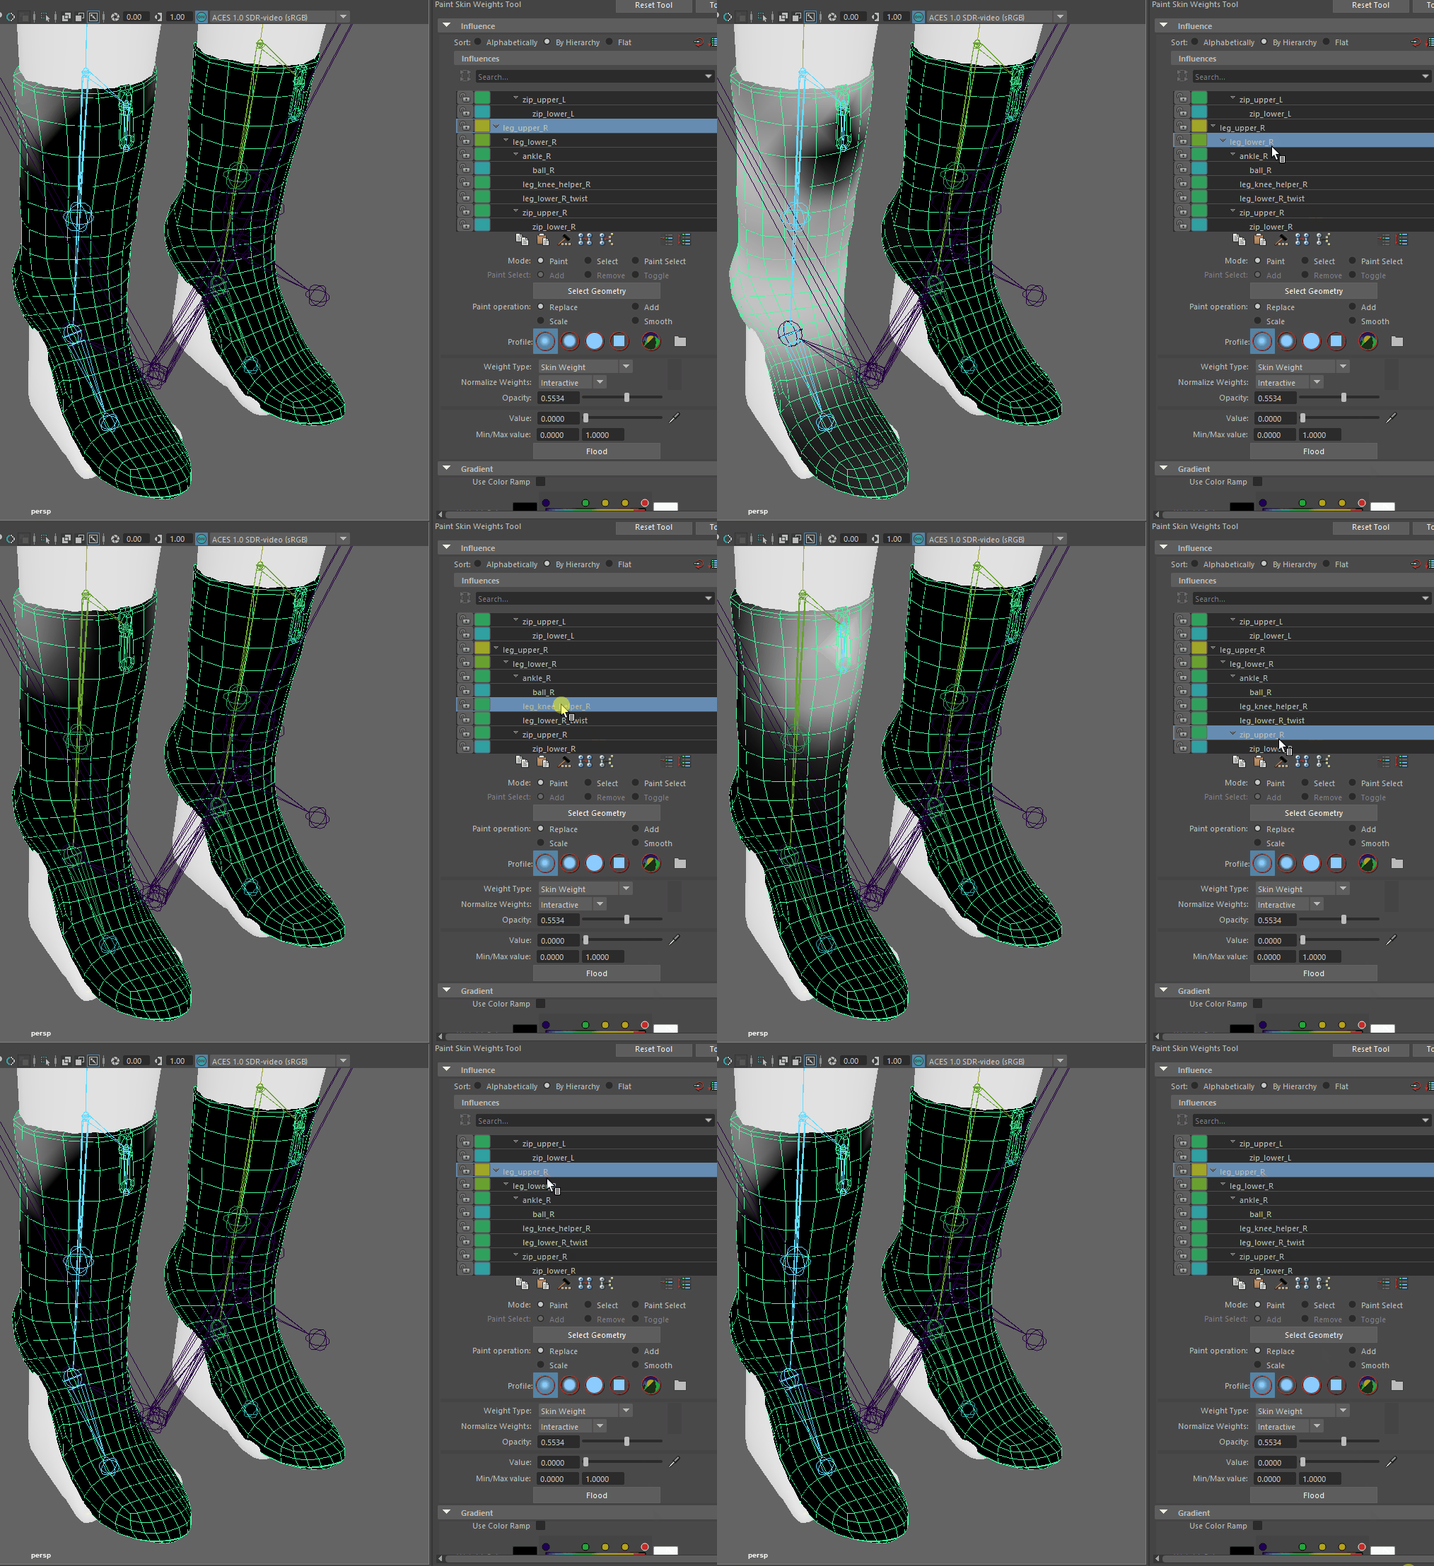
Bones and joints must influence vertices. By selecting a joint in the hierarchy list during painting, we can see how it affects surrounding vertices (the white and black paint on the model).
Joints and bones
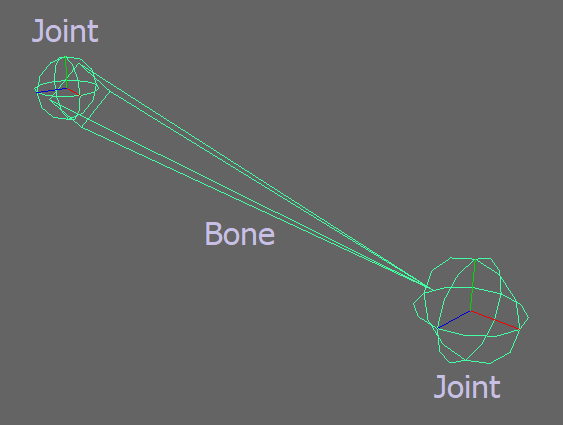
Bones are the longer shaped object that sits between two joints. Joints are the round object that sits between the bones.
Hierarchy
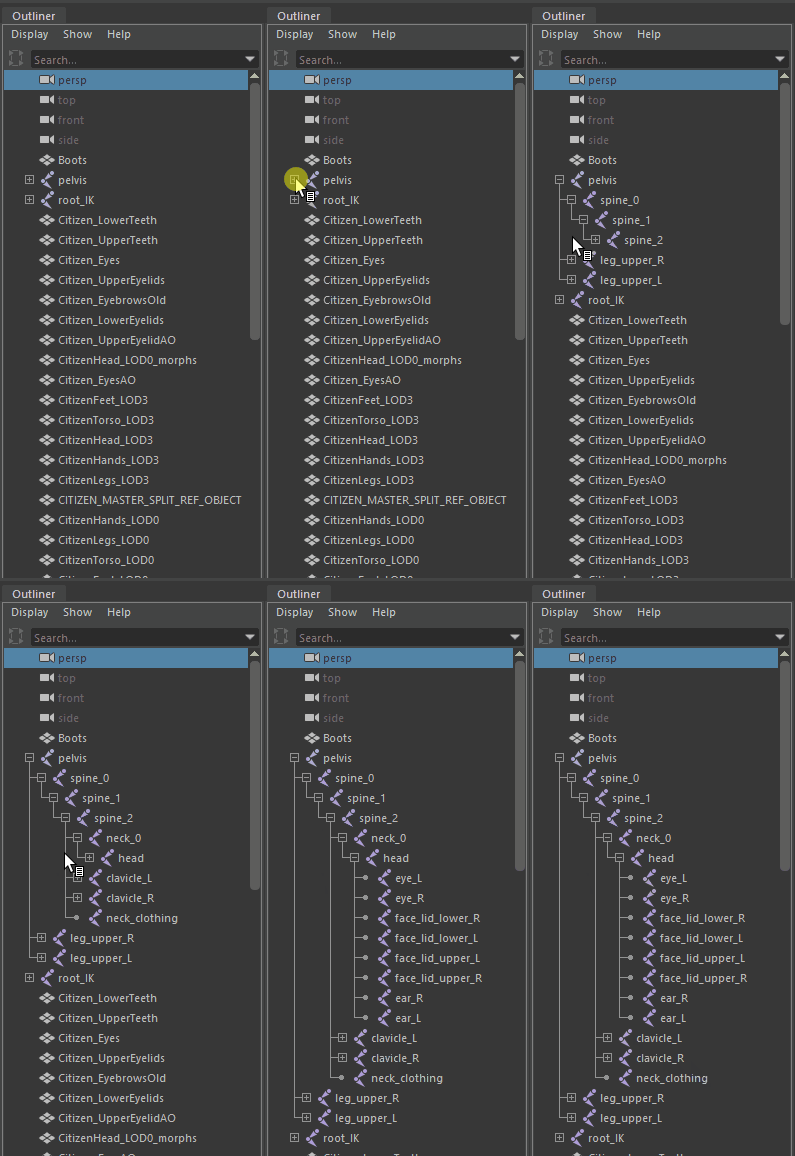
In Maya, skeletons are organised into hierarchies, with parent bones and child bones. For example, lower arm > wrist > fingers. Your jiggle bones will need to be placed into the most suitable (usually the nearest) hierarchical section for them to behave properly.
Deformation
How the vertices are pulled, stretched, and warped due to their surrounding influences. Deformation is good for organic parts, but not great for solid parts (such as zippers, metal, etc).
Skinning
This is the process of binding the mesh and its vertices to the nearest bone on the skeletal rig. Again, Danduw's video goes over that in more depth.
Important advice before you start
1. Make backups.
Again, this cannot be stressed enough. It is good practice in the world of game dev.
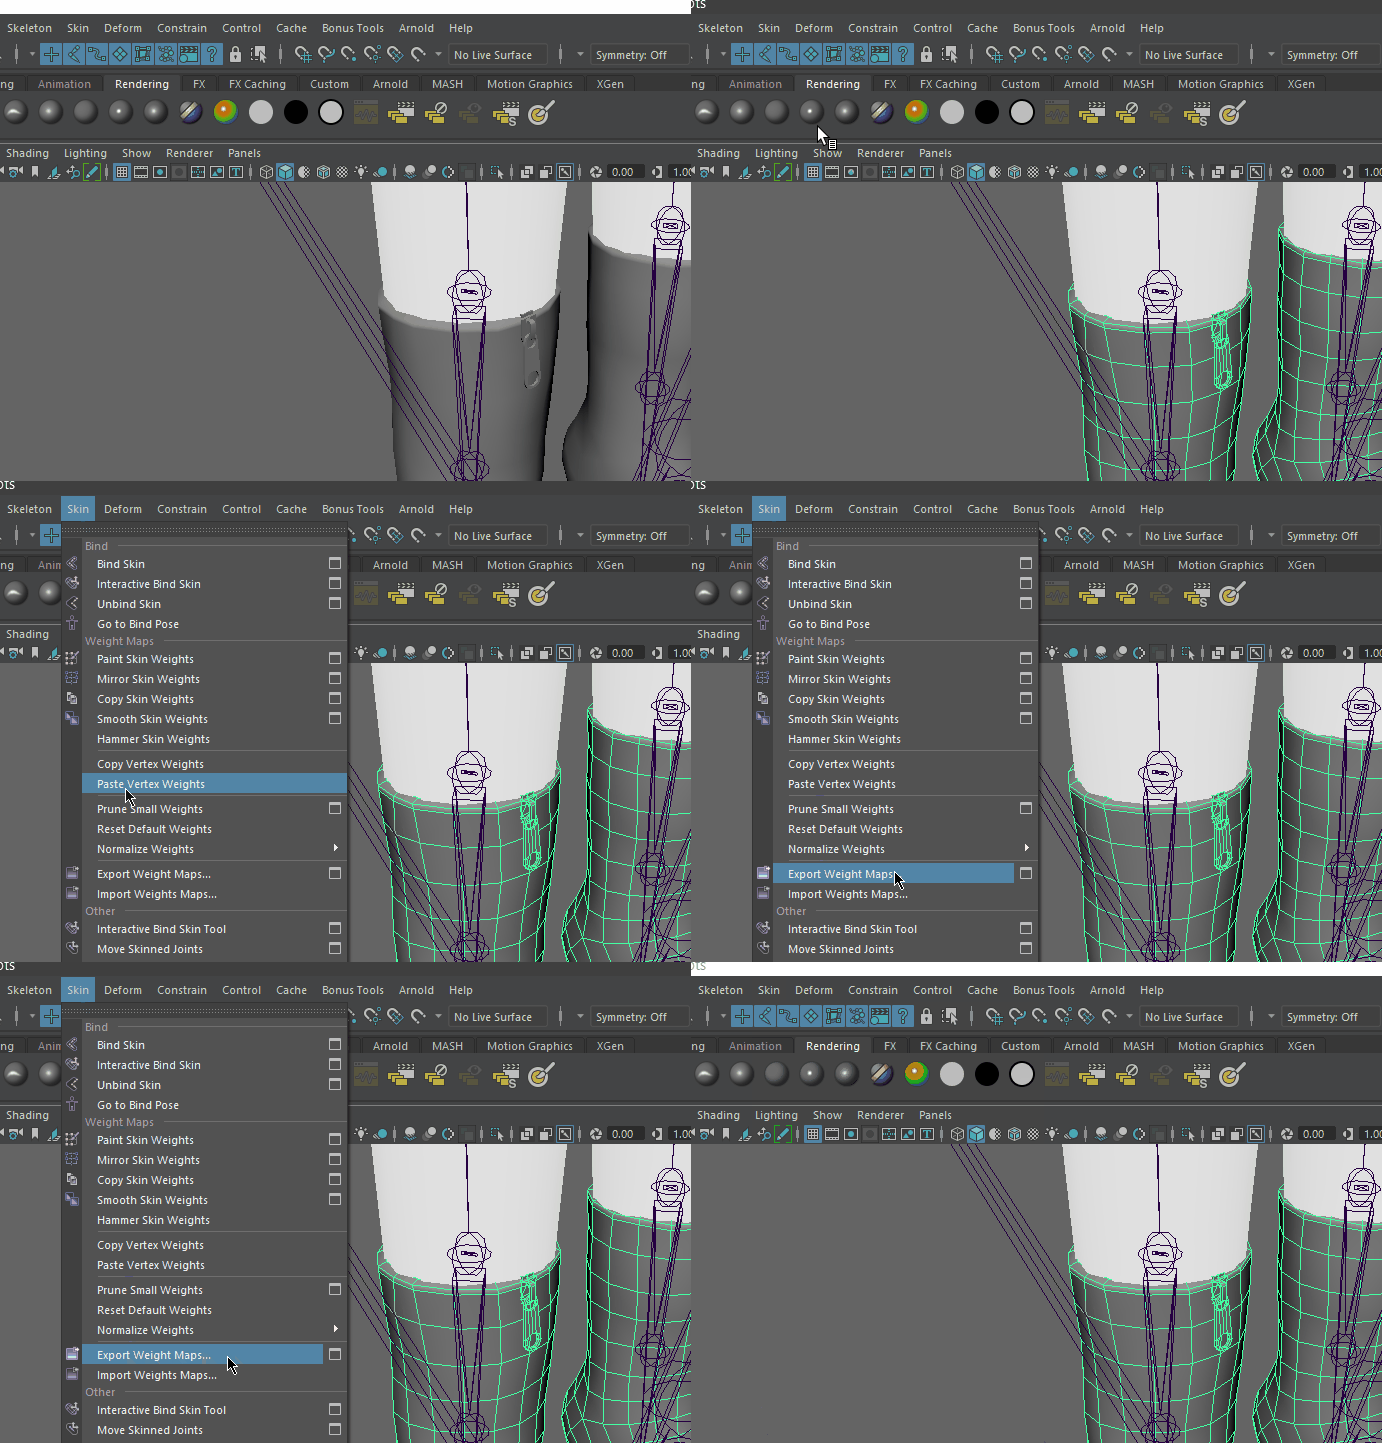
2. Regularly export your vertex weight maps from your model.
If you ever go back and forth between the engine and Maya to tweak your vertex weight painting, you should have a version to go back to if it turned out horribly. Vertex painting can get burdensome if you have, for example, a clothing mesh that won’t play nice with Terry’s rig because you may have to clear up a lot of clipping issues. This might not be an issue with simpler props.
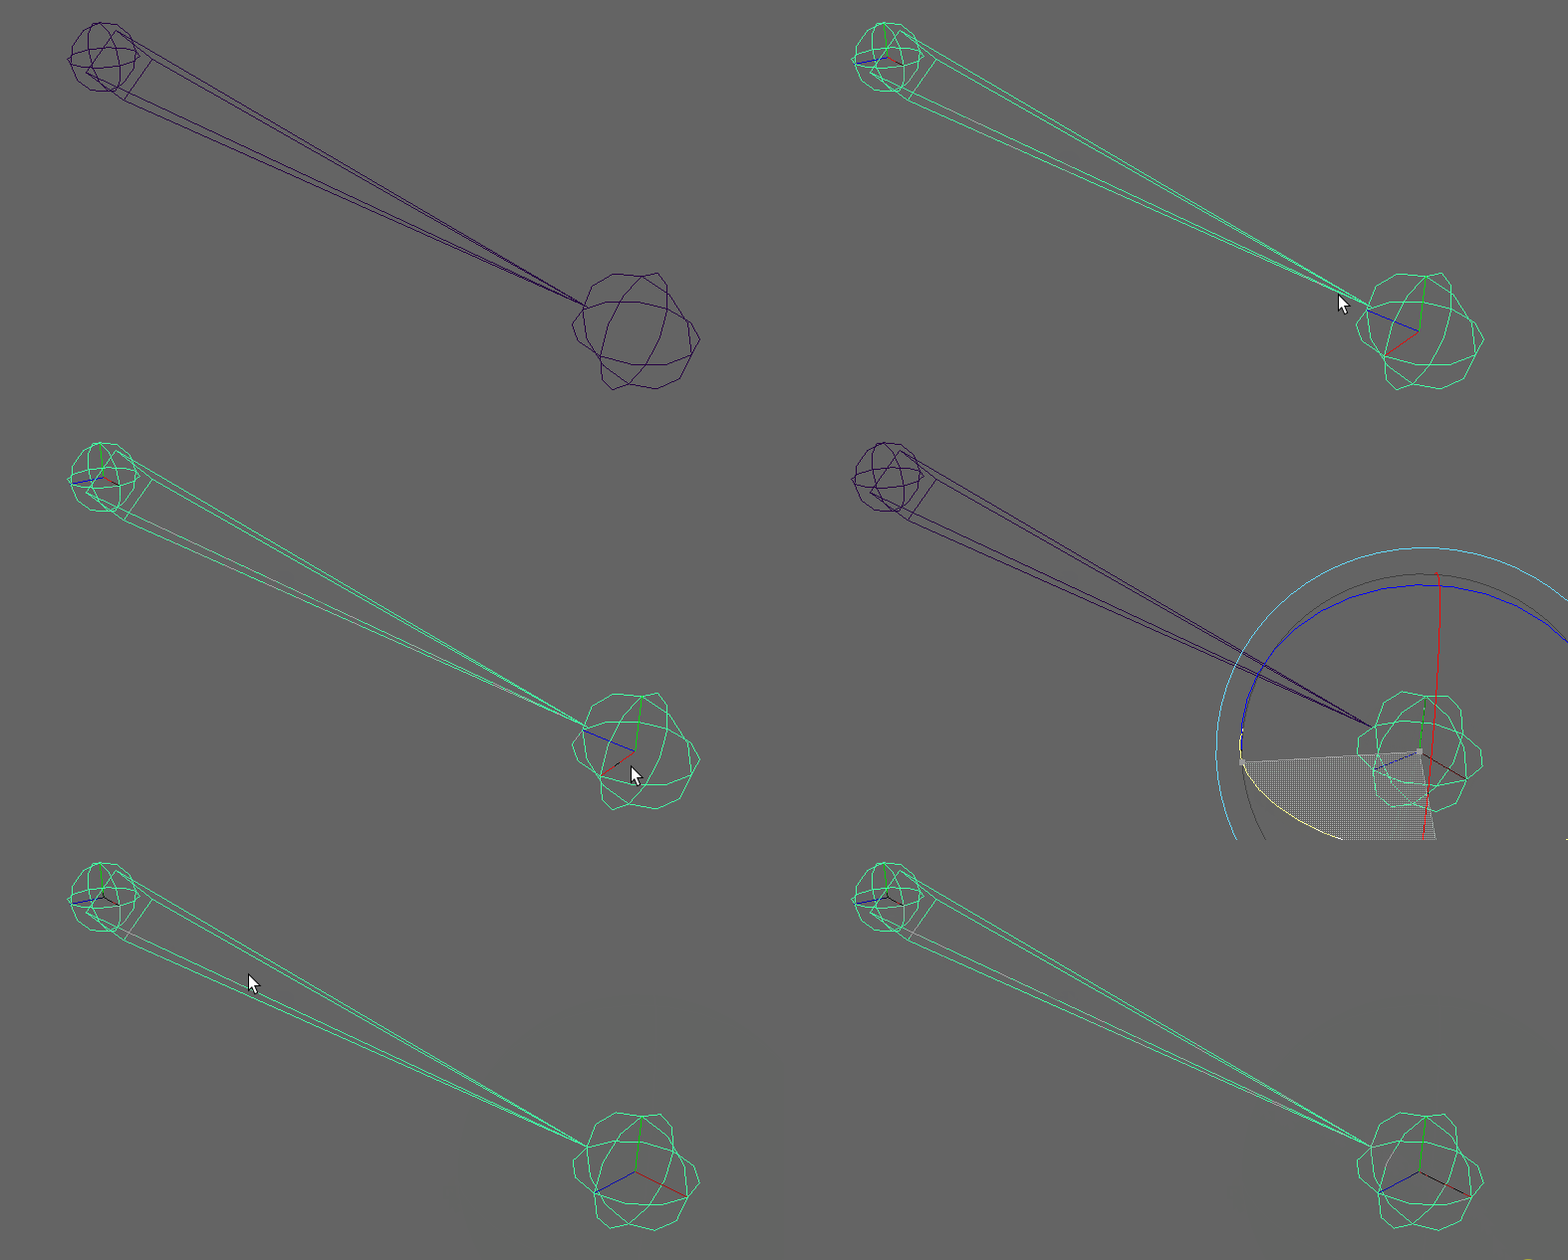
3. Jiggle bones must follow the x-axis (the red axis).
This is so your jiggle bones will correspond and react in the proper fashion.
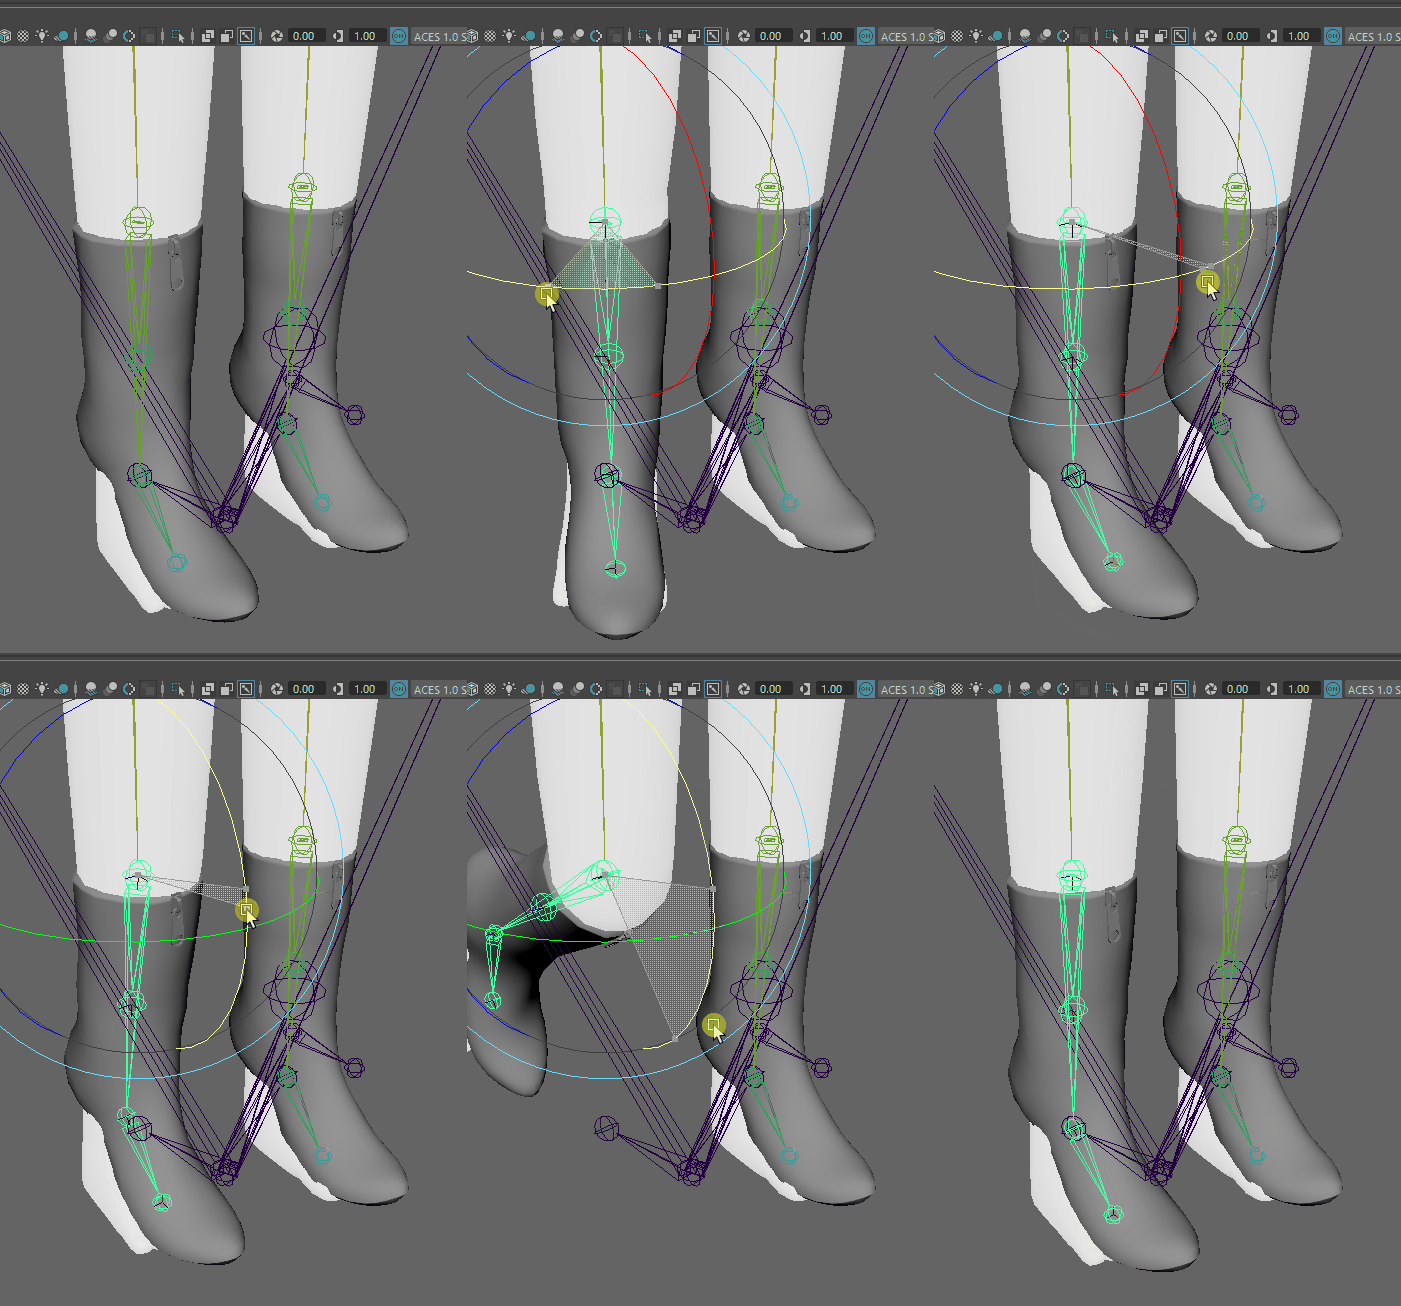
4. Keep your model combined and as one mesh.
Remember that the vertices are what will be physically simulated by the engine. In the case of the zipper, it is a part of the entire boot model - you don’t need to separate the zip as a separate mesh.
5. Source 2 works with a maximum of 4 joint influences when skin binding.
Keep the above in mind when binding and unbinding skin.
Zipper
The first section will cover a basic dangling zipper from a pair of leather boots. We will start in Maya, move into ModelDoc, and then test out our zipper in-game.
These boots are already bound to the skeleton, are weight painted, and properly follow Terry’s leg movements. The zip in question remains solid and keeps its shape. If you are working with garments, you should watch Danduw's video on the basics of vertex weight painting to ensure your model fits and moves cleanly before playing with jiggle bones.
1. Creating your jiggle joints and bones
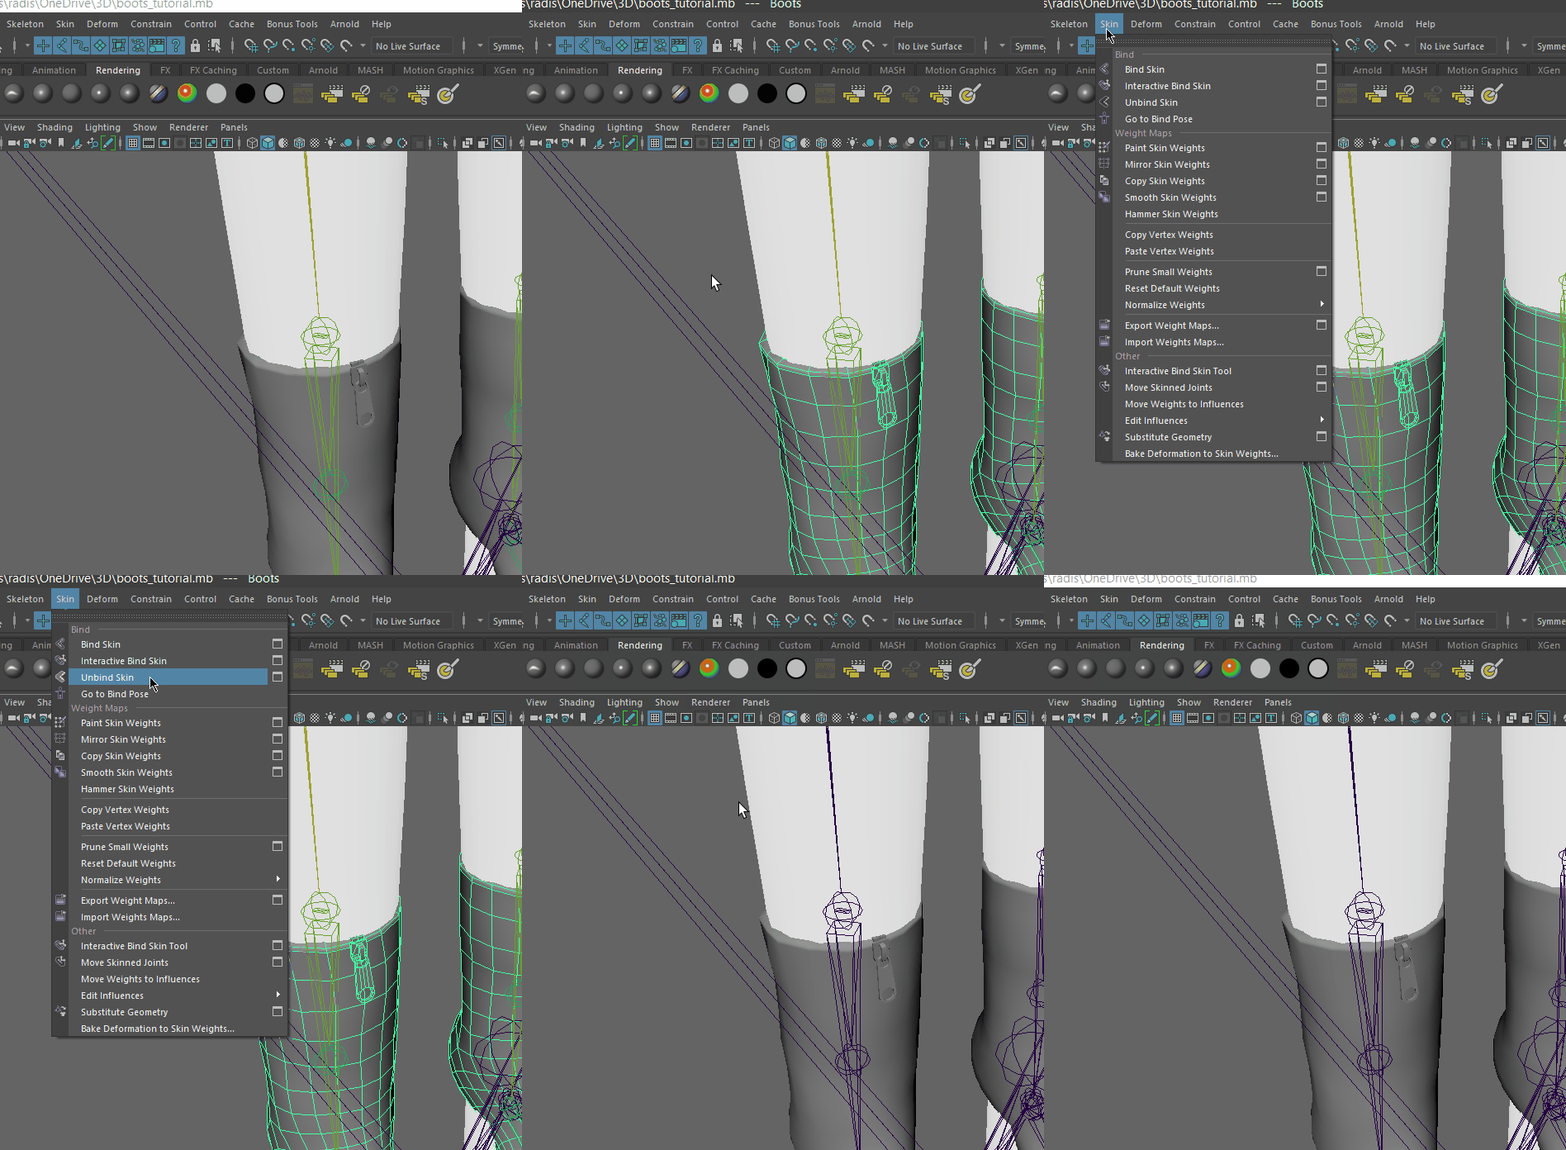
1.1 Export your weight maps.
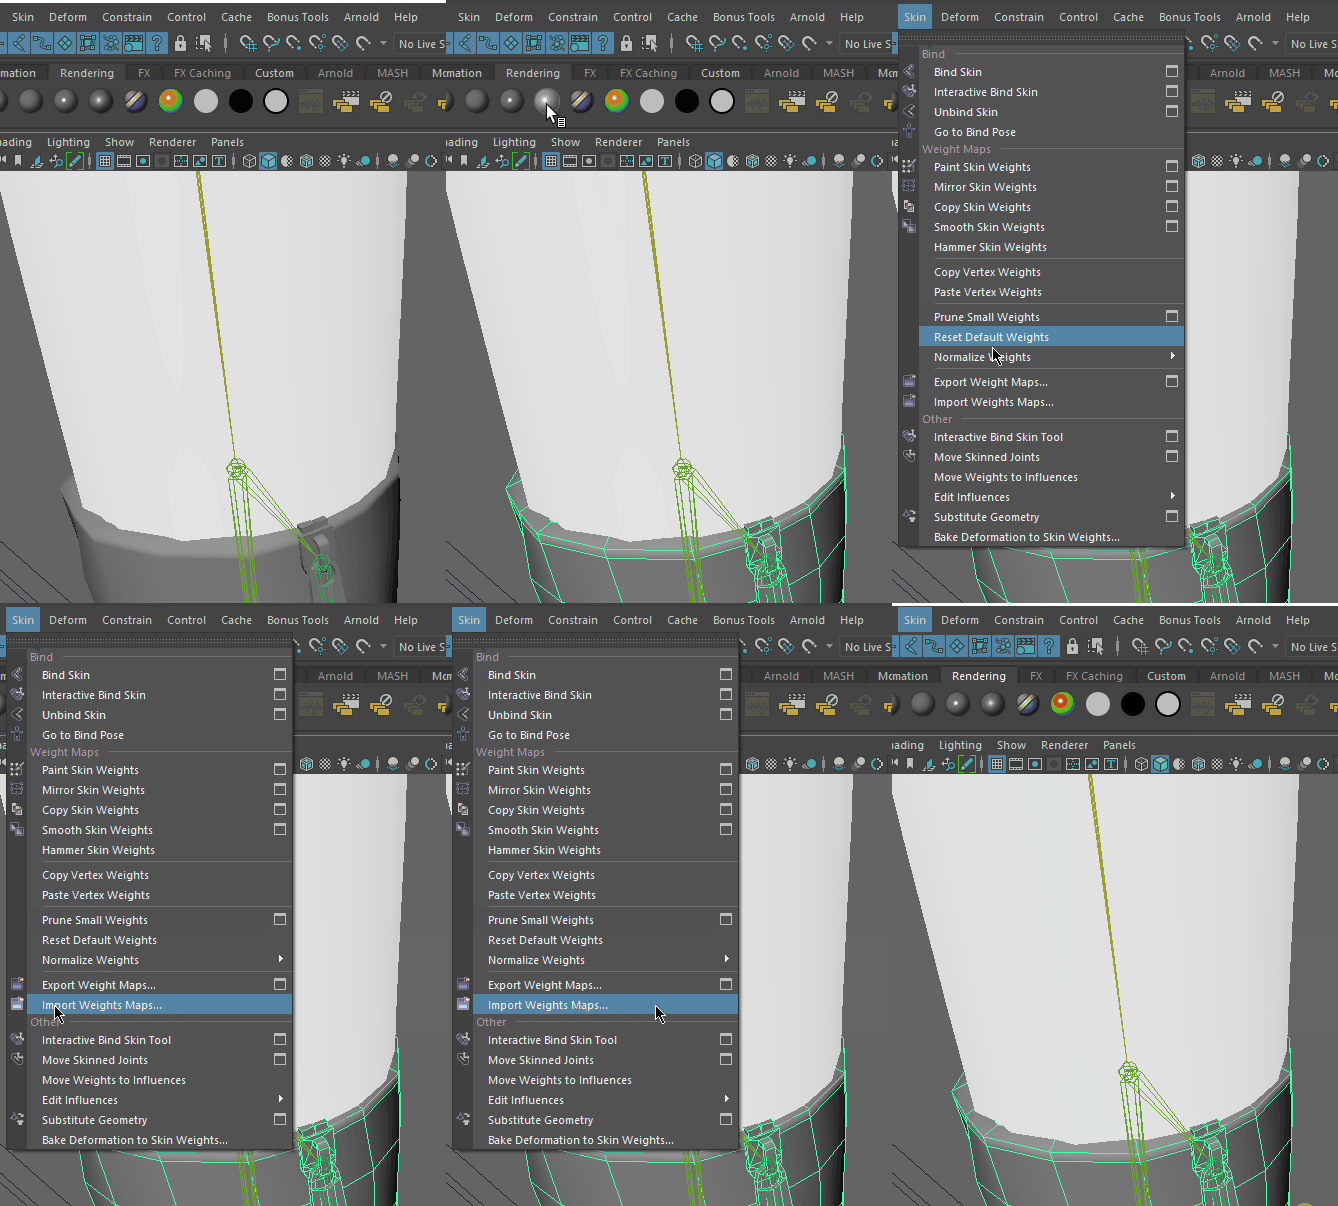
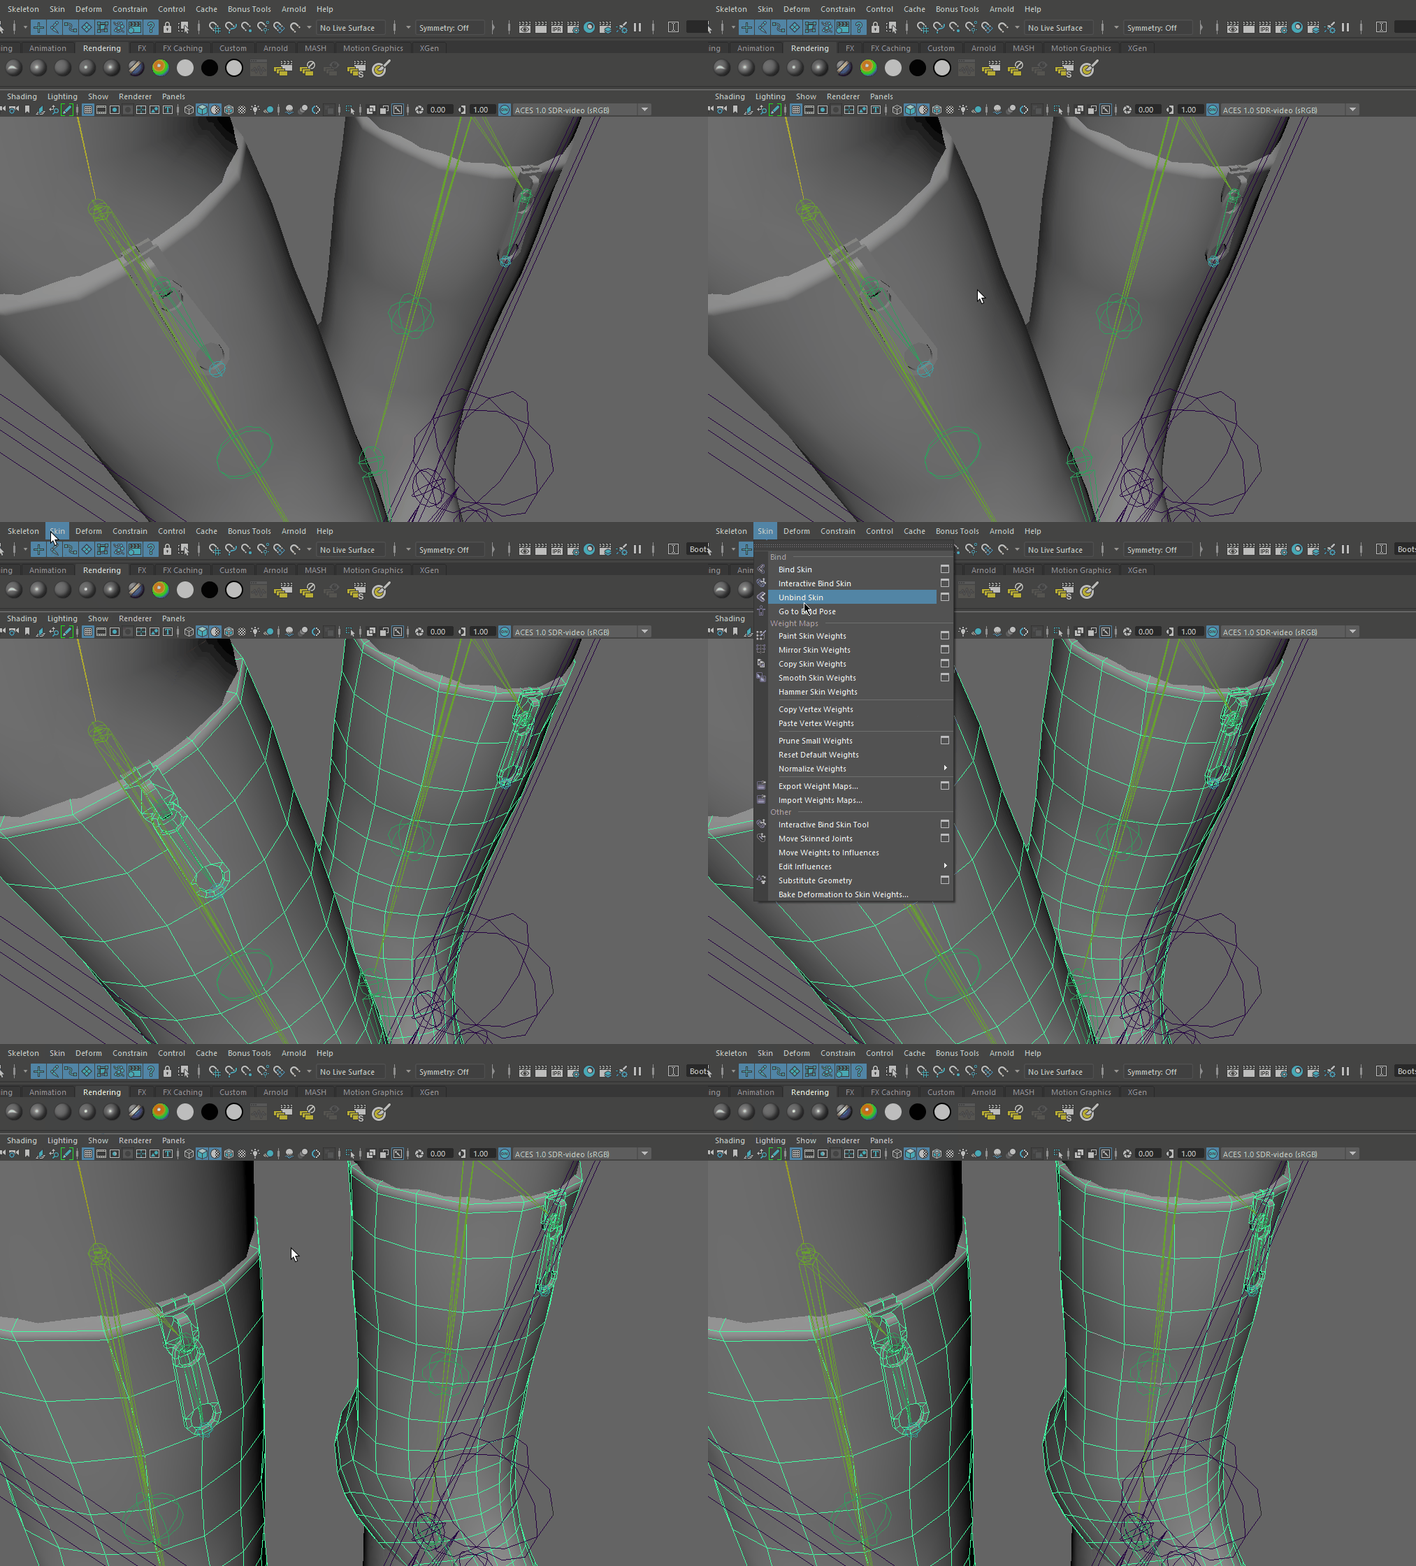
We are adding new joints, and so the model must be unbound from the skin and then rebound before any changes in the hierarchy are detected. Export your weight maps so you can reimport them onto the mesh when we rebind the skin later.

1.2 Unbind your skin from the skeleton rig.
This is so we can freely work with the skeleton to add bones. The skeleton turns dark blue to indicate that a mesh is not skinned to it.
1.3 Choose the nearest and most applicable joint for your use case.
For the zipper, joint leg_lower_R appears most suitable and thus this is the best starting joint.
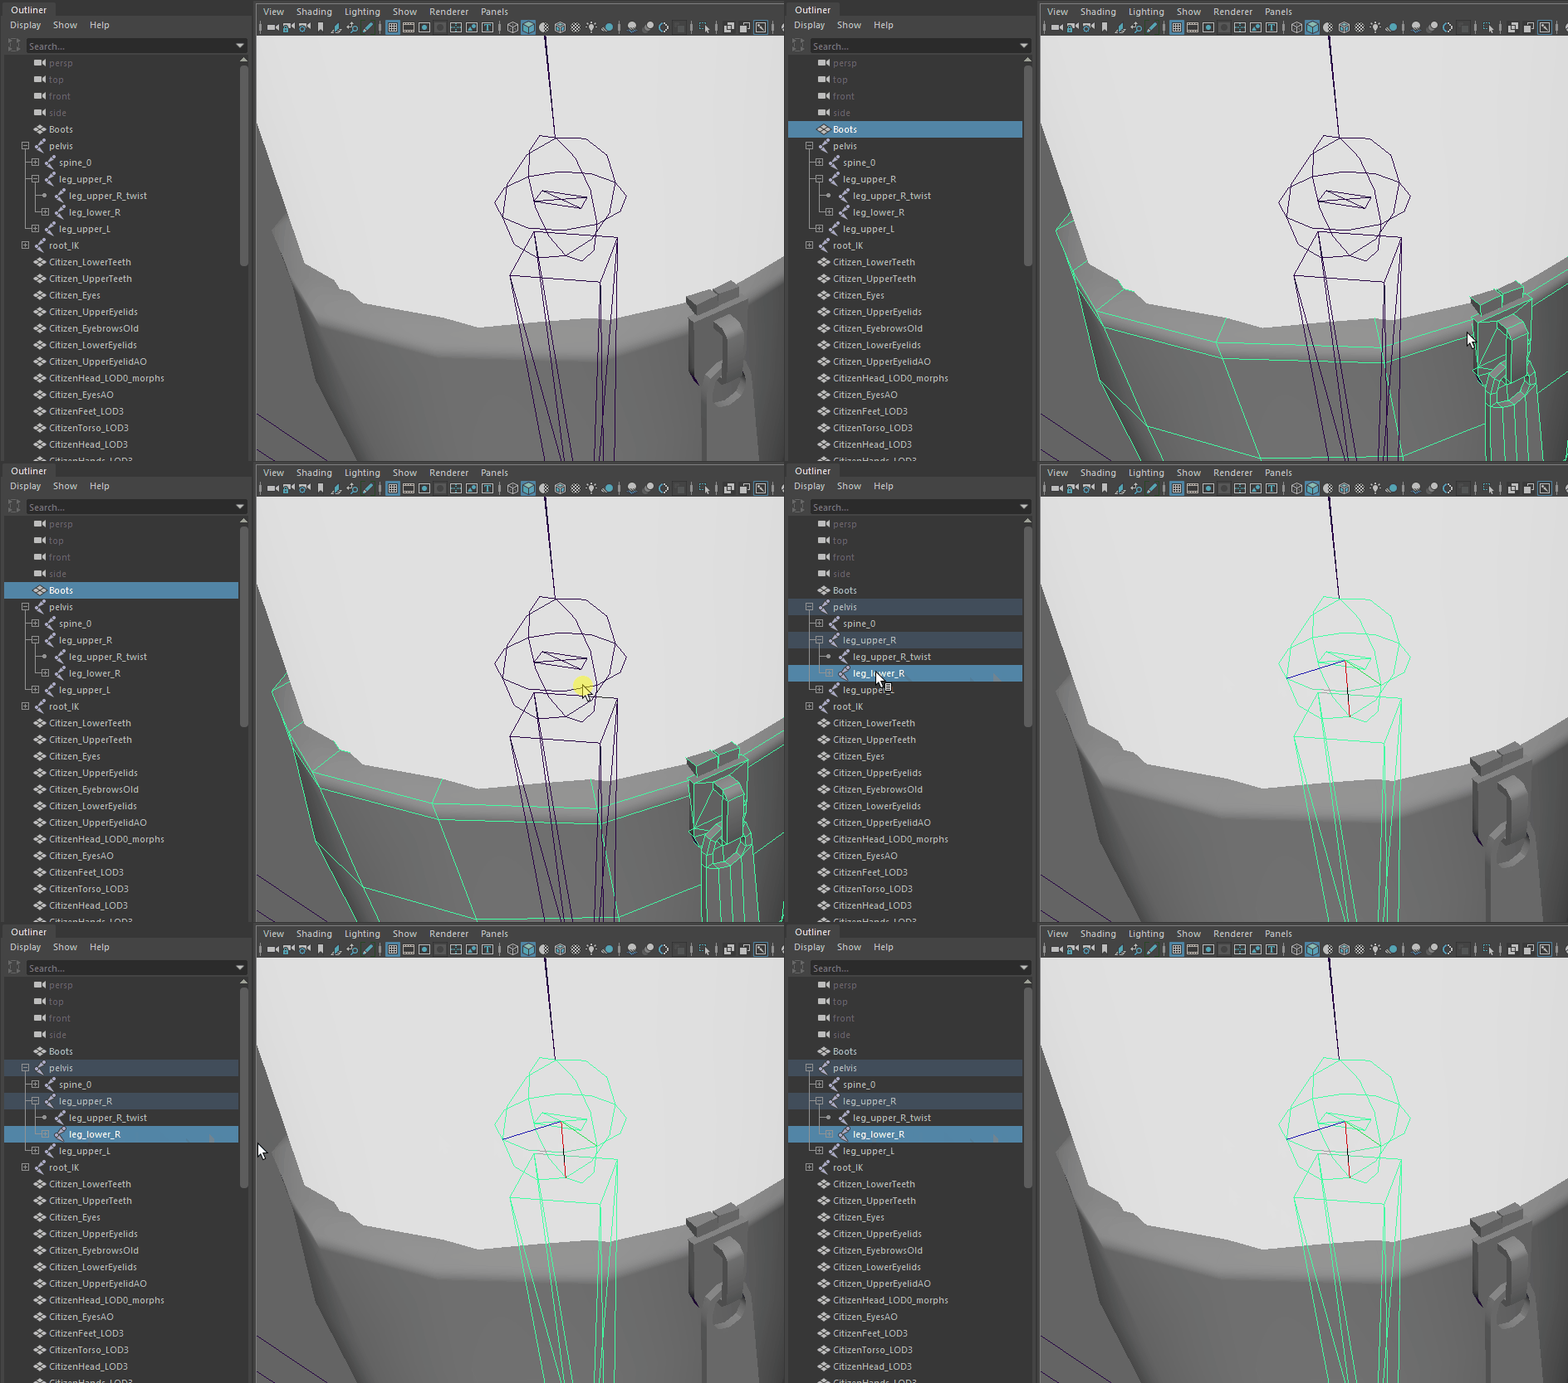
1.4 Turn on Snap to points so the bone you’re about to create snaps close to the desired point.

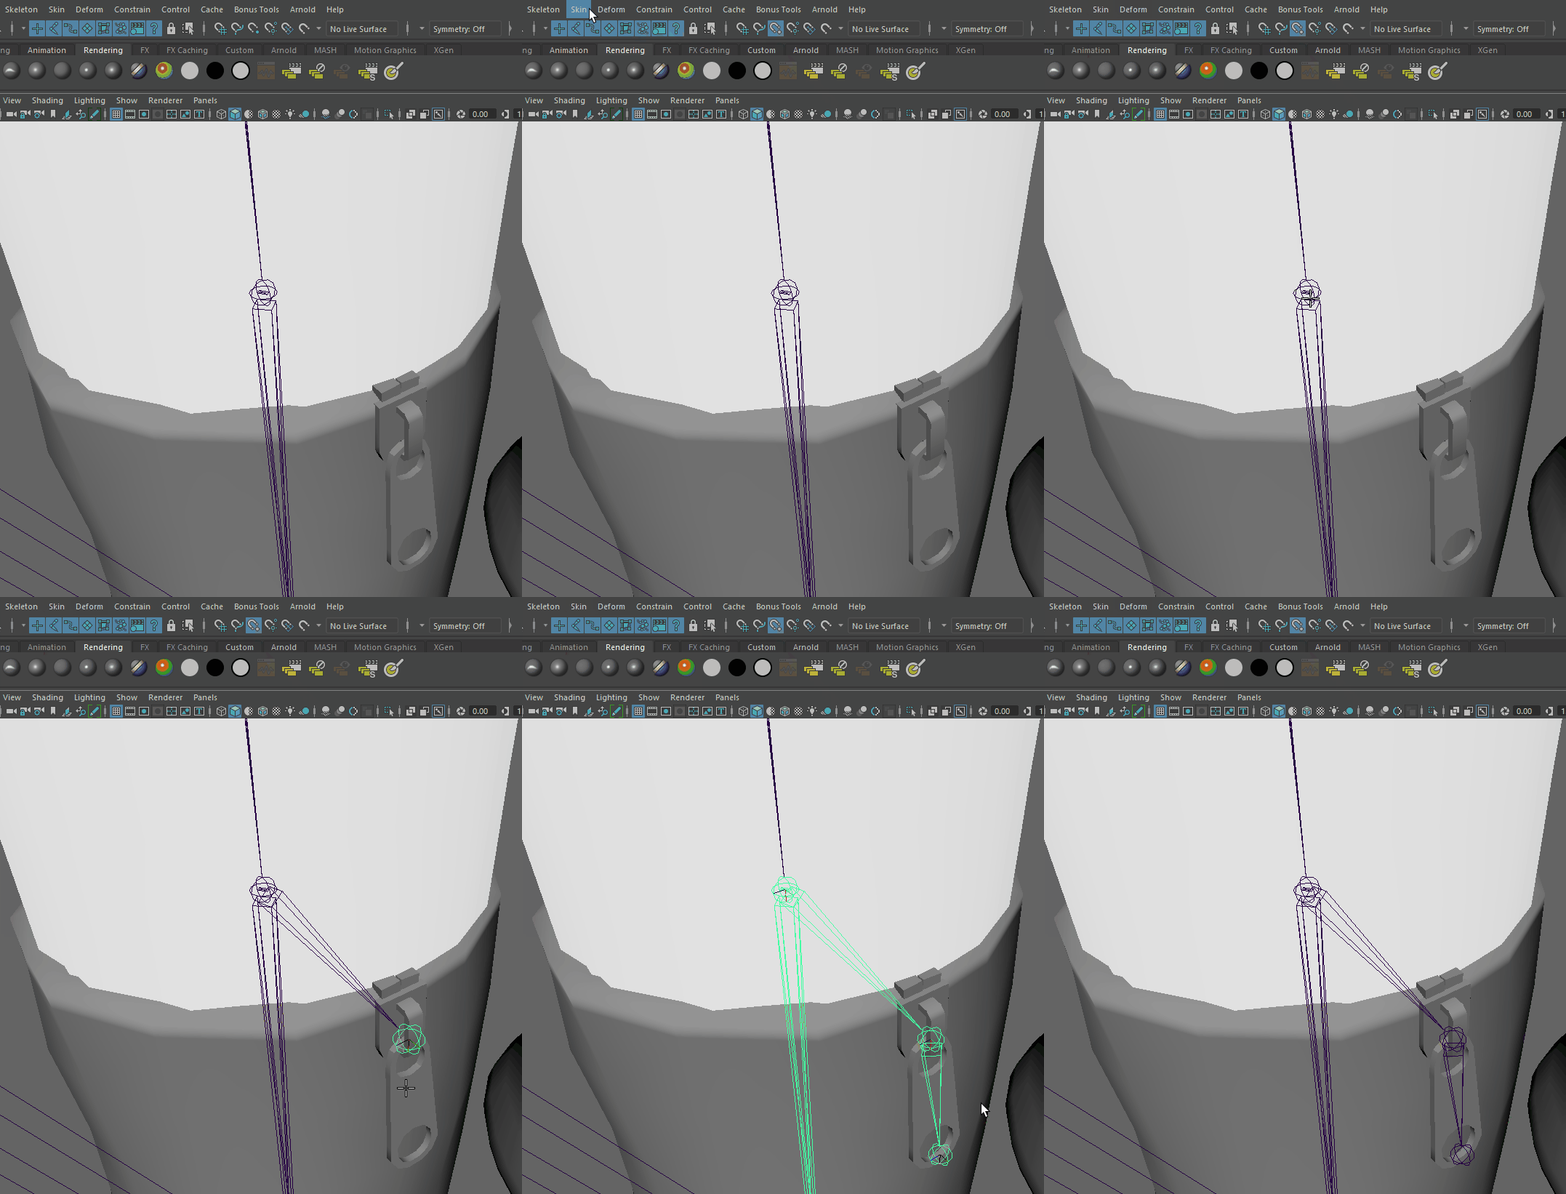
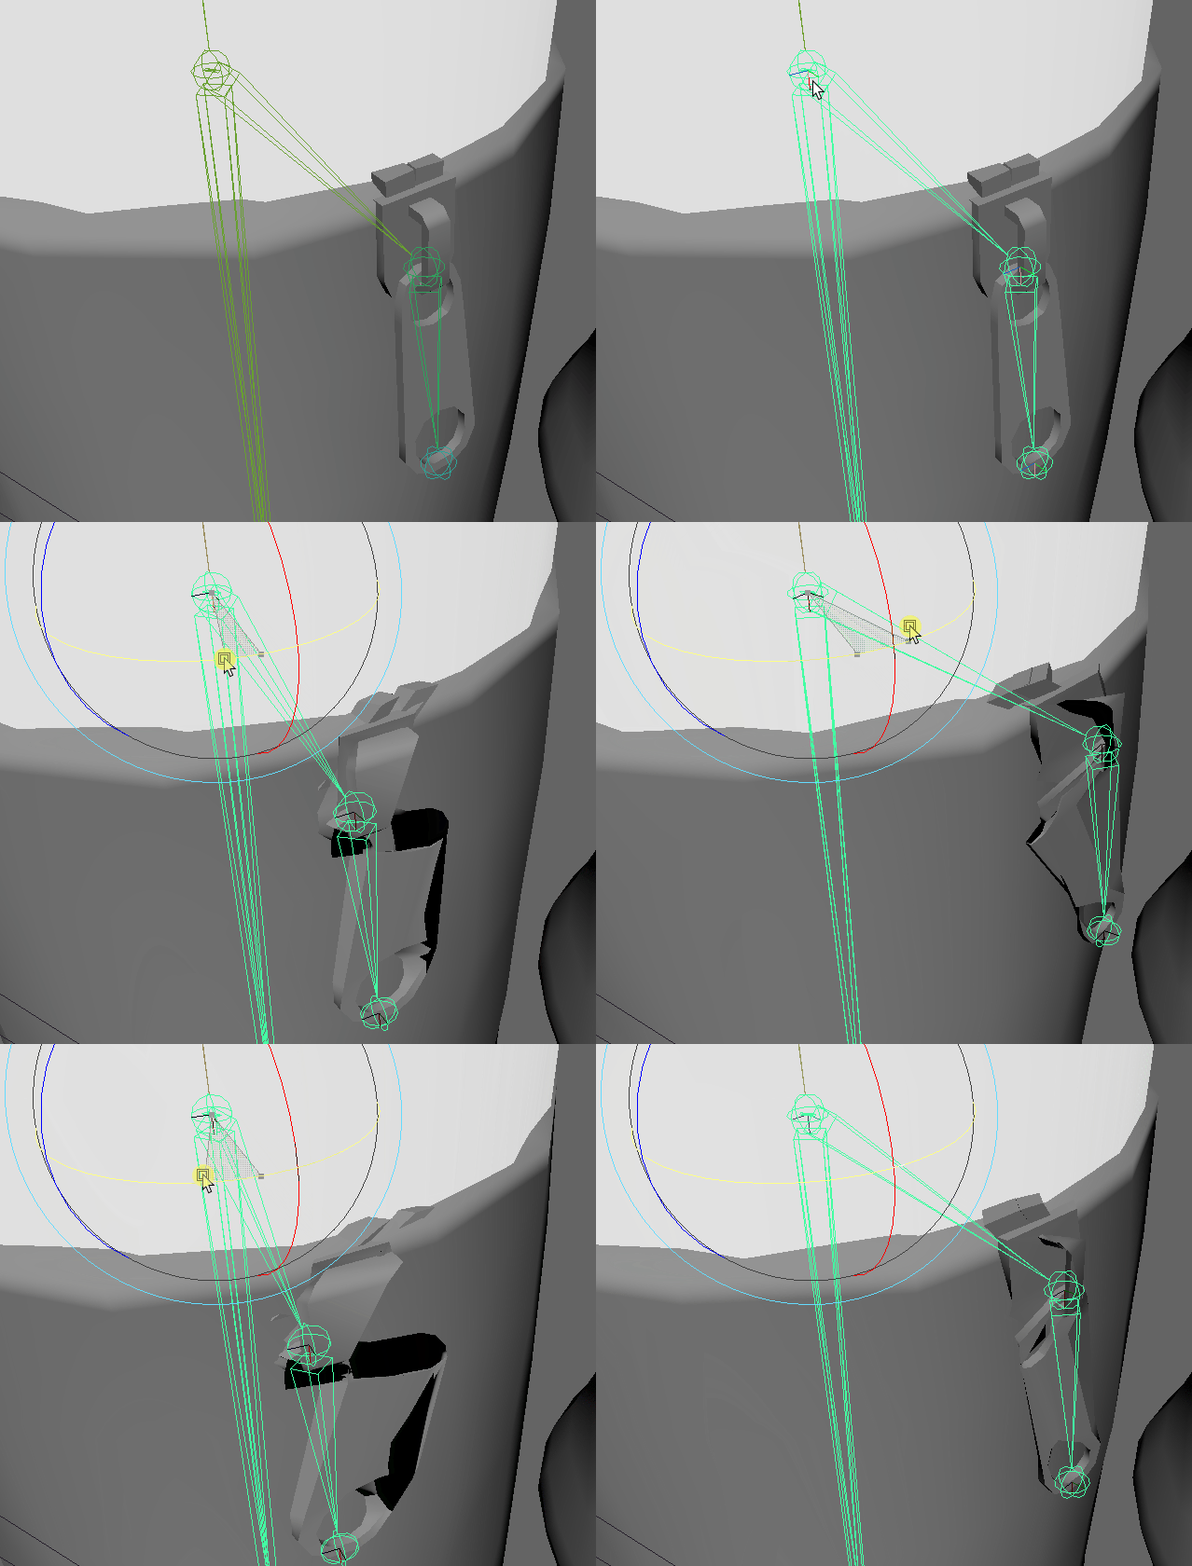
1.5 Using Skeleton > Create Joints, click on the joint leg_lower_R and click out two joints.
For the sake of this tutorial, we will draw out an additional bone to help us visualise things a little. It doesn't hurt, but it's not totally necessary for something like a zip that just dangles from a single point. Be aware of this for future projects.
You can keep clicking until you’re done.
1.6 You’ve just added a new bone to the rig. Wow!
Rename them appropriately. In this case, it’d be zipper_upper_R and zipper_lower_R.
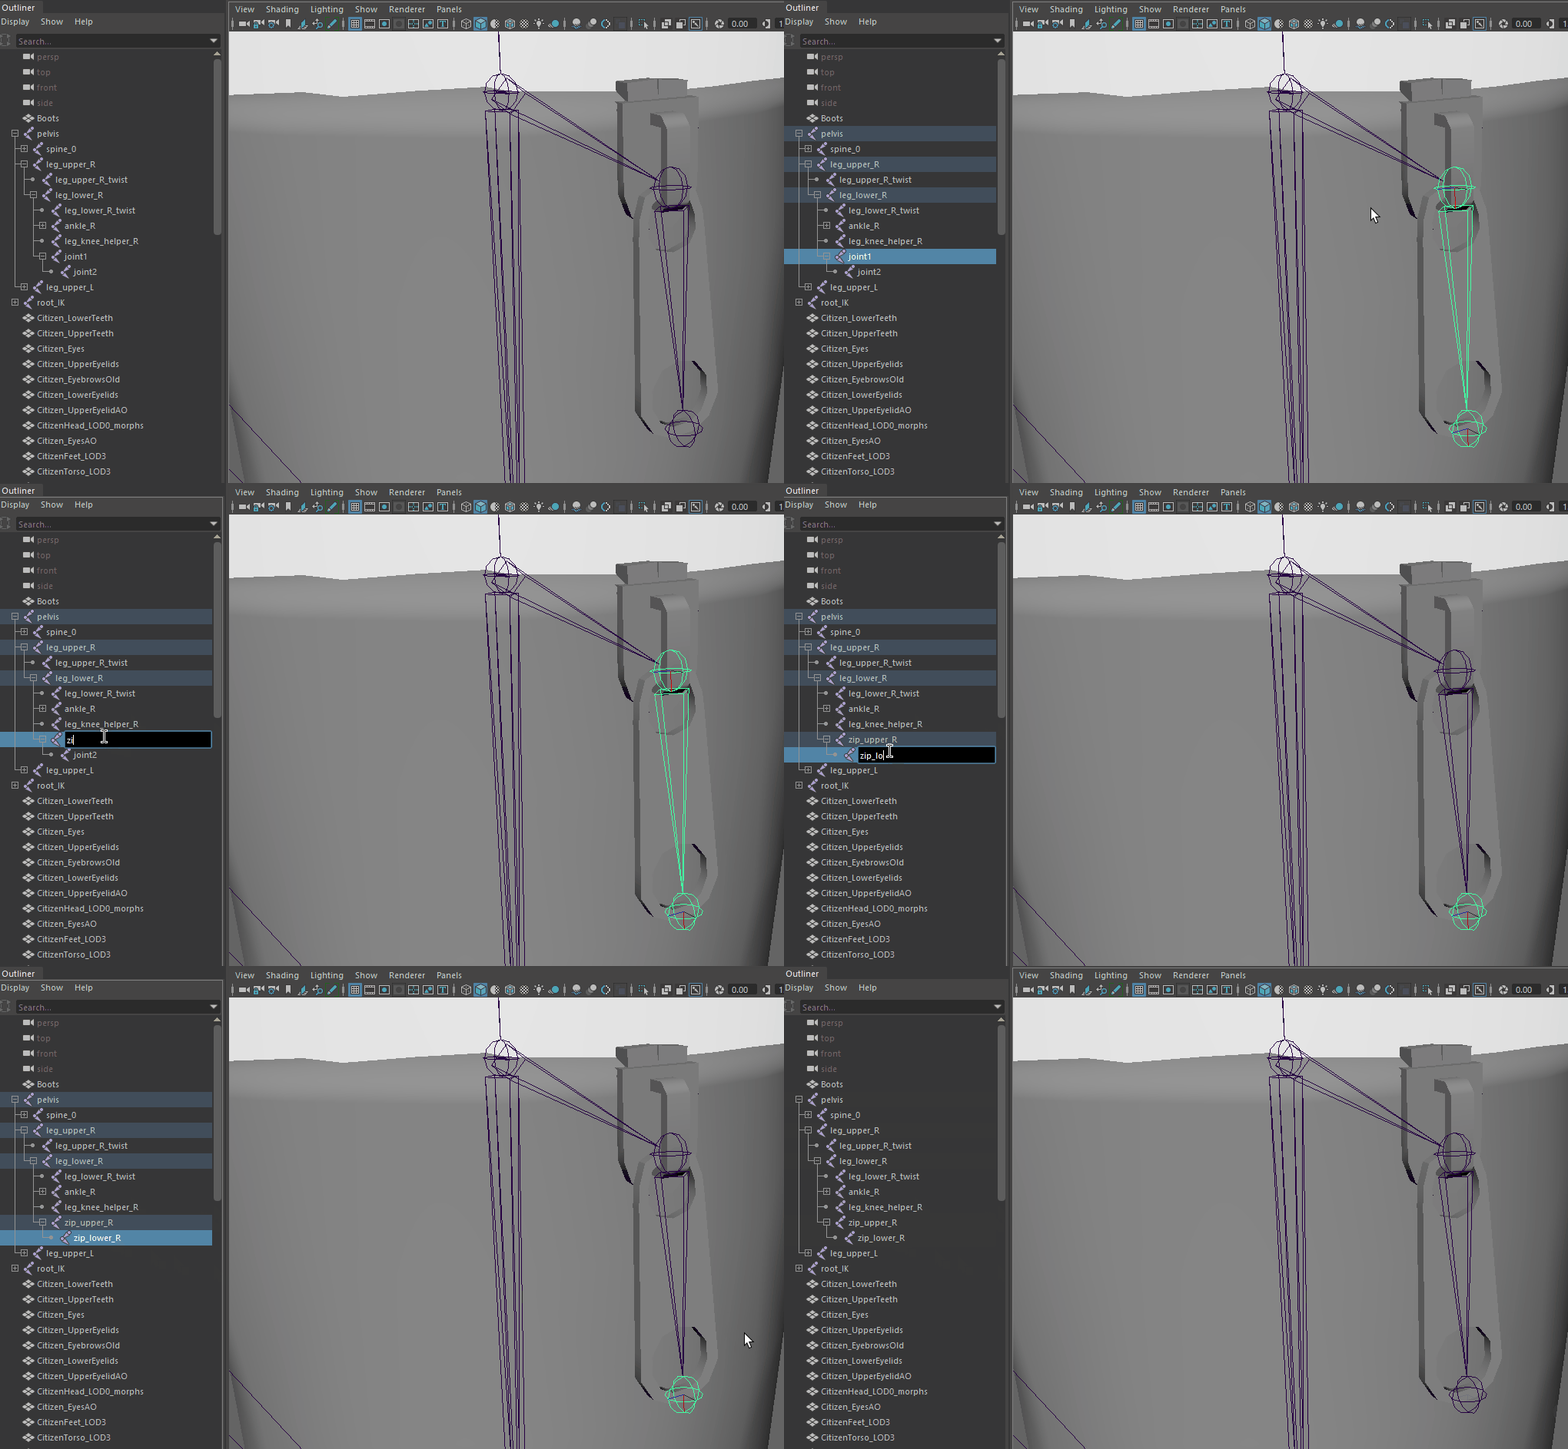
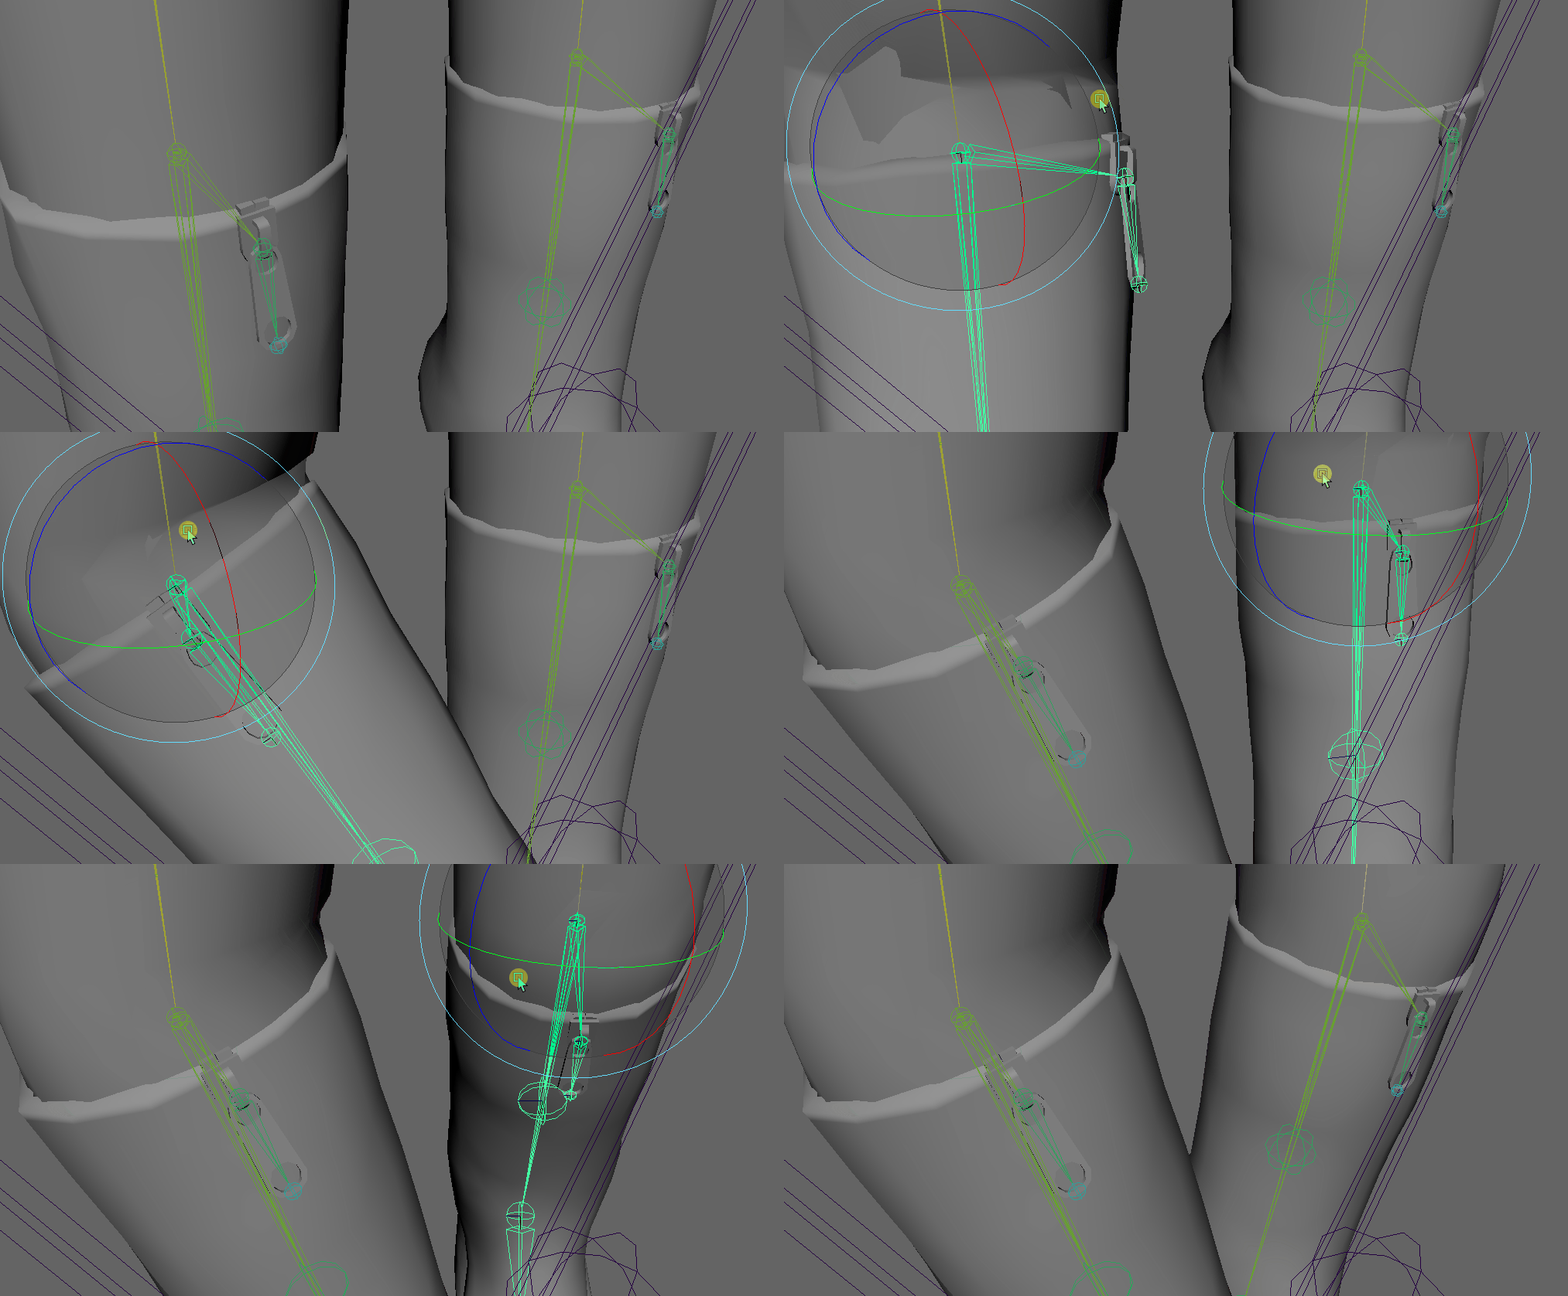
1.7 As shown above, rotate the joints so that the x-axis follows the zipper.
What we’ve created is essentially a small armature for the zip to follow.
1.8 Repeat the above for the opposite boot.
Remember to keep good naming conventions (e.g., zipper_upper_L and zipper_lower_L).
2. Rebinding your skin & reimporting your weights
2.1 Select your mesh in the outliner, hold CTRL, and then select your rig (in this case, it is the pelvis). This selection order creates the hierarchy.
You don’t want to select the two things the other way around. Then, click the Bind Skin settings box. Ensure your settings are as follows, then click apply.
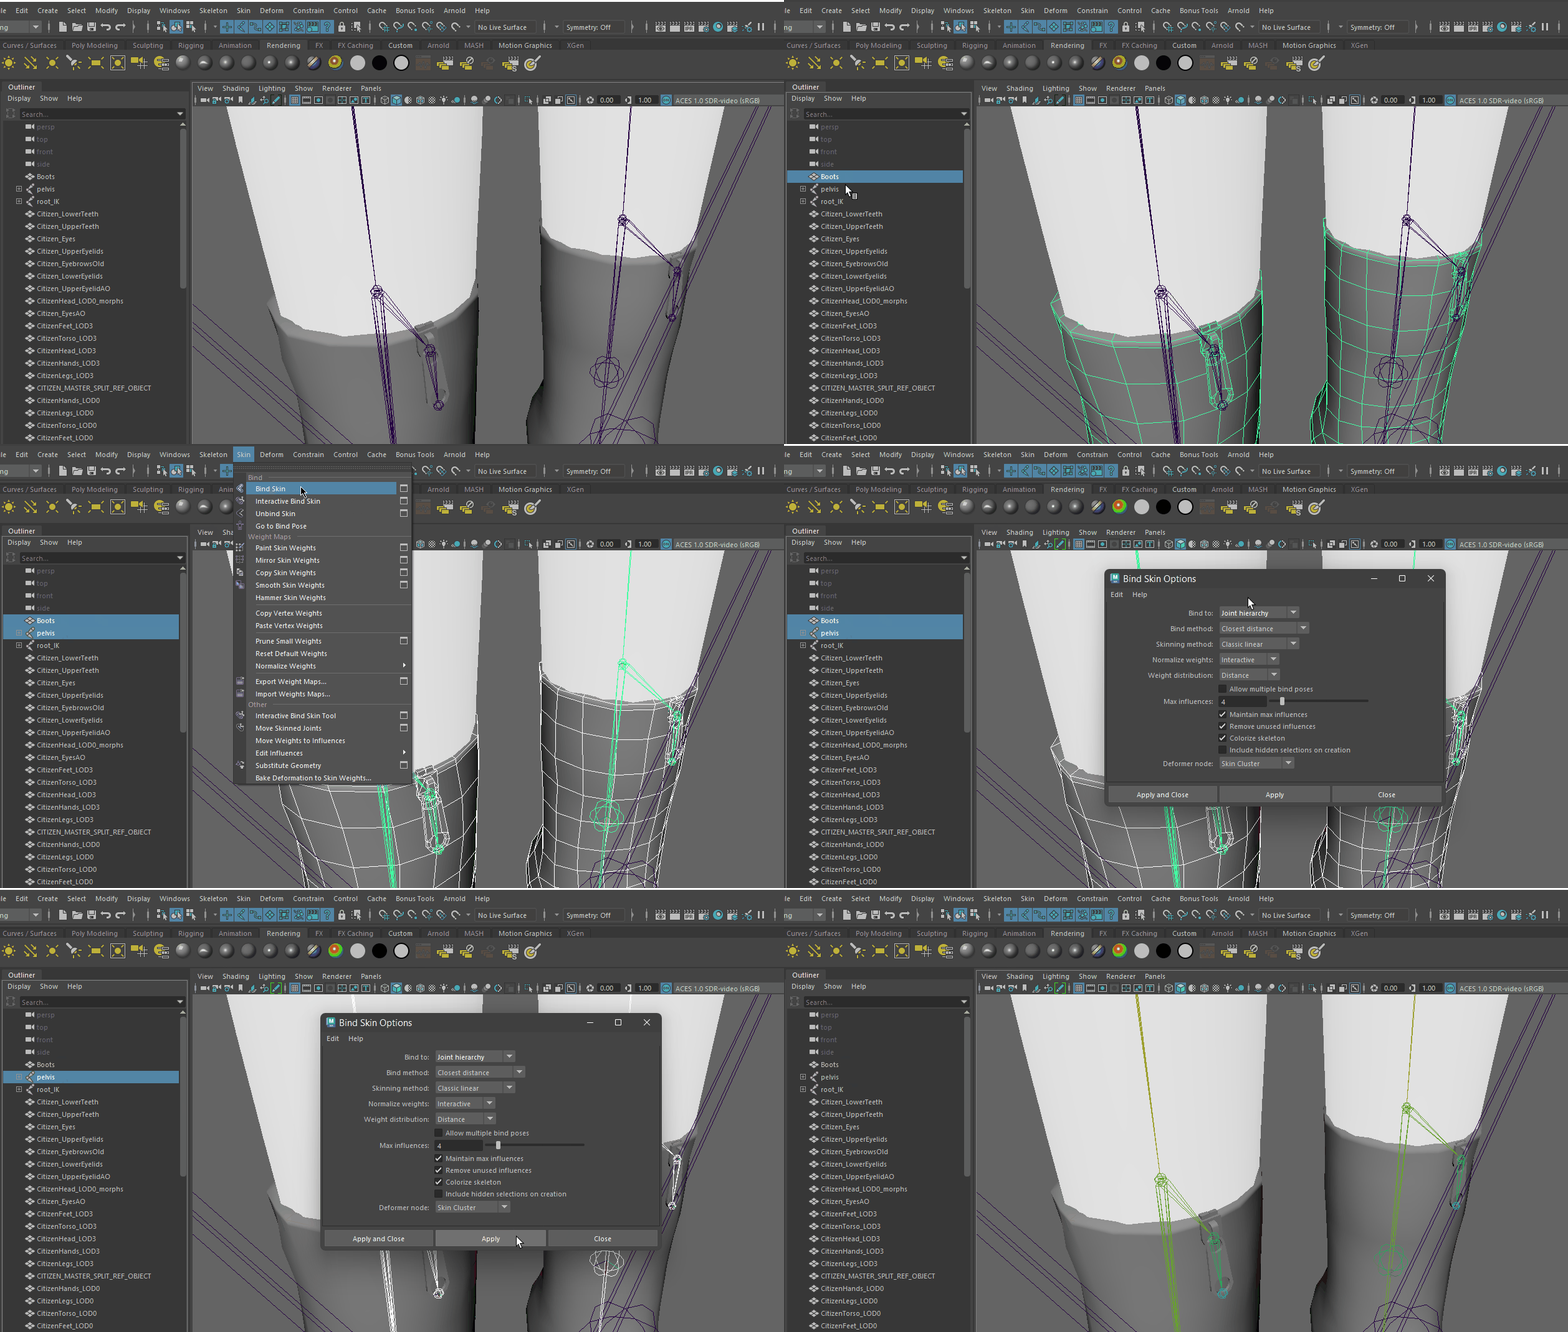
2.2 With the mesh selected (not the skeleton), reimport your weight maps.
This should restore your hard work from earlier.
3. Painting your weights
3.1 Because the zip is a solid part of the mesh, this means the deformation has to remain minimal or non-existent.
We don’t want the zipper to bend or warp. In the case of this boot, the zipper sits in a location that has barely any deformation. Lucky.
However, sometimes you may find your solid part bends and warps uncontrollably. To fix this, we have to ensure the solid part is not influenced by any other joint than the one that is placed directly upon it. If the zipper’s vertices are influenced by other joints in the hierarchy, it’ll get pulled into those directions. We want to make sure it keeps its shape, so that the jiggle bone effect is more realistic.
Use your discretion as to which influences will have the best looking effect. Keep the number of bones low if it is something like a hinge - a bit like this zip - and painting will become a lot easier. In this case, we only want the zip to be influenced by one joint: zip_upper_R. You only need it to be influenced by one joint in this case, because the jiggle bone in Source 2 will assign only to a single joint.
3.2 Anything that is influenced (painted white) by the zipper bone we have created will jiggle.
In the case of this zip, we want to make sure only zipper_upper_R and zipper_upper_L are influencing the corresponding zips on each boot, so make sure the jiggle bones are only affecting the desired jiggling parts. If they affect other parts of the mesh, those parts will jiggle too. We don’t want that.
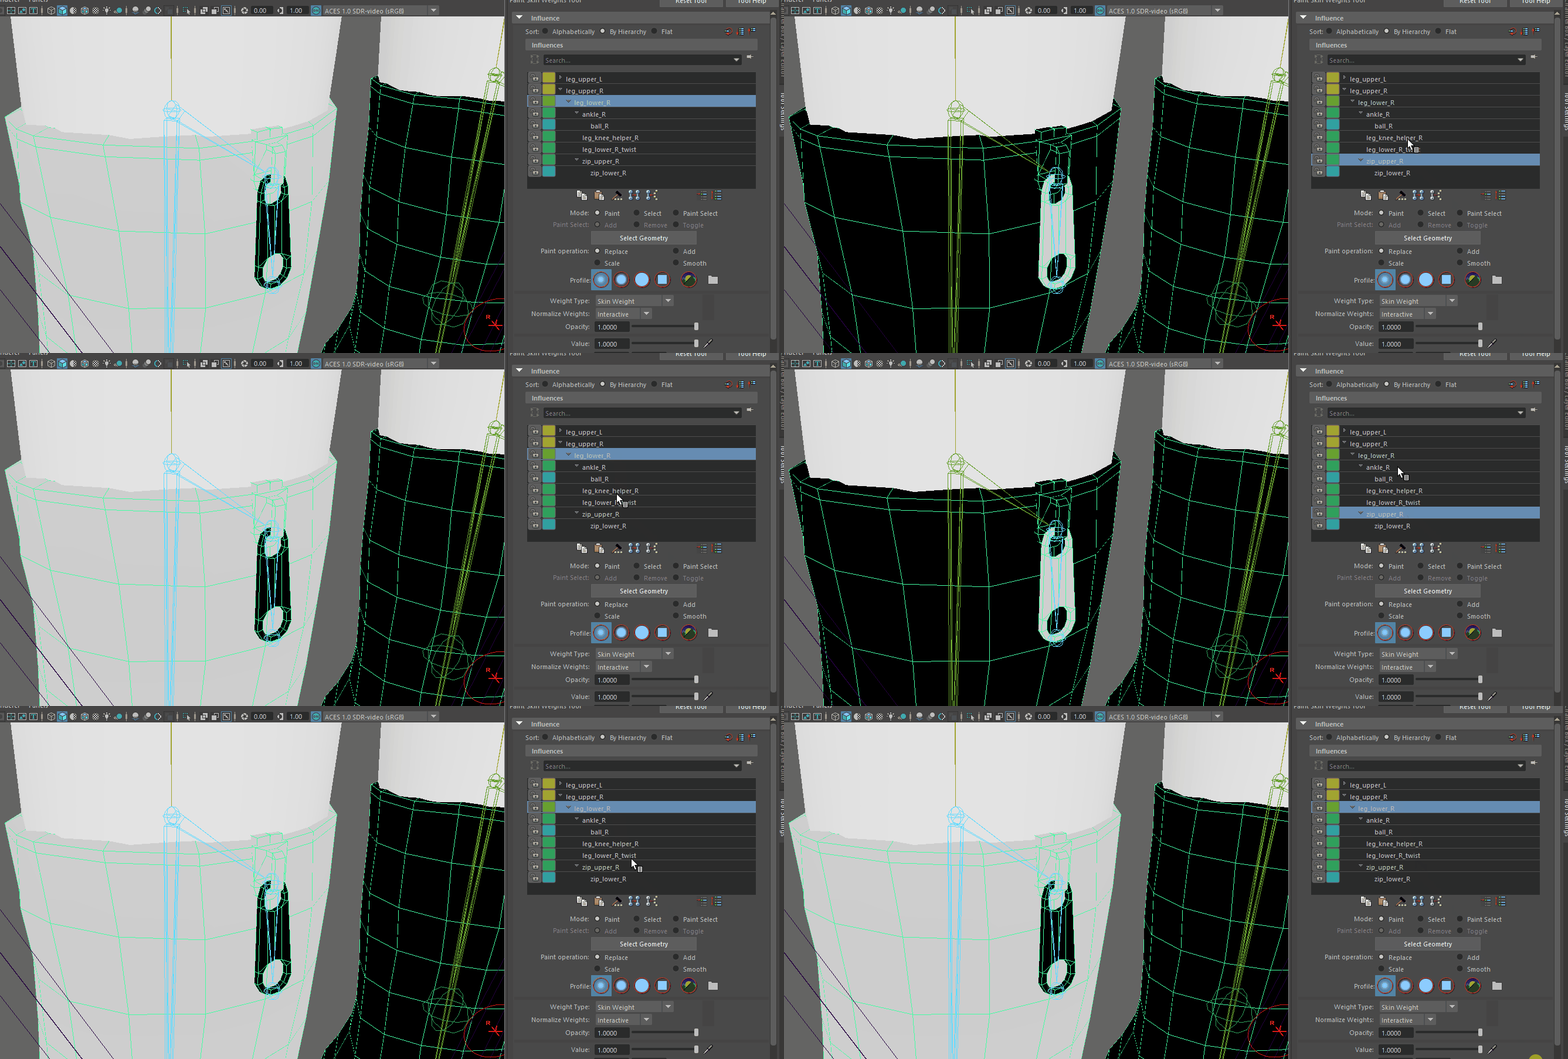
As a general rule of thumb, the more solid an object, the more solid the vertex weight paint should be (white). Naturally, gradients are better for fleshier or organic parts.
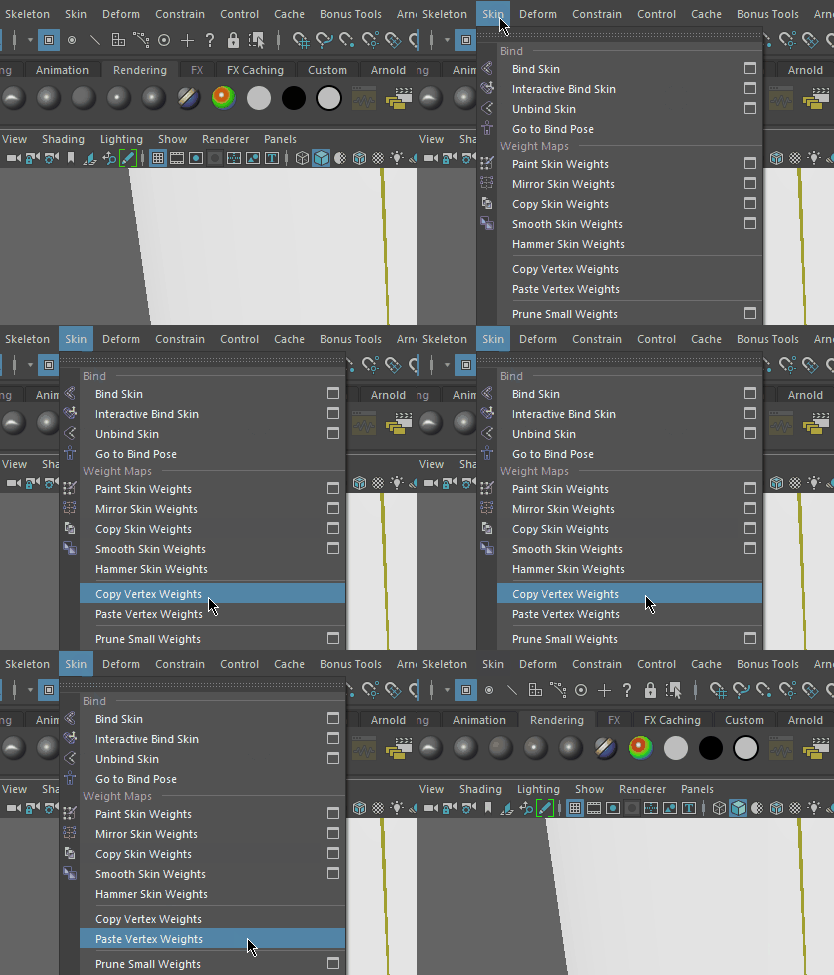
3.4 Test the jiggle bone and surrounding joints.
Manipulate the bones and make sure the area behaves as you want it to. If everything looks good, we can move onto importation. The zips here don't deform or clip. That's good!
3.5 Select the mesh, hold CTRL, and then select the skeleton (the pelvis, in this case).
Remember to restore your bind pose before you export as .fbx.
3.6 Export as .fbx into your chosen addon folder.
Keep Maya open in case you need to adjust your weight painting later.
4. Importing into ModelDoc
4.1 Search in the asset browser for your model. Load it into ModelDoc.
After adding your textures, compiling, and saving it as a .vmdl, you should see that your new and fantastic jiggle bones were imported.
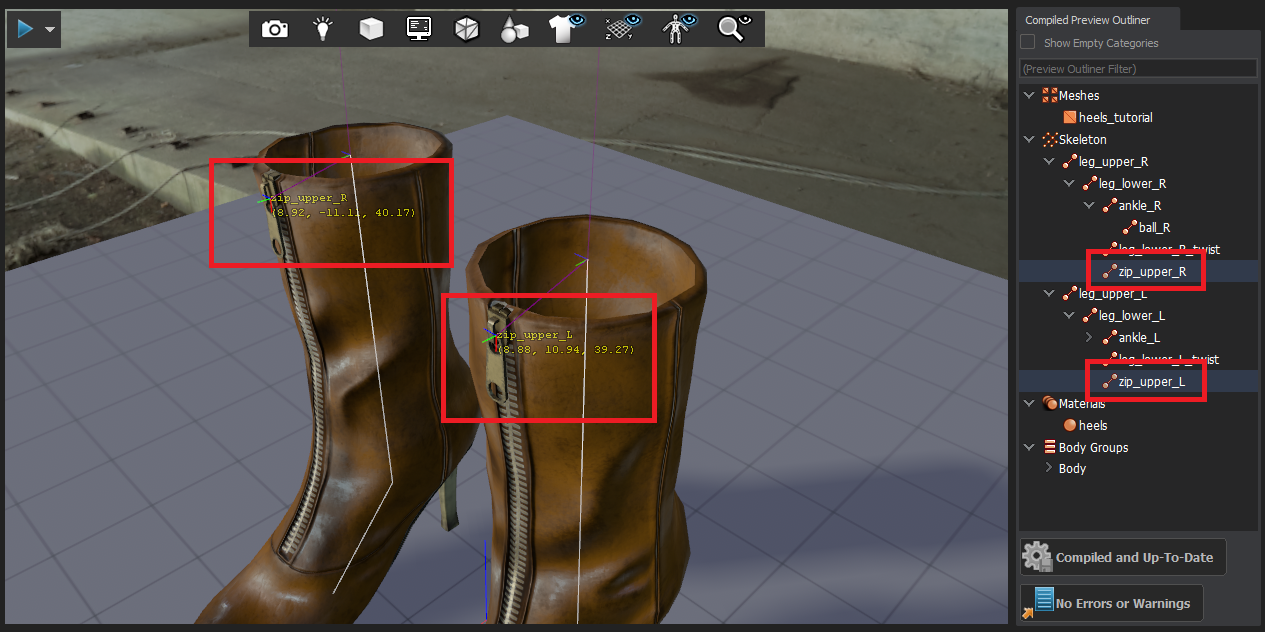
4.2 Click +Add and choose JiggleBone. Rename it appropriately (ZipBoneRight and ZipBoneLeft). Then, choose the corresponding bones.
Do this for every bone you want to jiggle.
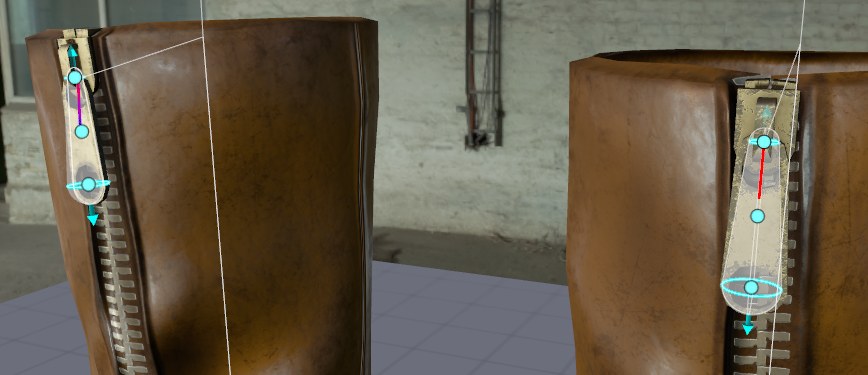
4.3 Shape the capsule to the shape of your jiggling mesh.
It should ideally start on the first joint and end on the last.
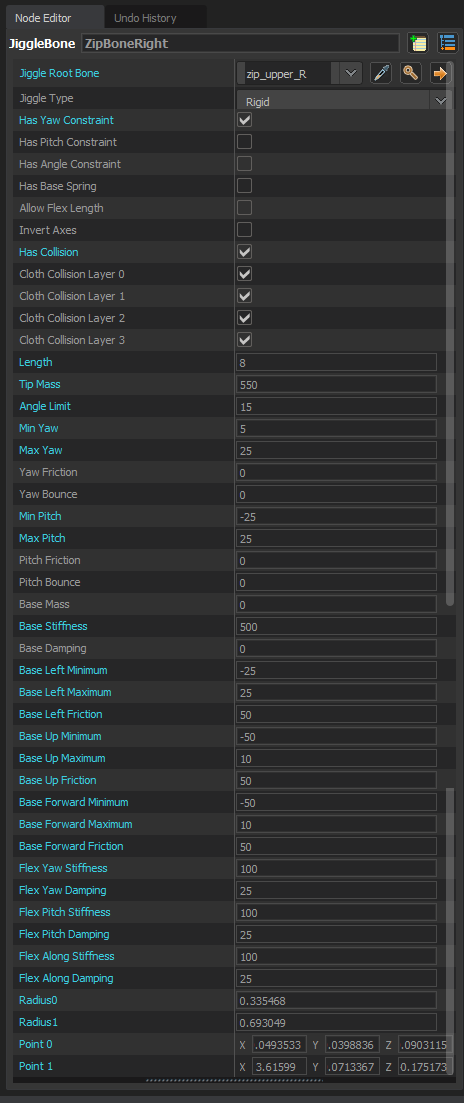
4.4 The below variables were used for the zipper.
These may not be perfect - and you may spend hours, days, weeks, or years perfecting your jiggle bones - but they do the job. They might be a good place to start if you want to experiment.
4.5 Hit compile.
If your mesh is a garment, you won’t be able to test it until you get in game. If it’s a basic physics prop - and once the variables are set up - you can hit the play button in the top left to test it out.
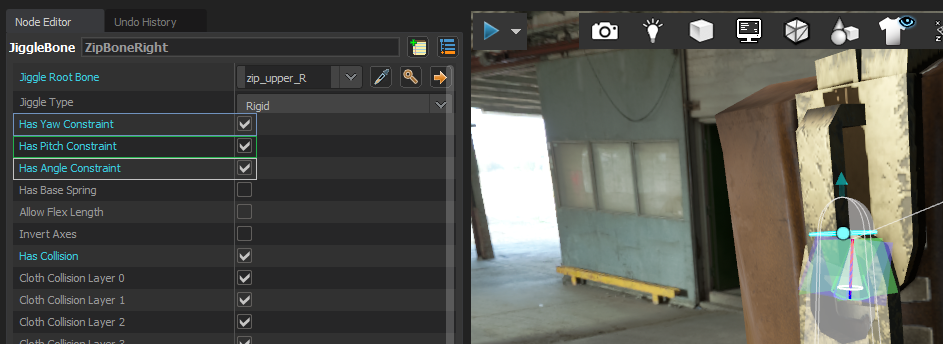
4.6 Use the jiggle bone helpers in ModelDoc to predict the effect of your variables.
For example, turning on the yaw, pitch, and angle constraints creates a couple of cones and planes for you to visualise the maximum and minimum effects of the physical forces. Changing the Min Yaw and Max Yaw values, for example, will also change the min and max yaw angles of the folded plane to help you understand how physics will affect the model.
6. Test, test, and test again
6.1 When in game, press F2 to use the free camera.
You can witness your jiggly bits react to any animations supplied to the skeleton by s&box. It's not perfect, but it's a good start. I know you can definitely do better!
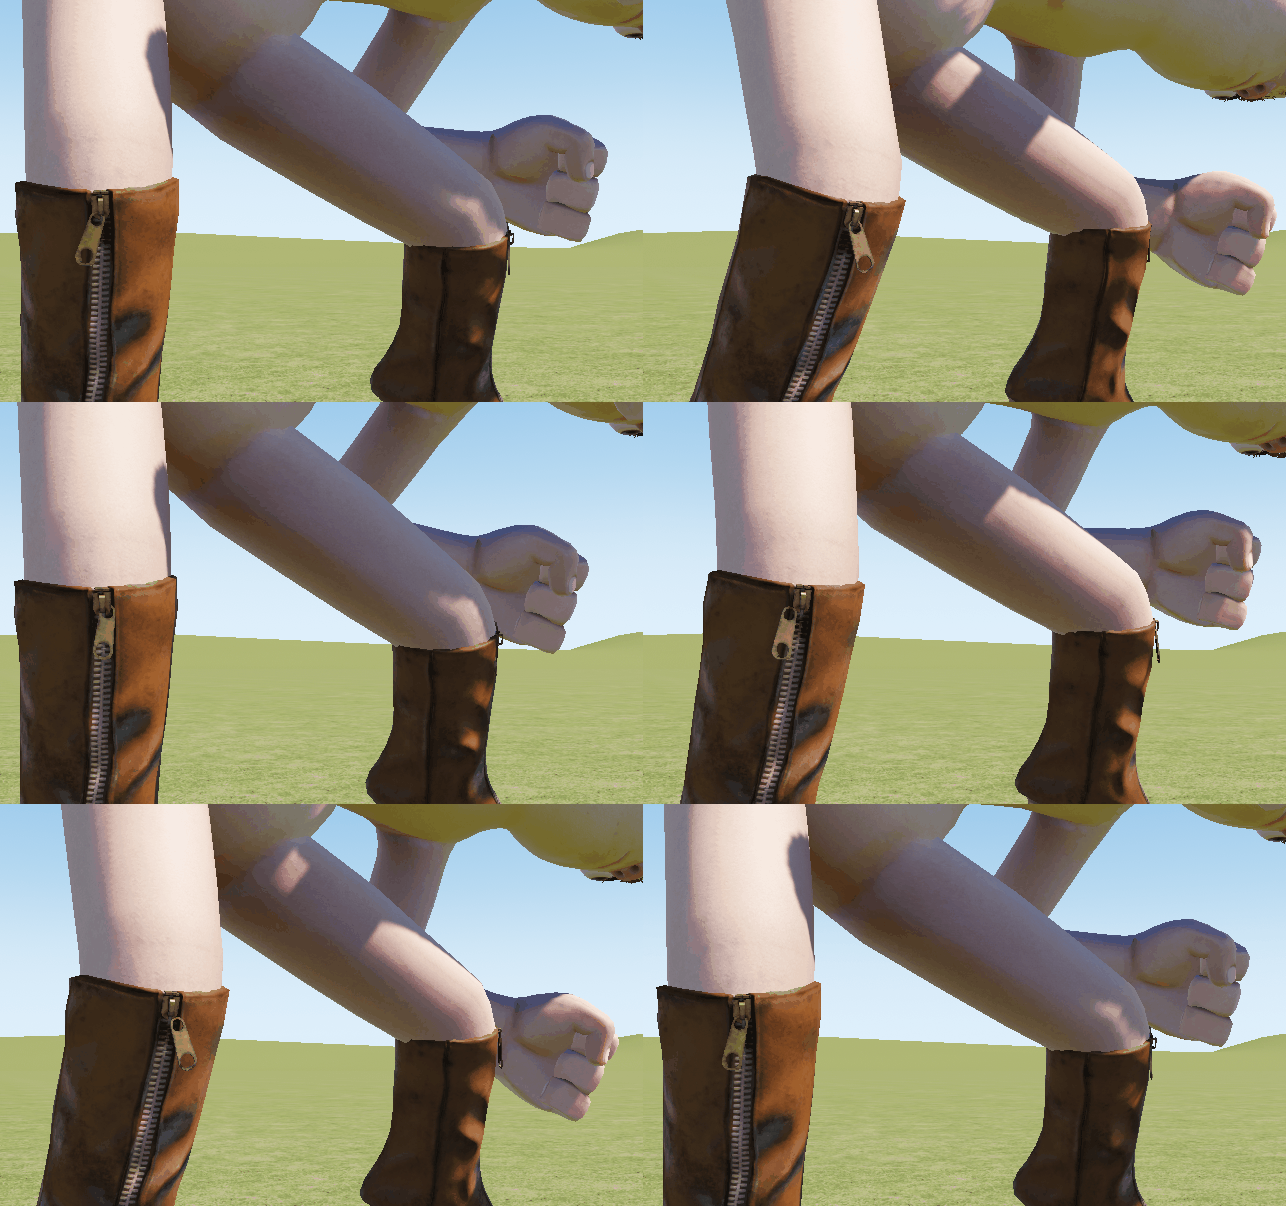
6.2 Adjust your variables (try to only do one at a time) and keep an eye on your in-game model.
It is crucial that you keep ModelDoc open and your game running so you can see any changes you make and if they benefit your project. If you are experiencing severe deformation, it's likely that you painted your vertex weights wrong or in an inconsistent manner. This is why you left Maya open - go back and adjust your painting!
Creating jiggle bones for the fake breasts
Coming soon.
Settings and variables for jiggle bones
Valve's examples
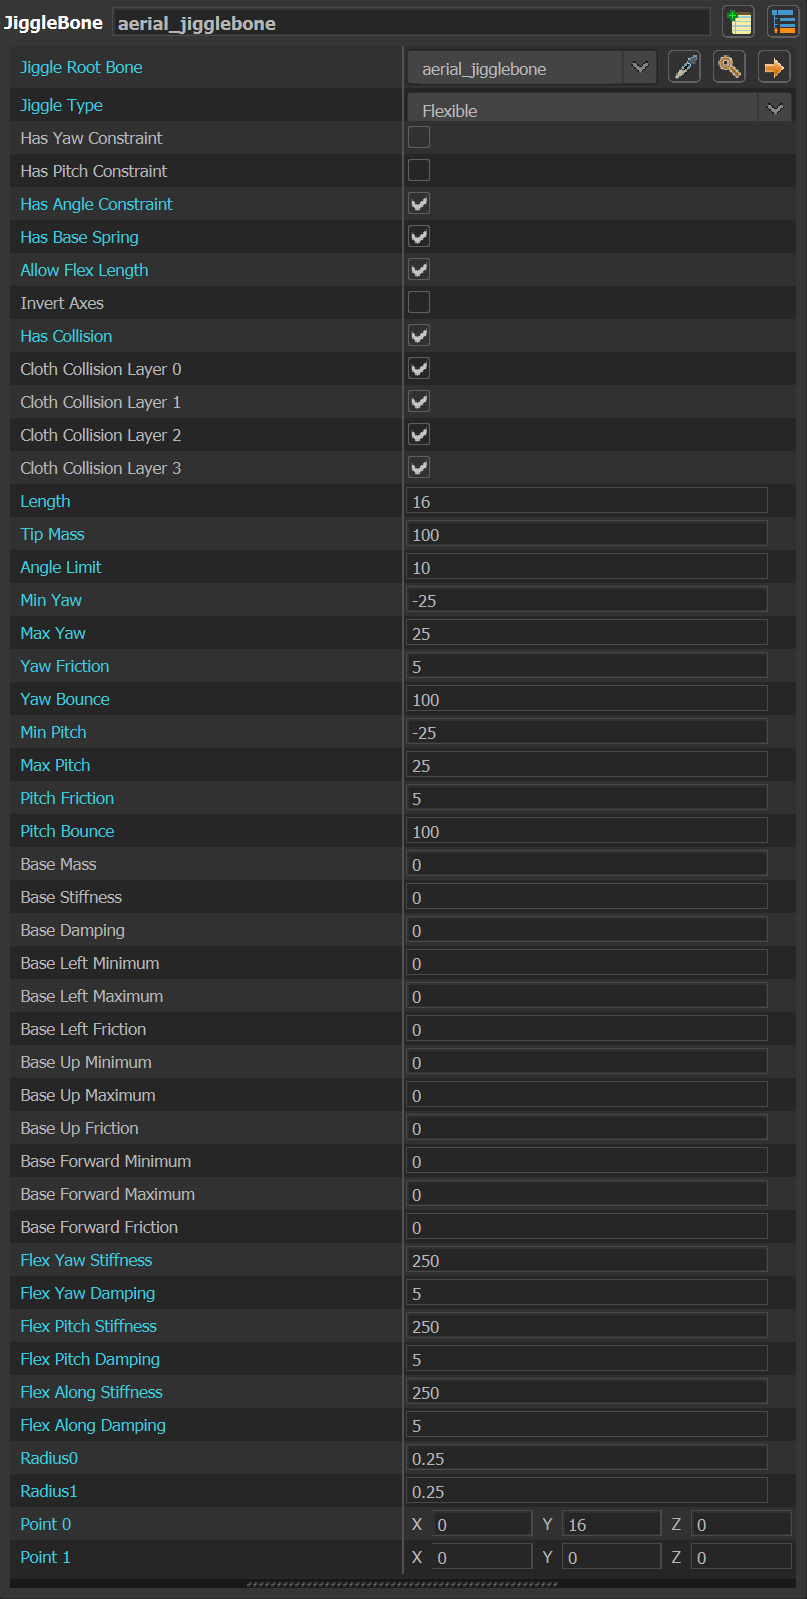
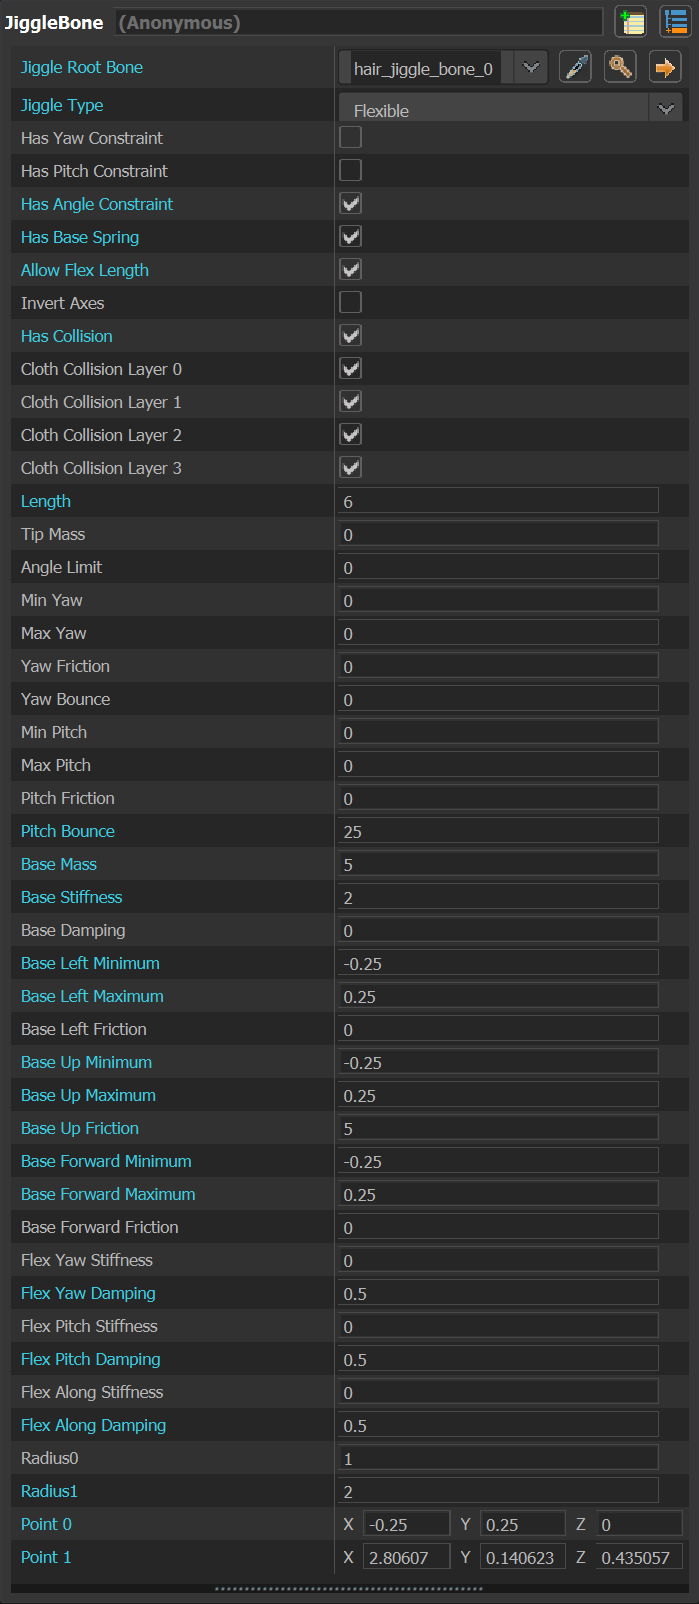
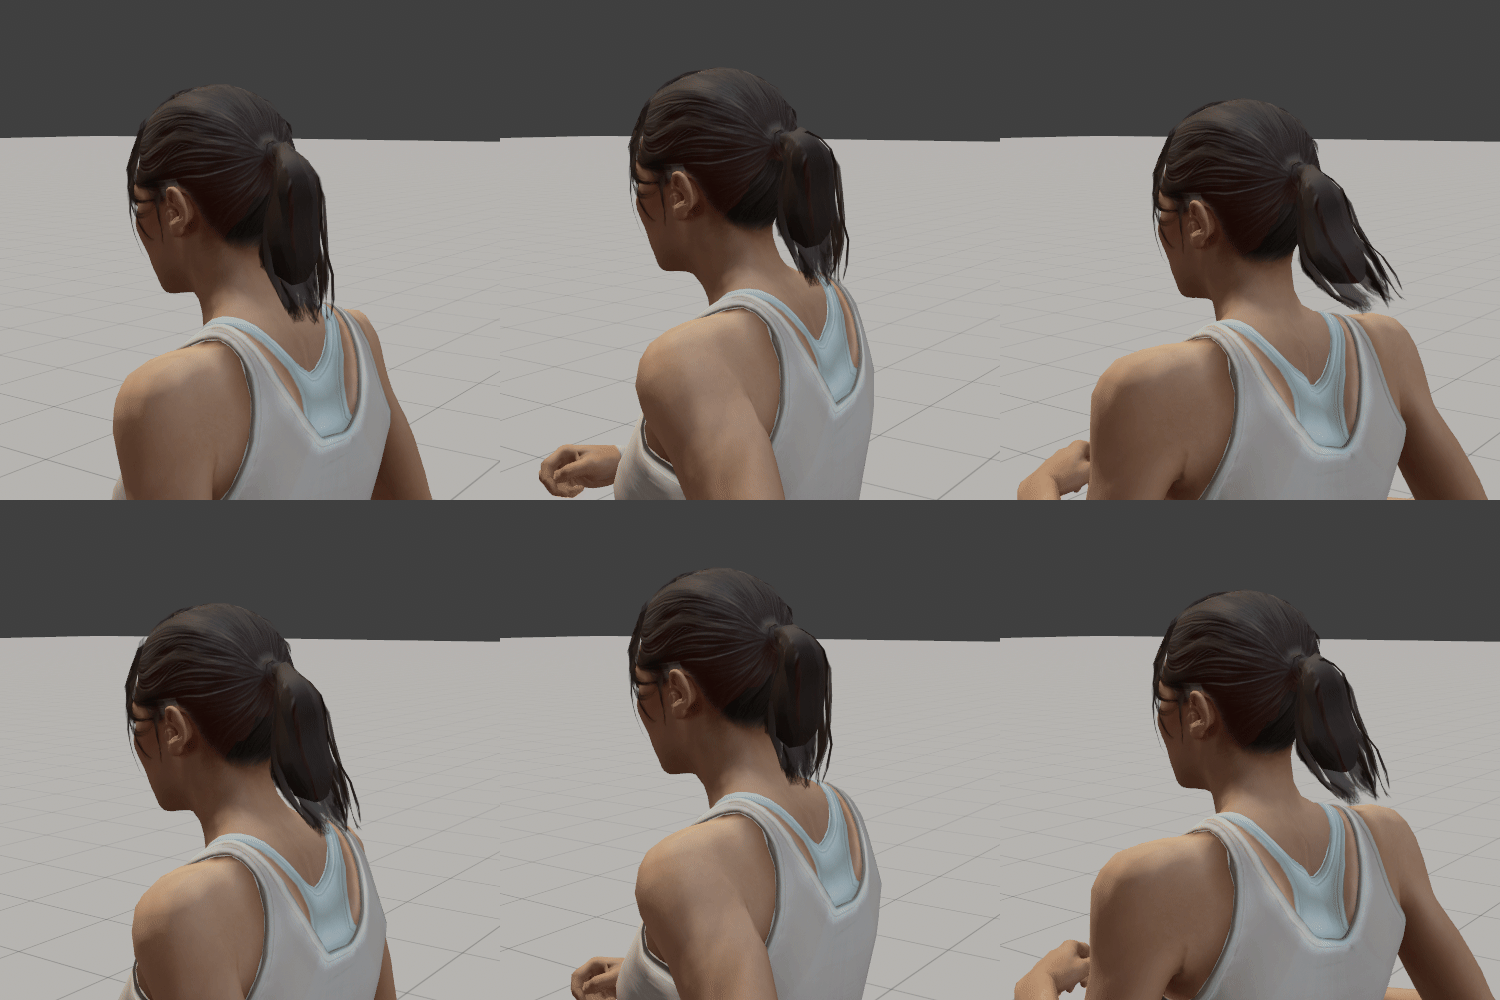
The below features example settings for different types of props from Valve games. This is how they set their bones up and so are a good guide to use if you’re lost or nothing is happening.
Atlas (BallBot) from Portal 2
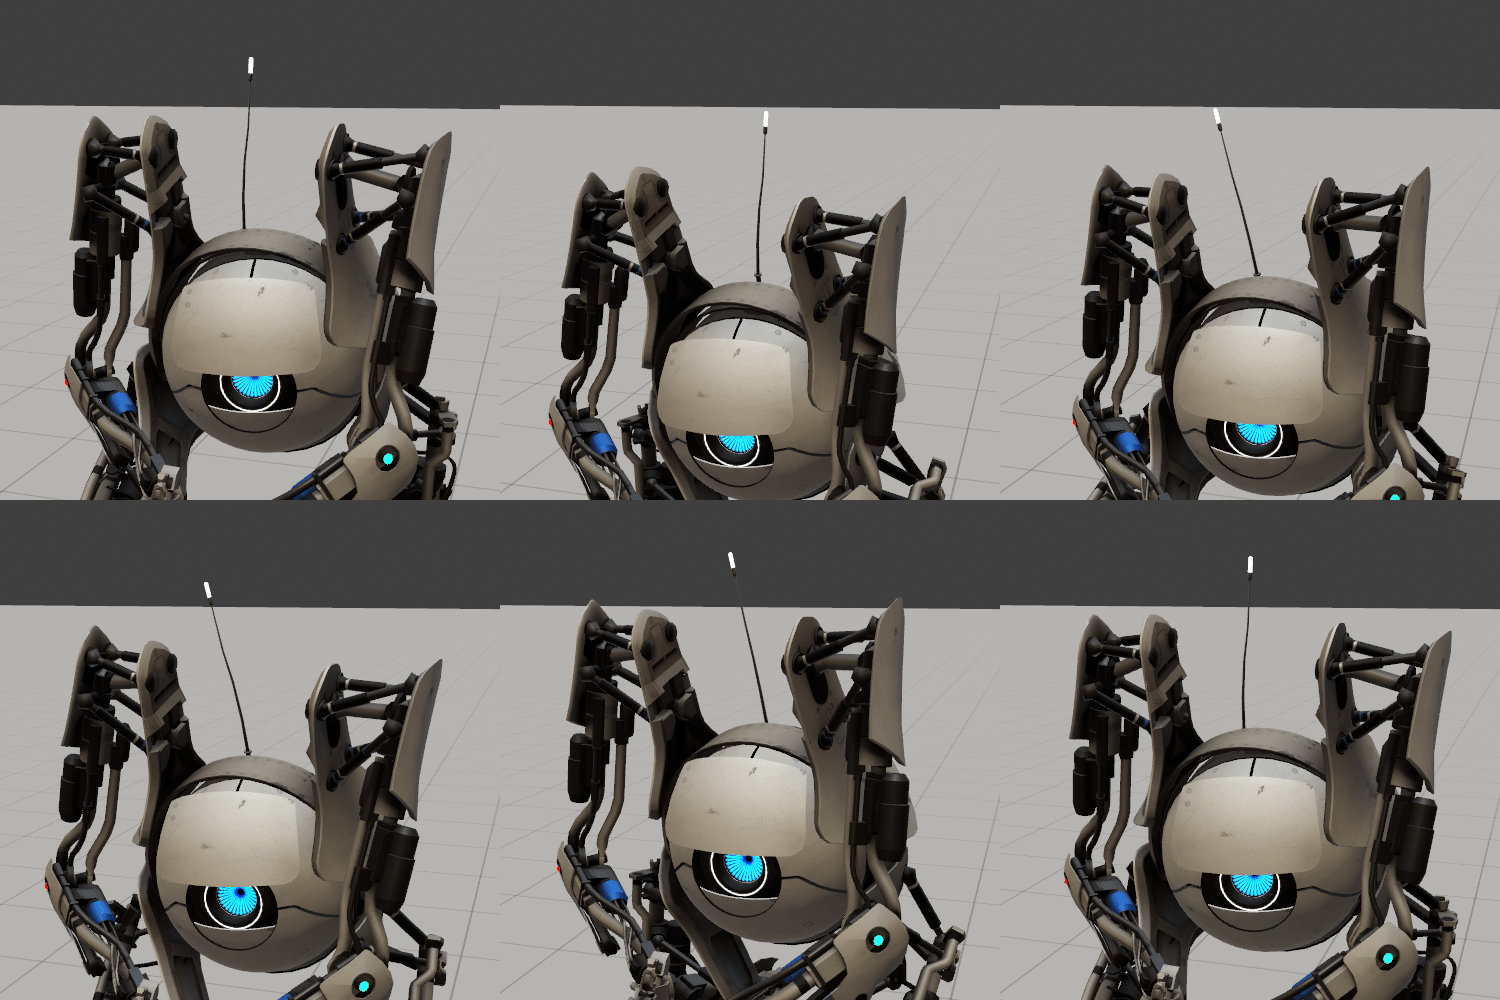
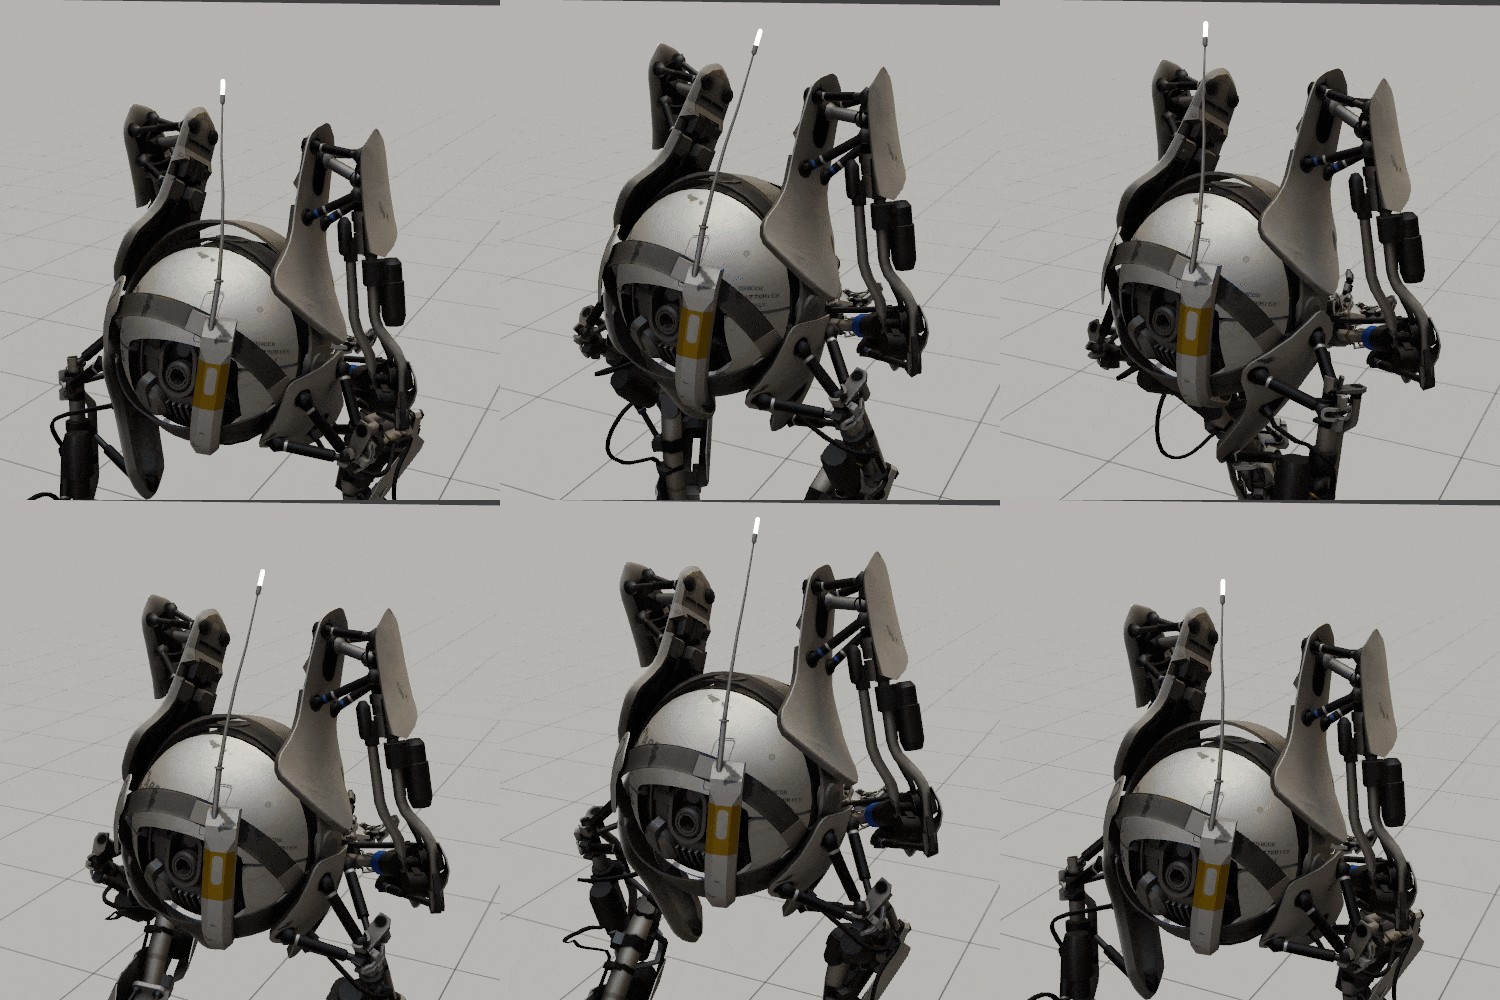
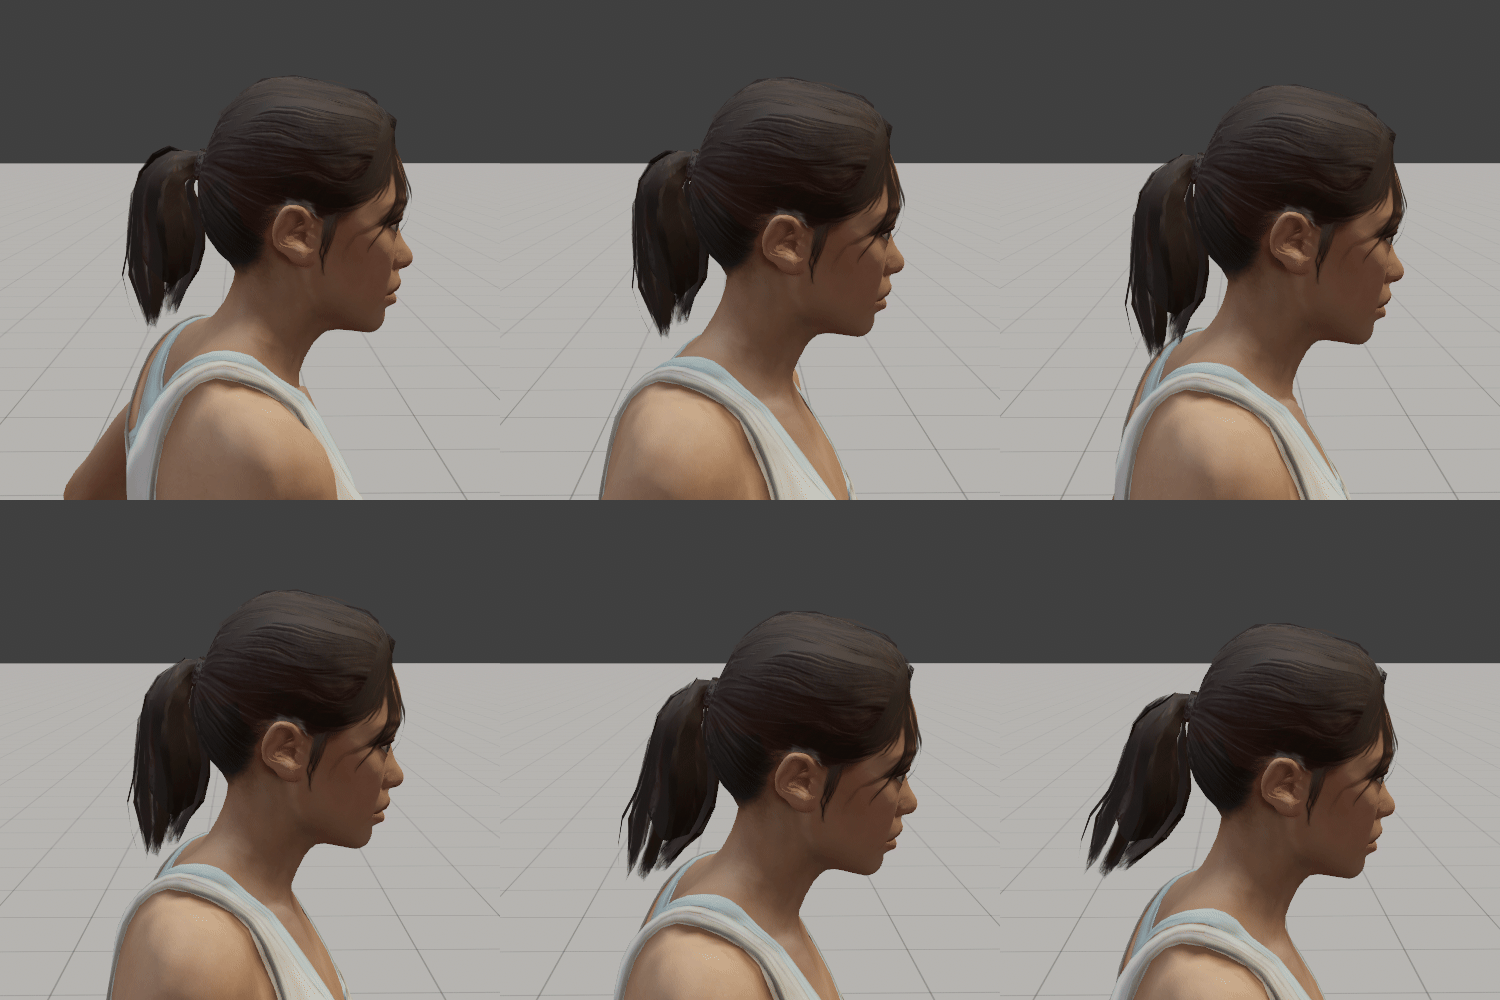
Chell (Player) from Portal 2
 Garry's Mod
 Rust
Rust
 Steamworks
 Wiki Help
 S&box
S&box