Tilesets-Advanced
The Advanced Features
This page aims to cover the remaining information about tilesets, it will cover everything left out of the initial Tilesets and more.
Tile Set Properties
Object Properties
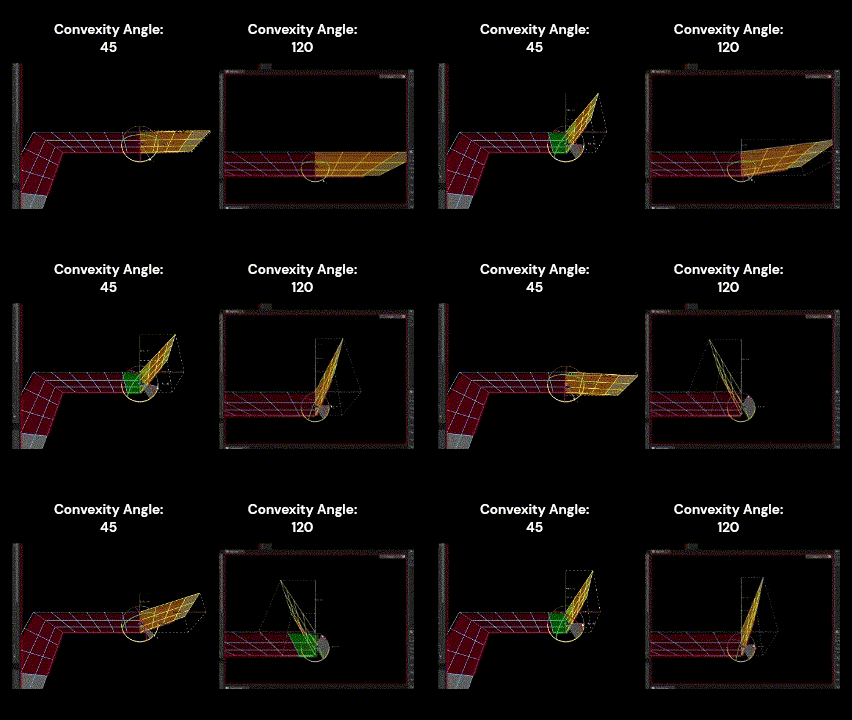
Convexity Angle
Changes the threshold for a angle to be considered convex/concave.
here I set tiles to appear as green when attached to a convex angle.
Ramp Rule Set
"Tile Set Properties" Tab
| Property | Description |
|---|---|
| mesh_face-world-z | TBD |
| mesh_edge_connectivity | which sides are connected regardless of angle |
| mesh_edge_convexity | define sides based on if its a concave/convex angle |
| mesh_edge_convexity_or_tileset | same as above but also includes option for different tileset |
Tile Set Mesh Properties Settings
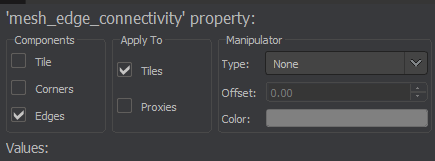
| Property | Description |
|---|---|
| Components | what the rule uses to determine how tile is connected |
| Apply To | where to send the information to |
| Manipulator | TBD |
Tile Set Materials
This allows you to use placeholder materials in your tiles and gives you an way to swap between multiple styles when creating your mesh
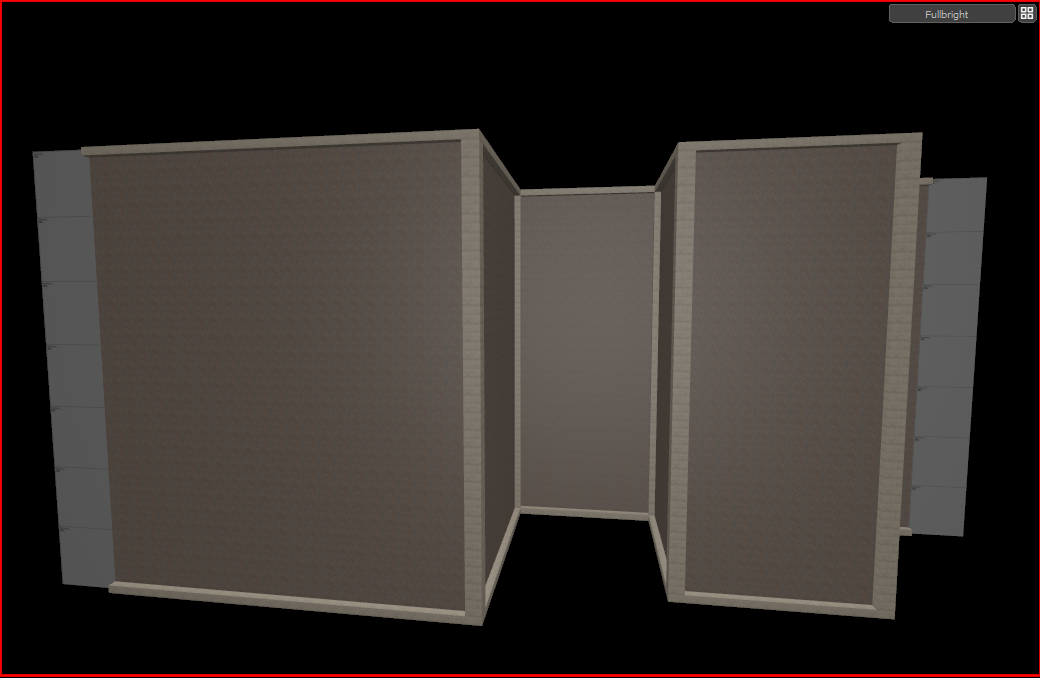
- Create your Tiles with placeholder materials. Here is an example I made for walls with an protruded outline.

Open the Tile Set's Object Properties Window and goto the "Tile Set Materials" Tab
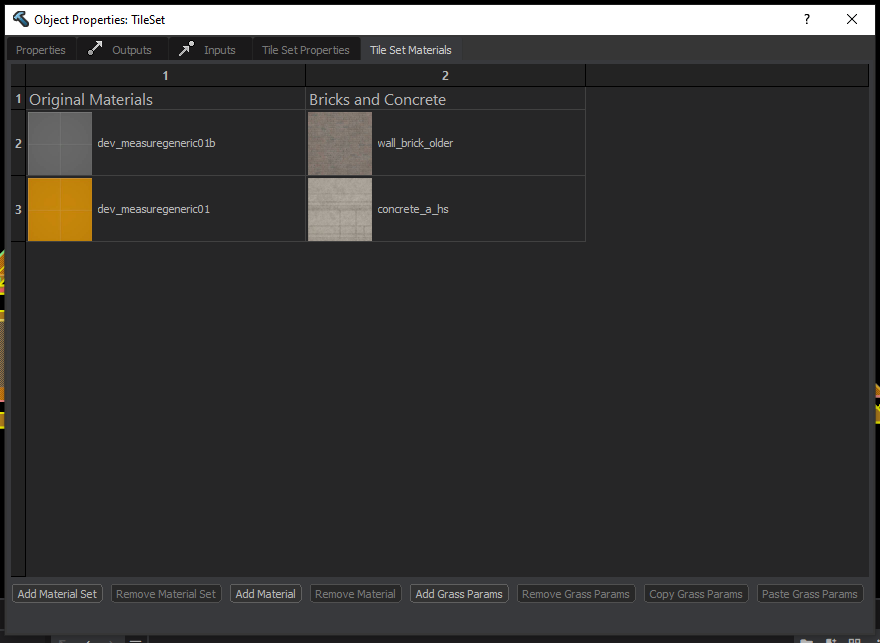
Along the bottom, click the third option "Add Material", this will add the "reflectivity_30" by default but double click it and and change it to one of your placeholder materials. Do this for all placeholder materials
- Once you have all your materials added, click the first option "Add Material Set". This will create a new column copying your placeholder materials, in this new column change the material from the placeholder to the real material. Remember to name any created sets for future reference.
It should look something like this
- Now that you have created the material set, go to your Tile Mesh, Choose Face Mode, and select all the faces that you want to apply the Material Set to. Then right click to open the context menu, and choose
Context Menu -> Tiles -> Assign Material Set -> {Material Set Name}
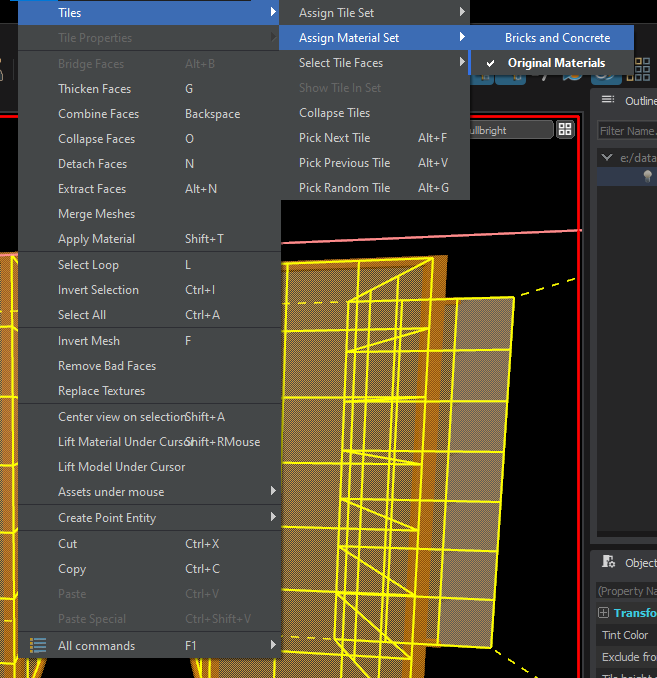
- Behold, All the placeholder materials now take on that Material Set's Equivalent.
Tile Properties
| Property | Description |
|---|---|
| Name | User given name for tile |
| Base Width | Width of the tile |
| Base Height | Height of the tile |
| Use Best Size Match | If checked, the tile closest to the mesh size will be used, even if not exact. |
| Minimum Size Scale | The minimum scale at which the tile can be selected, 0 is disabled |
| Maximum Size Scale | The maximum scale at which the tile can be selected, 0 is disabled |
| Probability Weight | Determines the chance of the tile being selected from multiple tiles of the same size |
| Display Base Face | If checked, the tilemesh will remain visable even when replaced by a tile |
| Align To Axis | Forces the edge rules to align to the provided world axis |
| Rotation Snapping | Forces the geometry to snap along this angle |
| Variation Id | <?TBD?> |
- Rotation Snapping - Description is educated guess, cannot determine behavior in practice
- Variation ID - Unknown, Believed possible to learn through the provided tile set examples
Using Concave & Convex angles
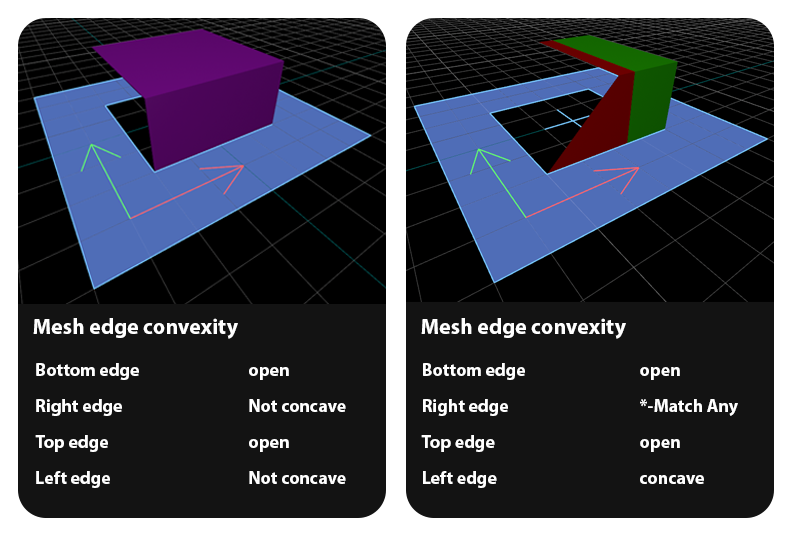
Concave and Convex angles allow your tile sets to use specific tiles based on how connected tiles are angled relative to it.
Examine this diagram to what name refers to what type of angle

in short, concave is an "inside" angle and and convex is an "outside" angle.
to give your tiles these rules, goto your TileSet Object Properties -> Tile Set Properties -> Add Mesh Property -> mesh_edge_convexity
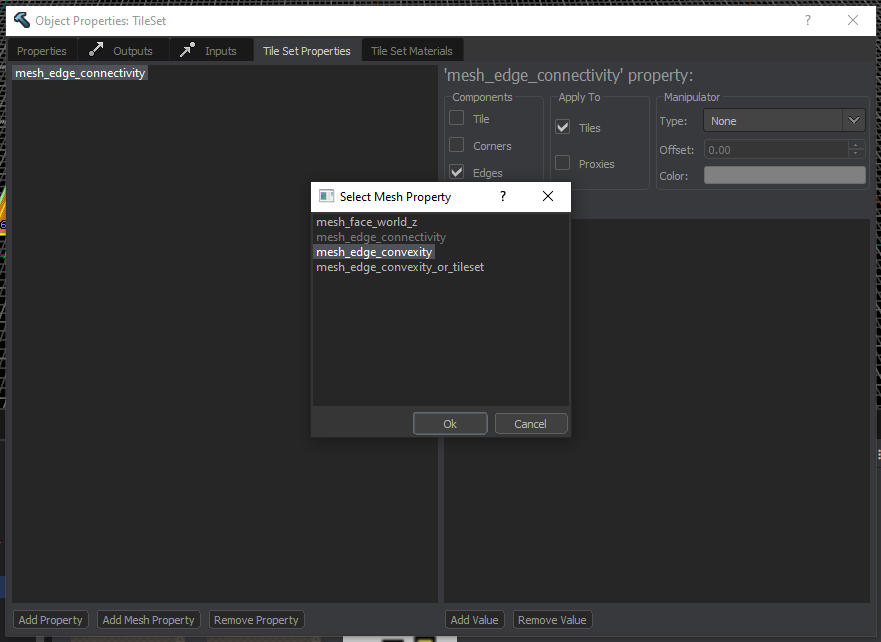
Once this TileSet property is added each tile will now be given those "rules" in its object properties allowing you to specify how the edges should connect
For those interested here is Template I made for creating building walls.
- The size of the tiles are 128x128 and they are to be placed vertical (z axis)
Also here is an example on how Concave/Convex angles can be used in practice
 Garry's Mod
 Rust
Rust
 Steamworks
 Wiki Help
 S&box
S&box