Making Your First Map
Introduction
Before doing anything check here first; Getting Started With Hammer
The purpose of this guide is to jump into Hammer and start making something, in this case, we will be remaking gm_flatgrass step-by-step.
For more documentation and tutorials on Source 2 mapping, refer to the Mapping Resources Page.
Knowing your tools
If you plan on uploading your map, Create your map by following Getting Started With Hammer
OR
'File' > 'New' ( ctrl + n ) to open a new map and then 'File' > 'Save' ( ctrl + s ) to save as gm_flatgrass. (This may cause compiler to complain that the vmap is not inside one of your created addons.)
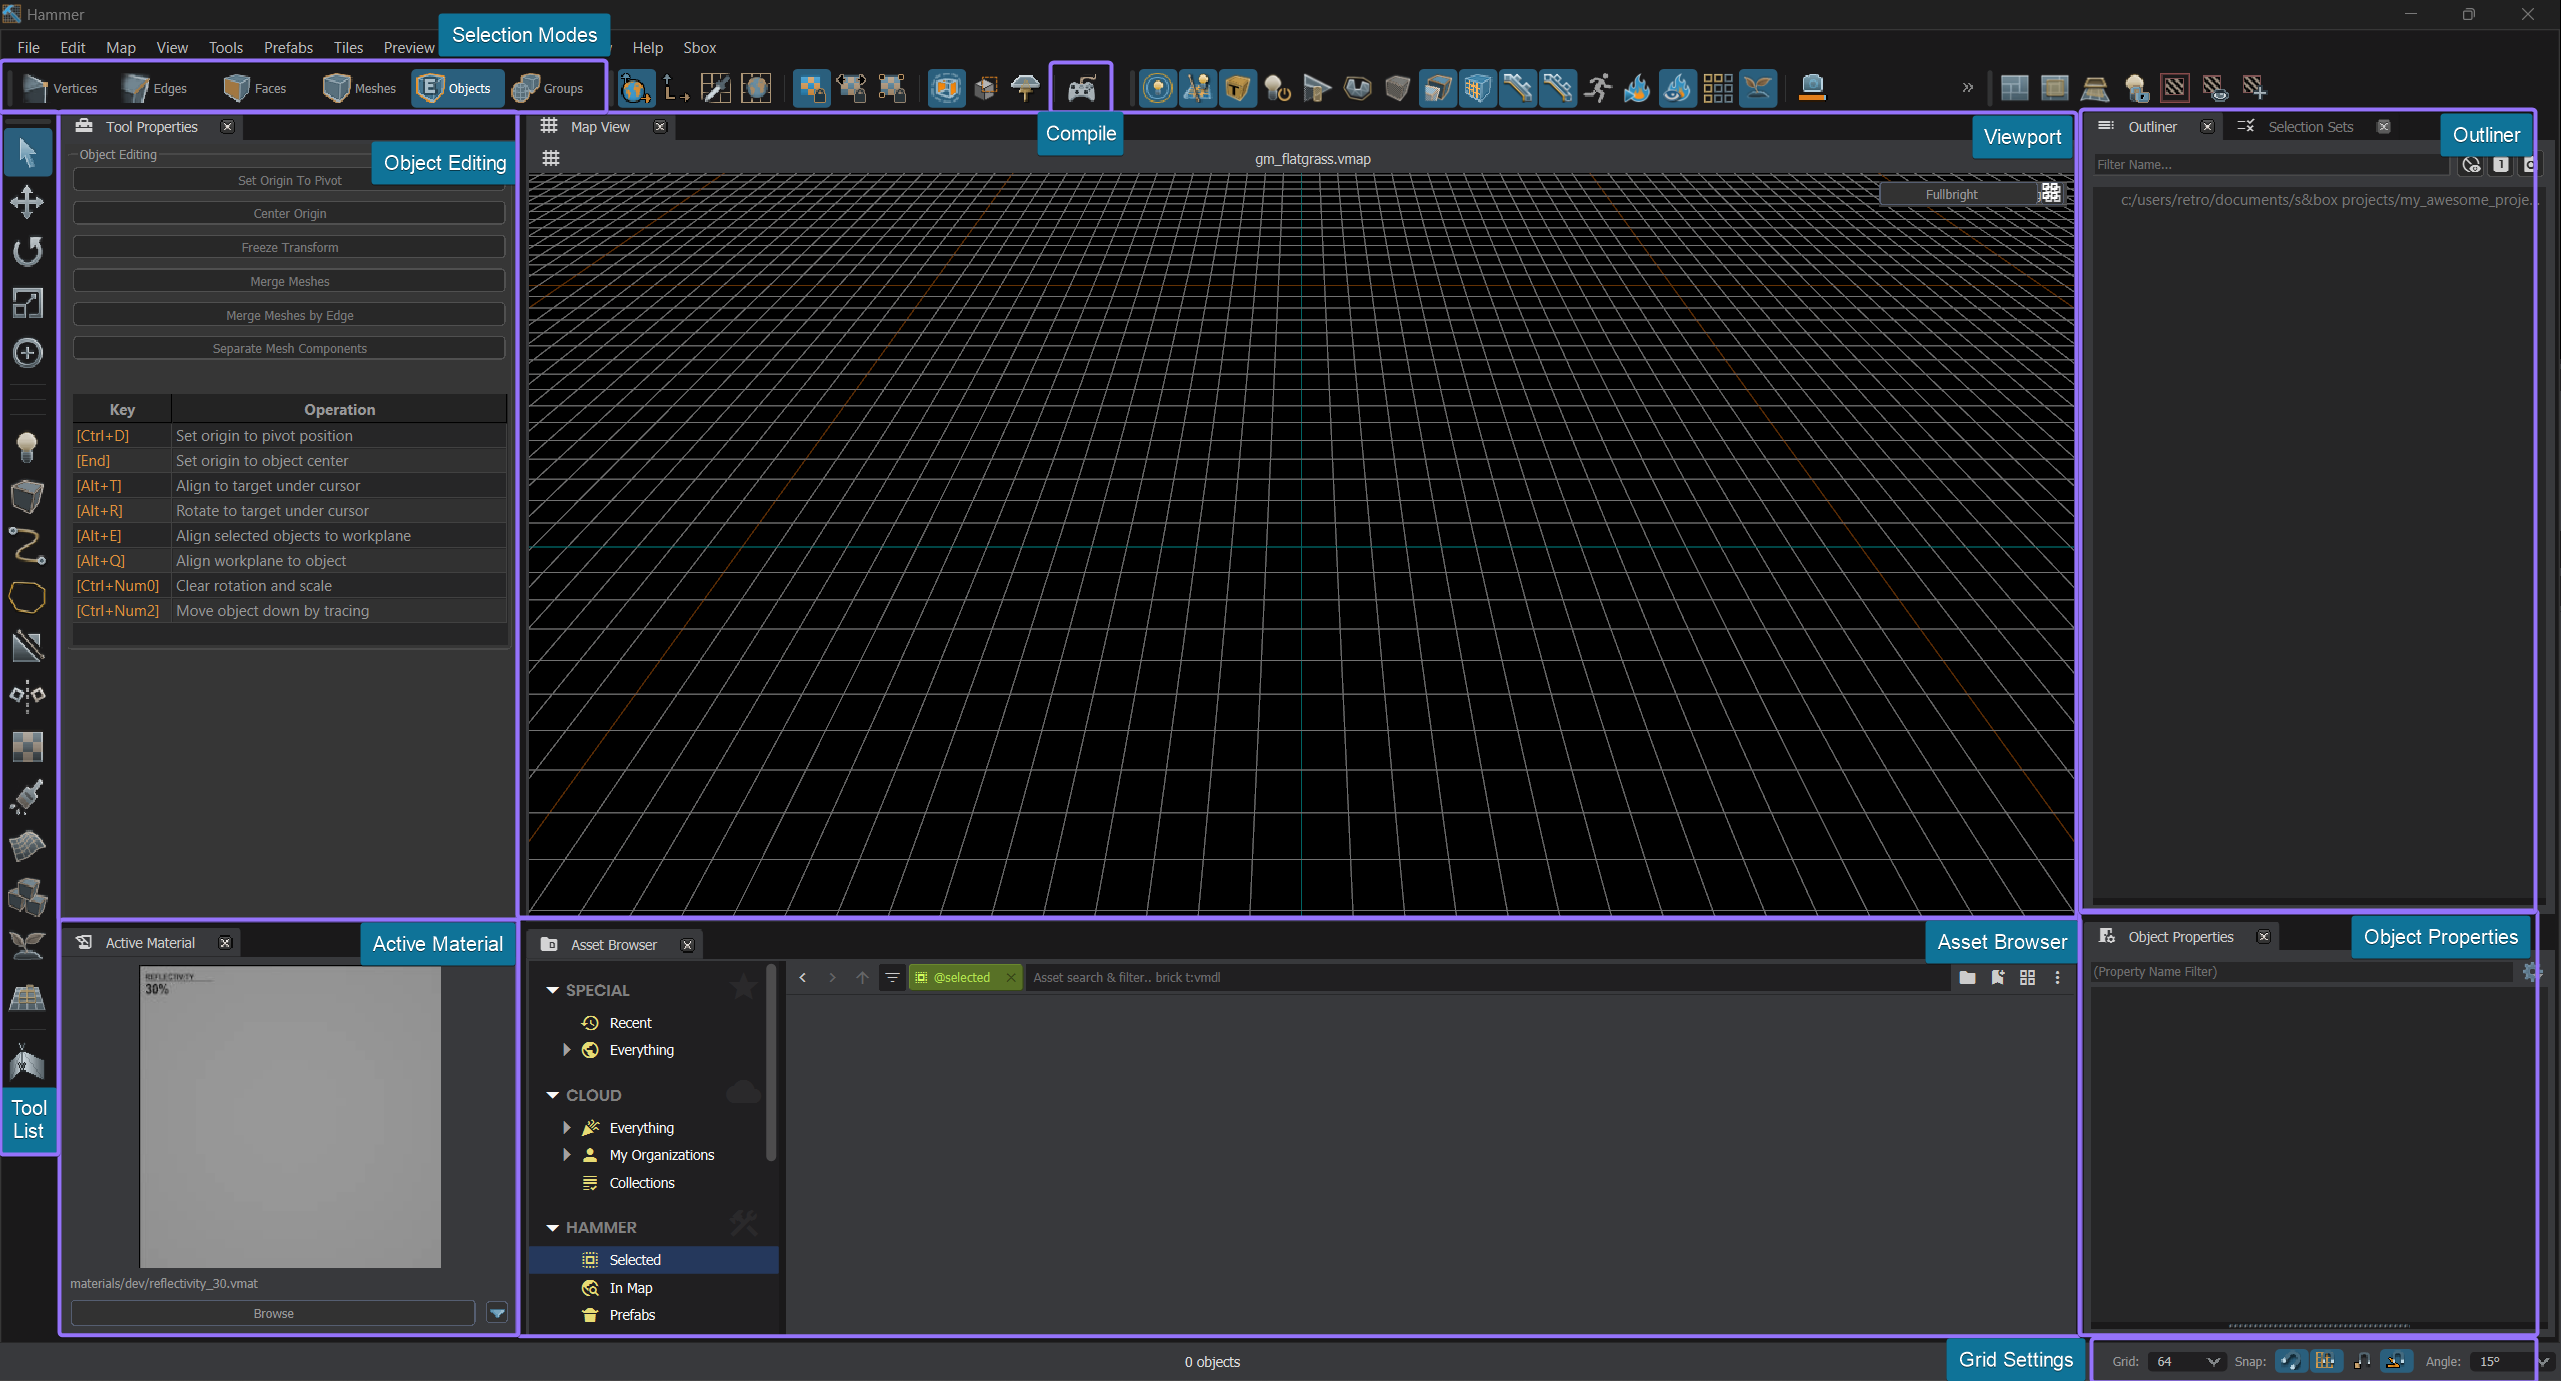
Selection Modes

From left to right we will be using the following modes: Edges ( 2 ), Faces ( 3 ), Objects ( 5 )
These three selection modes are the bare minimum to create this map, you can switch between them by pressing the number keys that represent their position.
After picking the Selection Mode, you may also choose which Tool to interact with.
Tools
You can find tools on the left side, in this guide we will use the following:
| Icon | Tool | Description |
|---|---|---|
 |
Selection Tool ( ⇧ shift + s ) | Select geometry elements, objects and groups. You can also use this to resize them. |
 |
Move Tool ( t ) | Move your selection along the X Y Z axes. |
 |
Rotate Tool ( r ) | Rotate your selection along the X Y Z axes. |
 |
Entity Tool ( ⇧ shift + e ) | Place any type of remaining entity such as: player spawns and lights. |
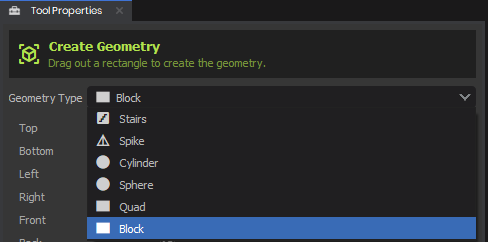
 |
Block Tool ( ⇧ shift + b ) | Create basic geometric shapes such as: Quad, Block, Cylinder, Spike, Sphere |
 |
Clipping Tool ( ⇧ shift + x ) | Slice geometry, cuts must be made in the 2D viewport and confirmed with ENTER. |
All of the rest
Crash course on everything else we will be using on this guide and a short description. I suggest you look at this video tutorial to help with the layout. (This video uses Half-Life: Alyx's Hammer, however, most of this should still apply.)
Object Editing: Depending on the Tool and your Selection Mode, this section will have different options to interact and modify the selected geometry.
Compile & Play: Opens the compile tool to compile your map, it's recommended to use Fast Compile while working.
Assets Window: Props, Materials, Prefabs etc... Thanks to Asset.Party intergration, you're able to drag and drop almost anything in the
Cloud > Everythingcategory directly into your map!Object Properties: While having an object or point entity selected you can modify its scale, position, rotation, and any properties it might have.
Grid Settings: When moving or resizing an object, it will snap to the smallest amount of units you have selected. Most of the time we will use 64, 32, 16, and 8 units.
Active Material: This displays your currently selected material, pressing ⇧ shift+t will apply the texture to any Object or Face currently selected
Outliner: As you map, this will fill up with everything you've created, such as meshes.
w a s d to move the camera in the viewports, scroll to Zoom-in/out and hold right-click to rotate.
Making the Map, Step-by-Step
Step 1:
With the Block Tool ( ⇧ shift + b ), select Quad in the Object Editing window.
Then, make a plane that is 2048x2048 units. The bigger your map is, the longer compiling takes, so for now we'll keep it small for the purposes of this guide.
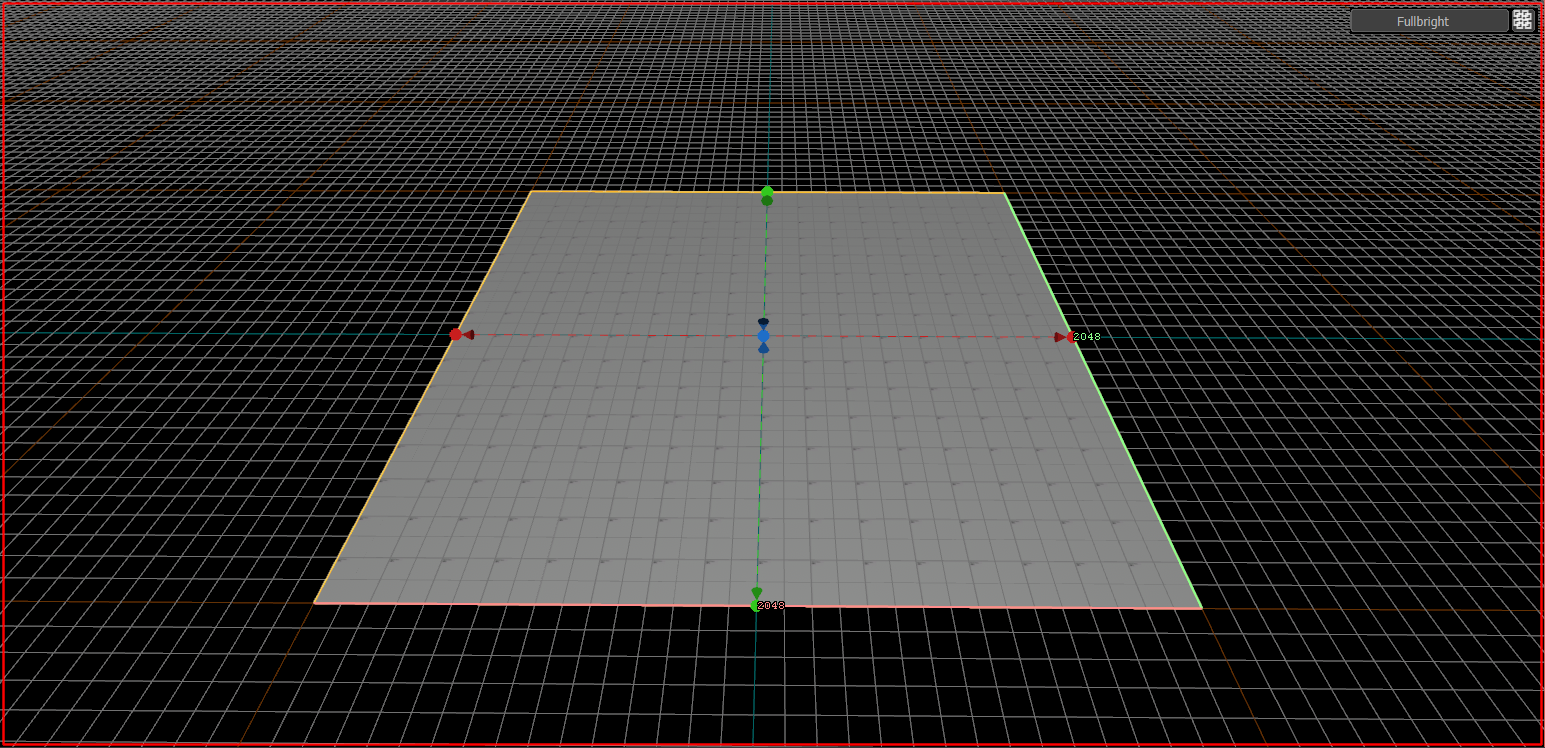
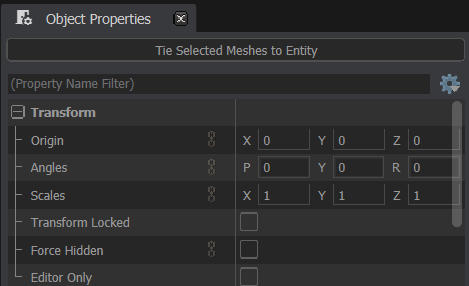
You can use the Object Properties to center the plane to X: 0; Y: 0 by clicking the + next to Transform
Step 2:
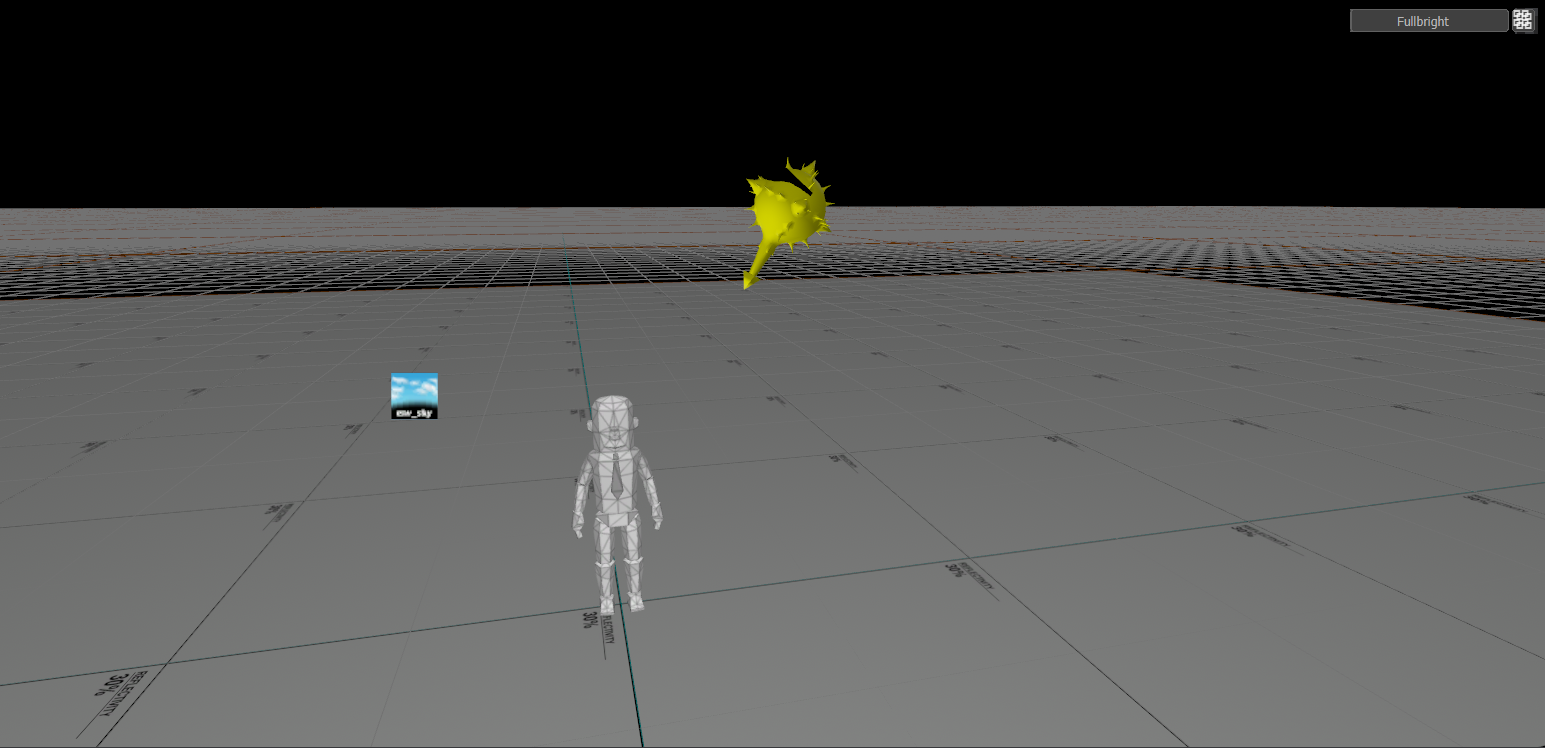
With the Entity Tool ( ⇧ shift + e ) selected, from the Object Editing window place the Player Start, Sky, and Environment Light. Make sure to rotate the light having the arrow face down using the Rotate Tool ( r ) and to give the Sky Entity a Sky Material in the Object Properties by clicking the Magnifying Glass.
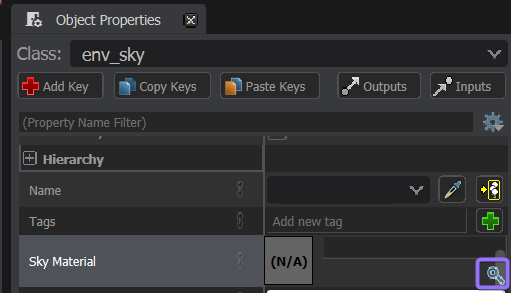
Let's use light_test_sky_overcast.
Step 2.5:
Enter Face Mode ( 3 ) and select a grass material from the Asset Browser by clicking Everything underneath Special, we can then filter it by clicking the triangle bars next to the search bar, then finally, type the material you want to use, in this case let's type "Grass" and double click terrain_grass.
Next, Select the face and apply the material. ( ⇧ shift + t ) Then do a Fast Compile.
From here, you're free to compile and test your map by using the methods listed in Getting Started With Hammer.
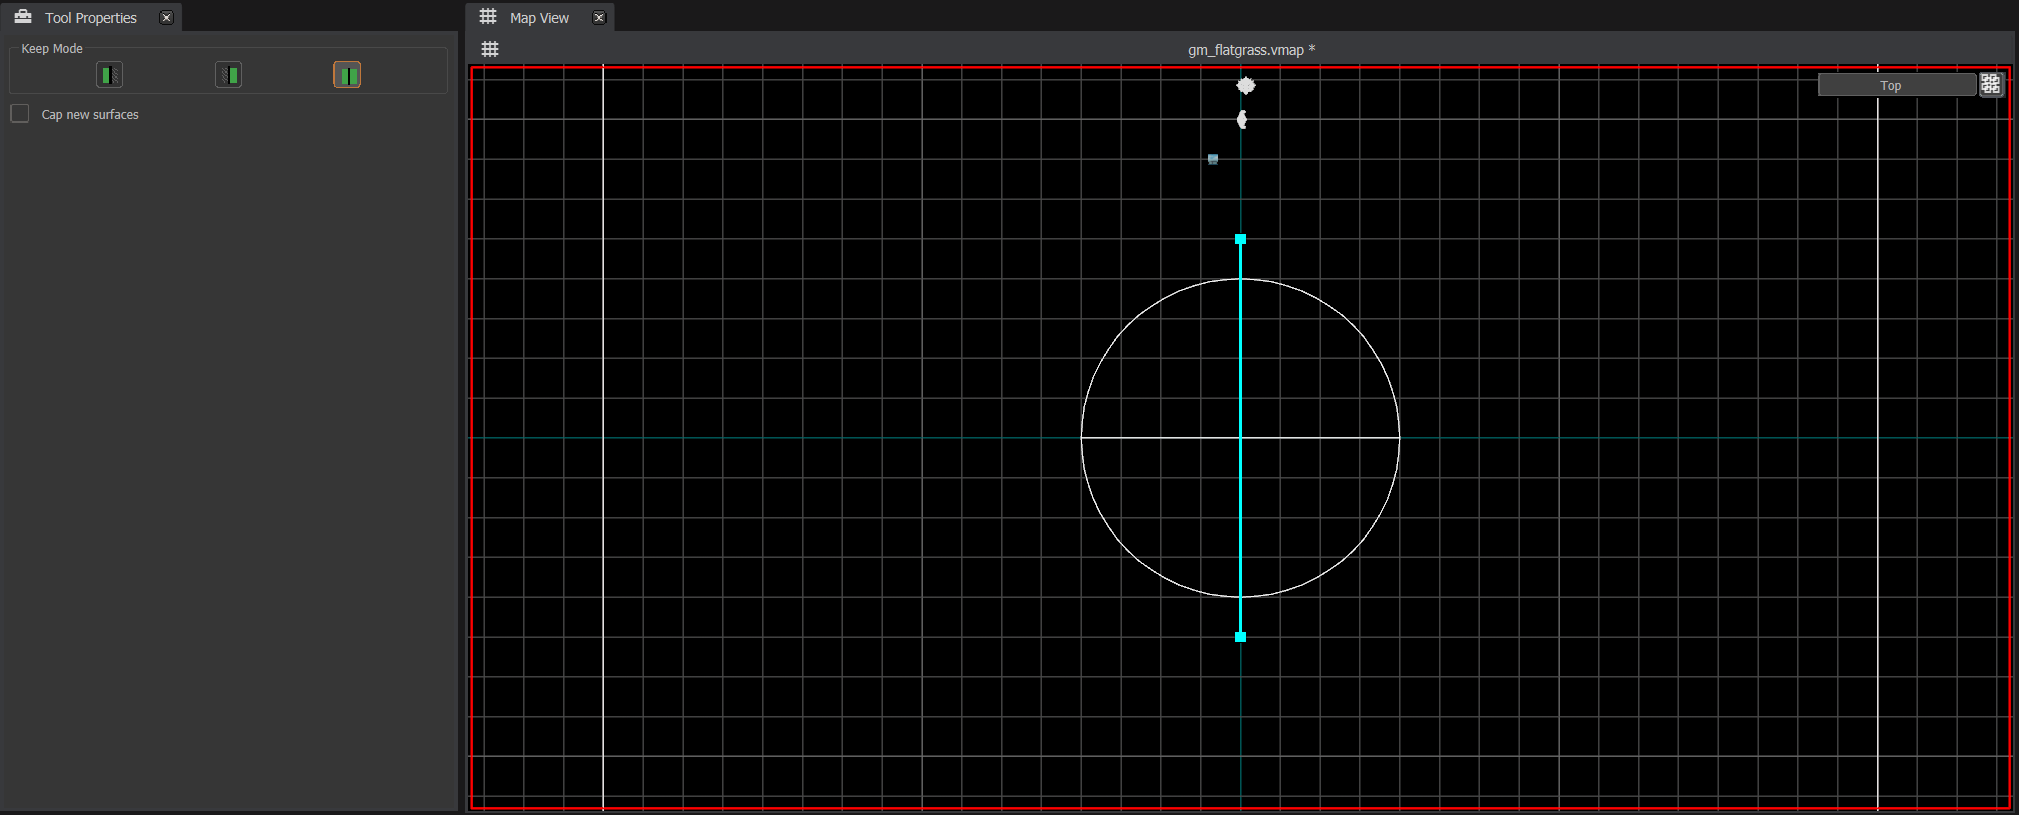
Step 3:
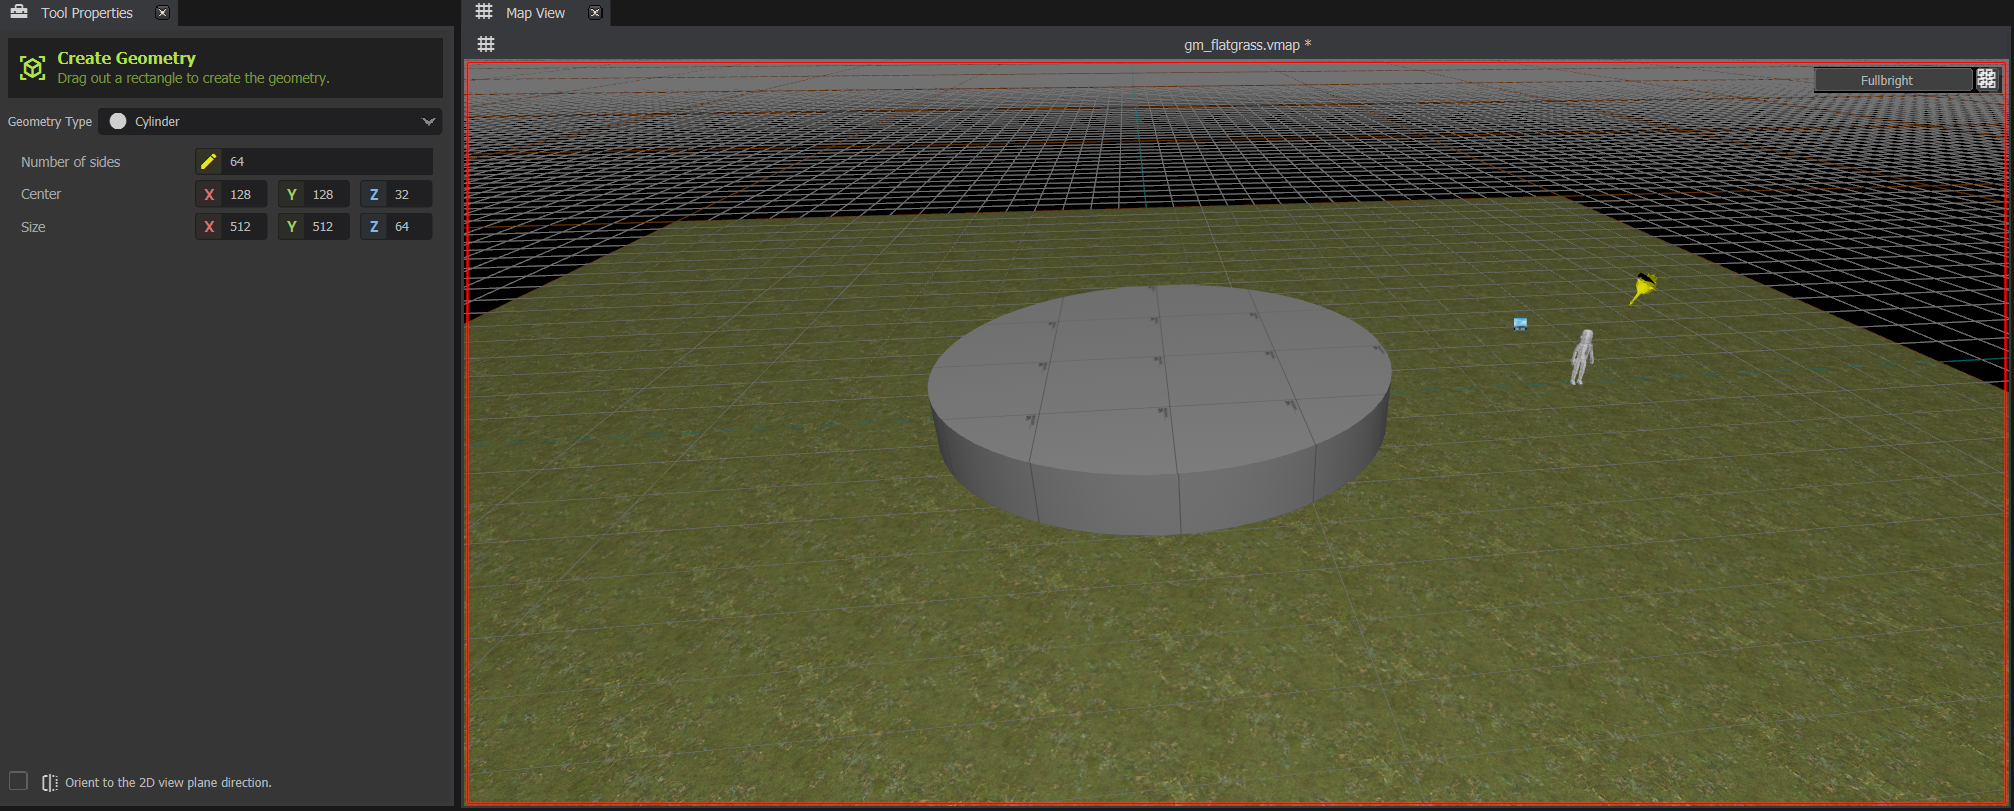
With the Block Tool ( ⇧ shift + b ), select Cylinder in the Object Editing window, make a cylinder that is 512x512 units and has 64 sides, place it in the center. This newly created mesh will use the Active Material, which in our case is terrain_grass. Let's change it back to the default for now. Shrimply type in "reflectivity_30" in the search bar.
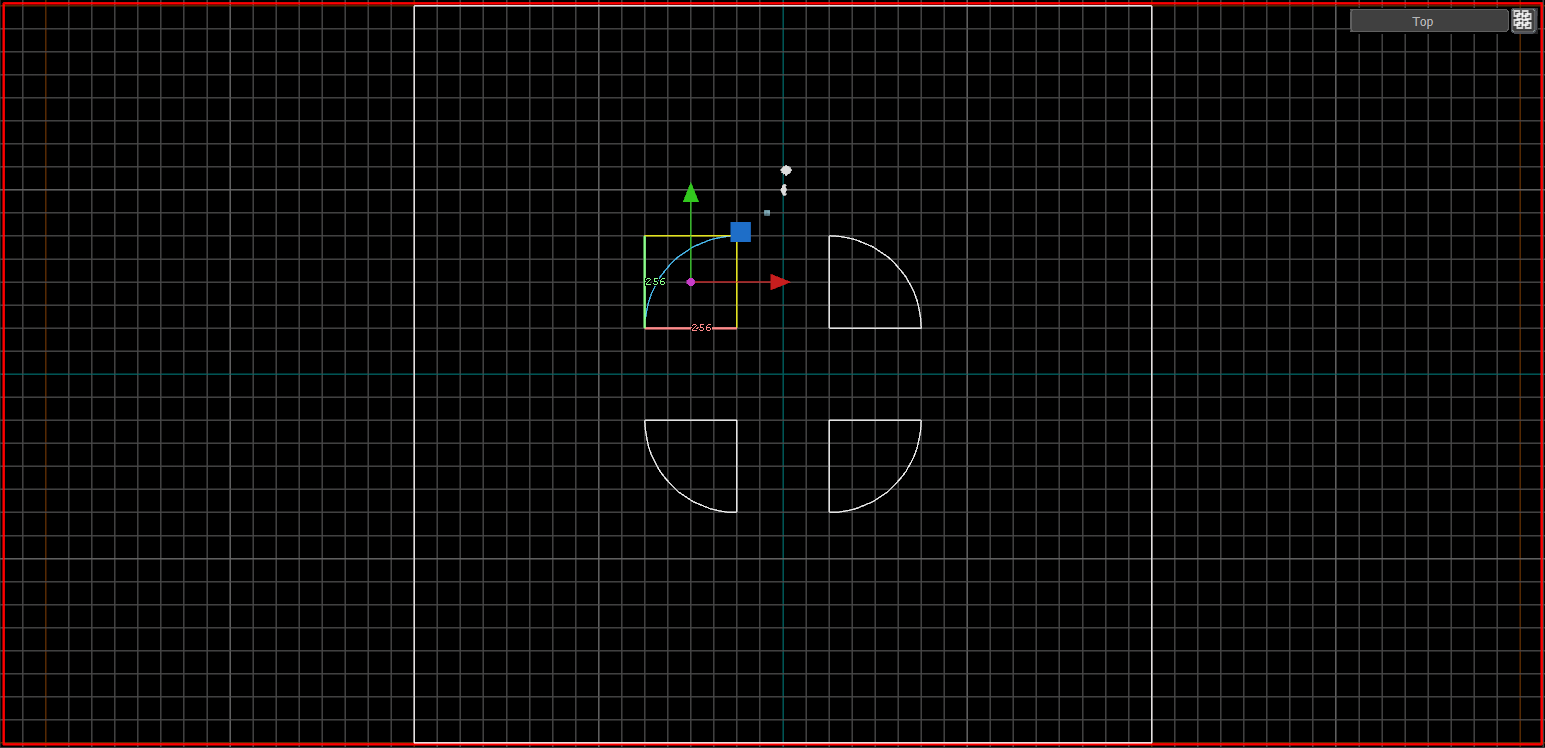
Step 4:
With the Clipping Tool ( ⇧ shift + x ), let's swap to our 2D Top-Down Viewport ( f2 ), slice the cylinder in half by pressing enter to confirm, then slice in quarters. In the Object Editing window remember to have the "Keep Both" (Third Option) Keep Mode selected.
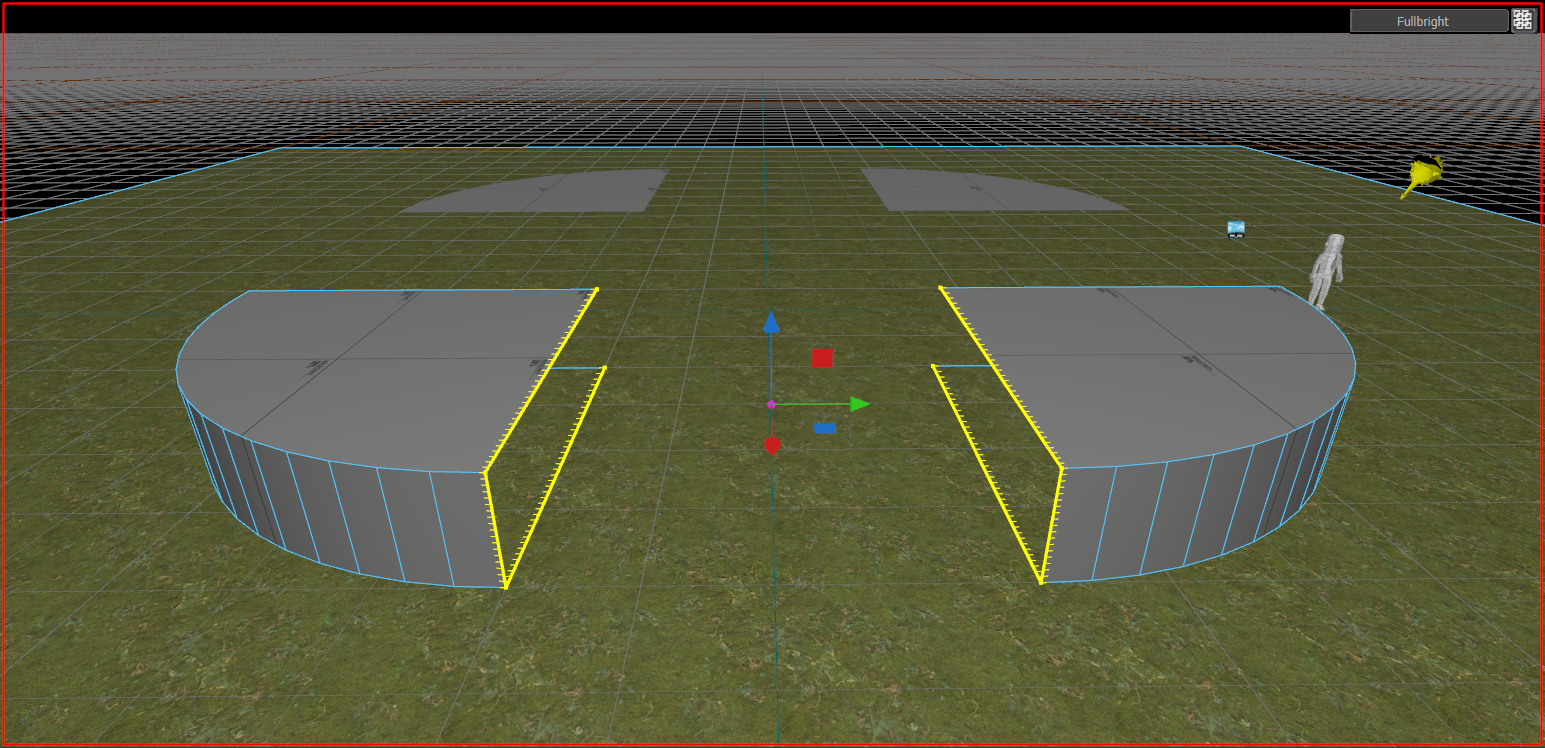
Step 5:
While in Objects Selection Mode ( 5 ) use the Move Tool ( t ) to separate the sections an equal distance from each other.
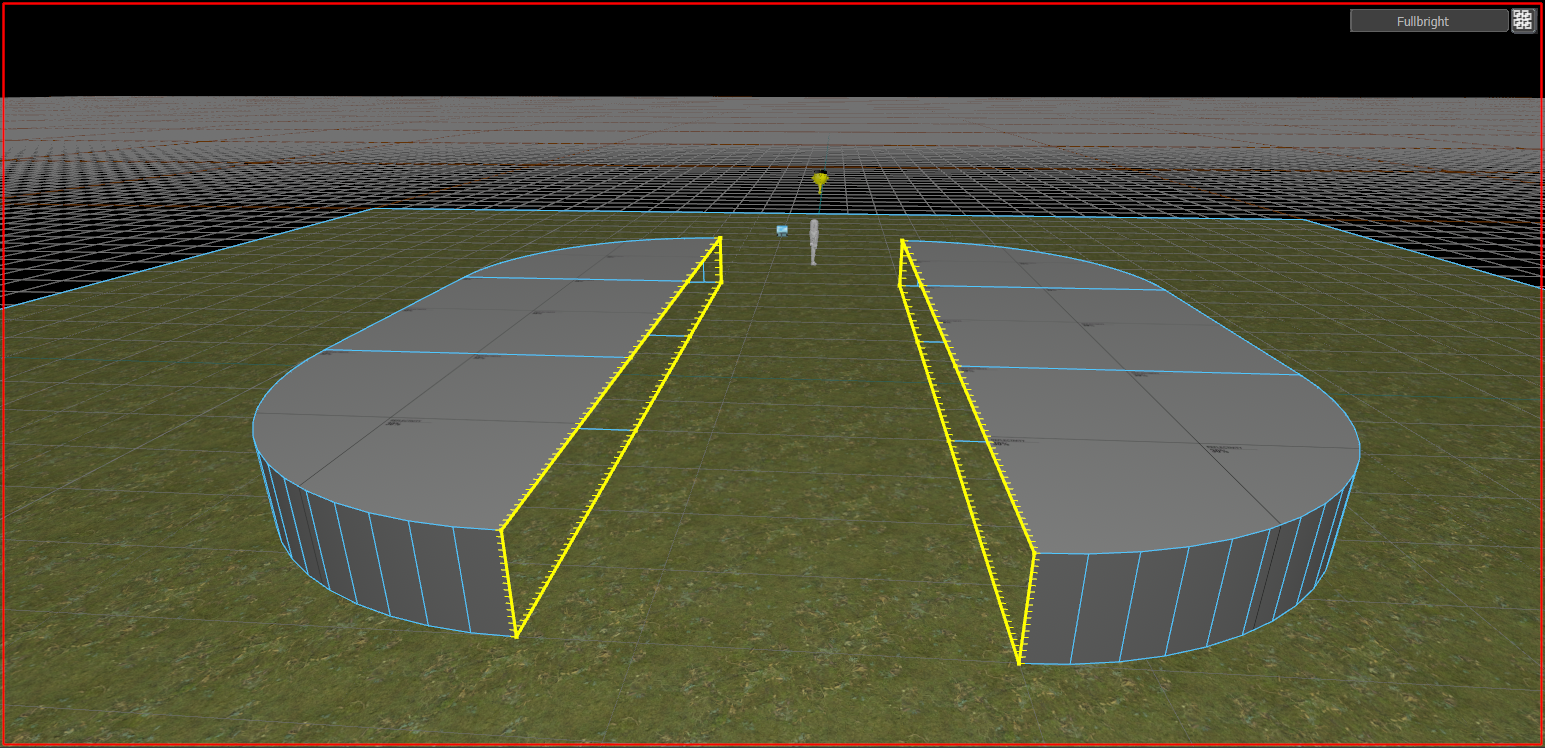
Step 6:
Let's swap back to our 3D View by pressing f5 (You can do most things in 3D View, but experienced mappers will use both modes to their strengths.)
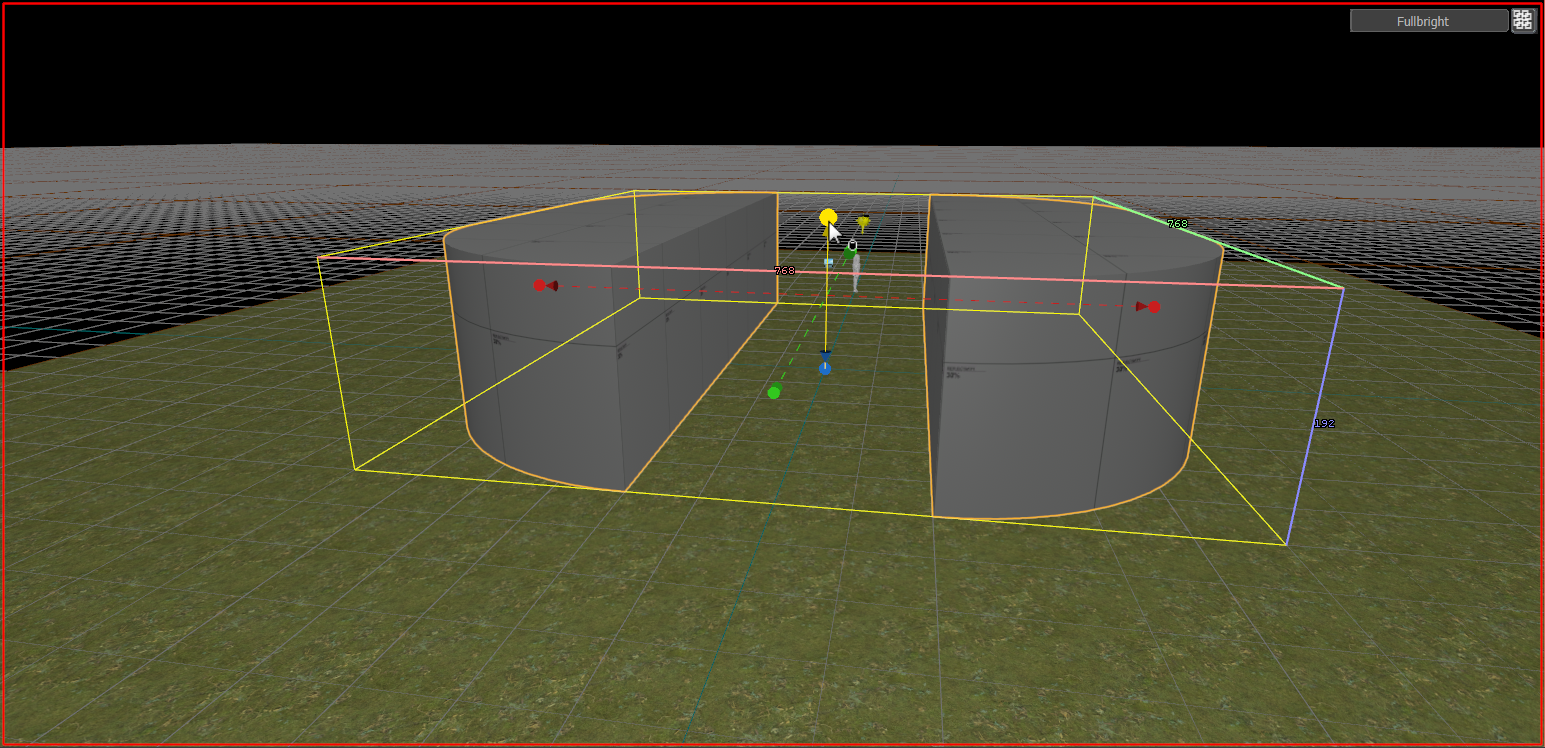
While in Edges Selection Mode ( 2 ) use the Selection Tool ( ⇧ shift + s ) to select all the edges on the side which is missing a face of two opposite sections. To select multiple edges at once you can hold ⇧ shift while clicking on the edges.
After you have all the edges selected like in the picture Bridge ( b ) them and, through the Object Editing window, select only 1 Step (Only 1 straight face will be generated) then press enter to confirm.
Repeat on the other side.
Step 7:
Select the edges of the remaining faceless side by either Double Clicking or Select Loop ( l ) in the Object Editing window after selecting one of the edges.
Fill Hole ( p ) to cover the face, repeat on the other side.
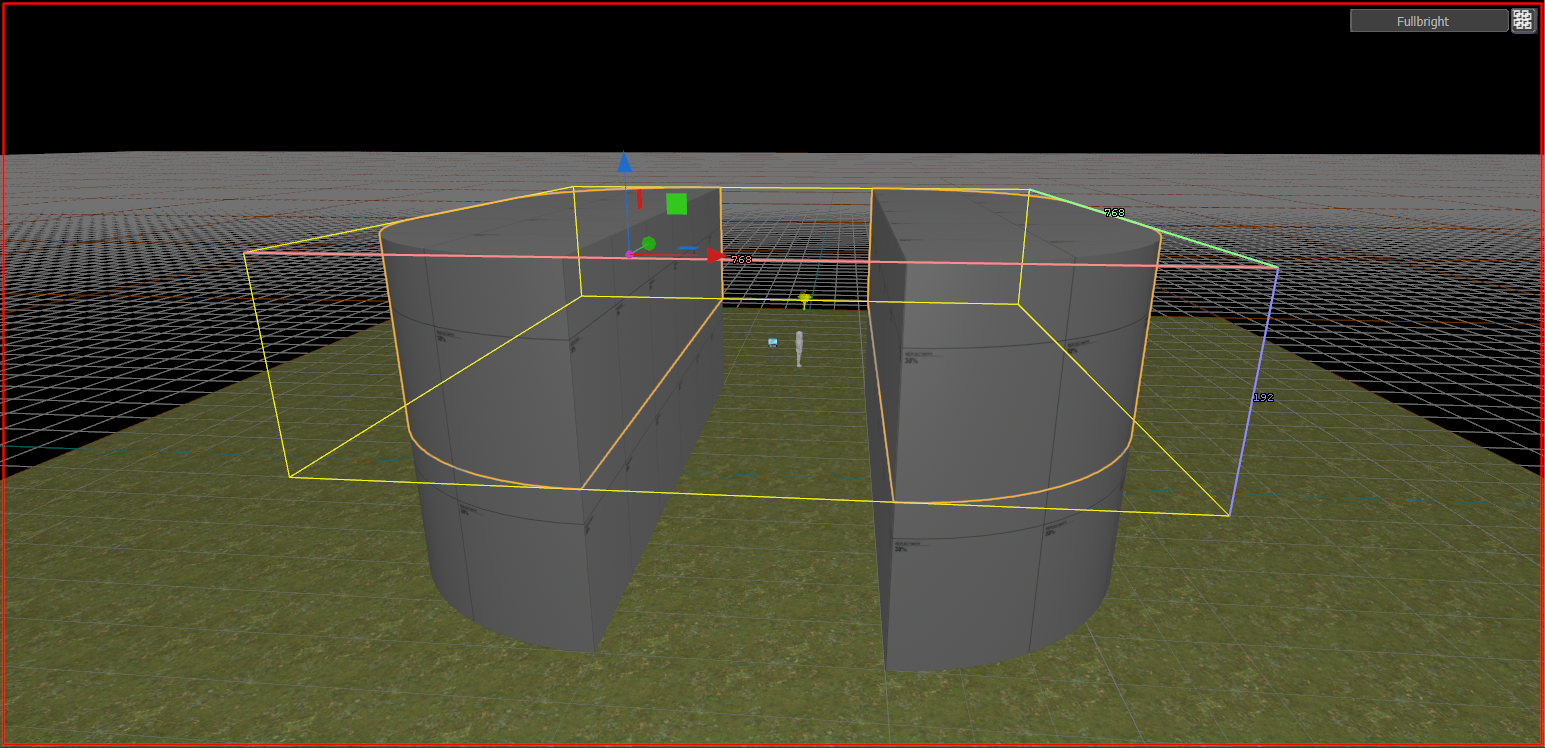
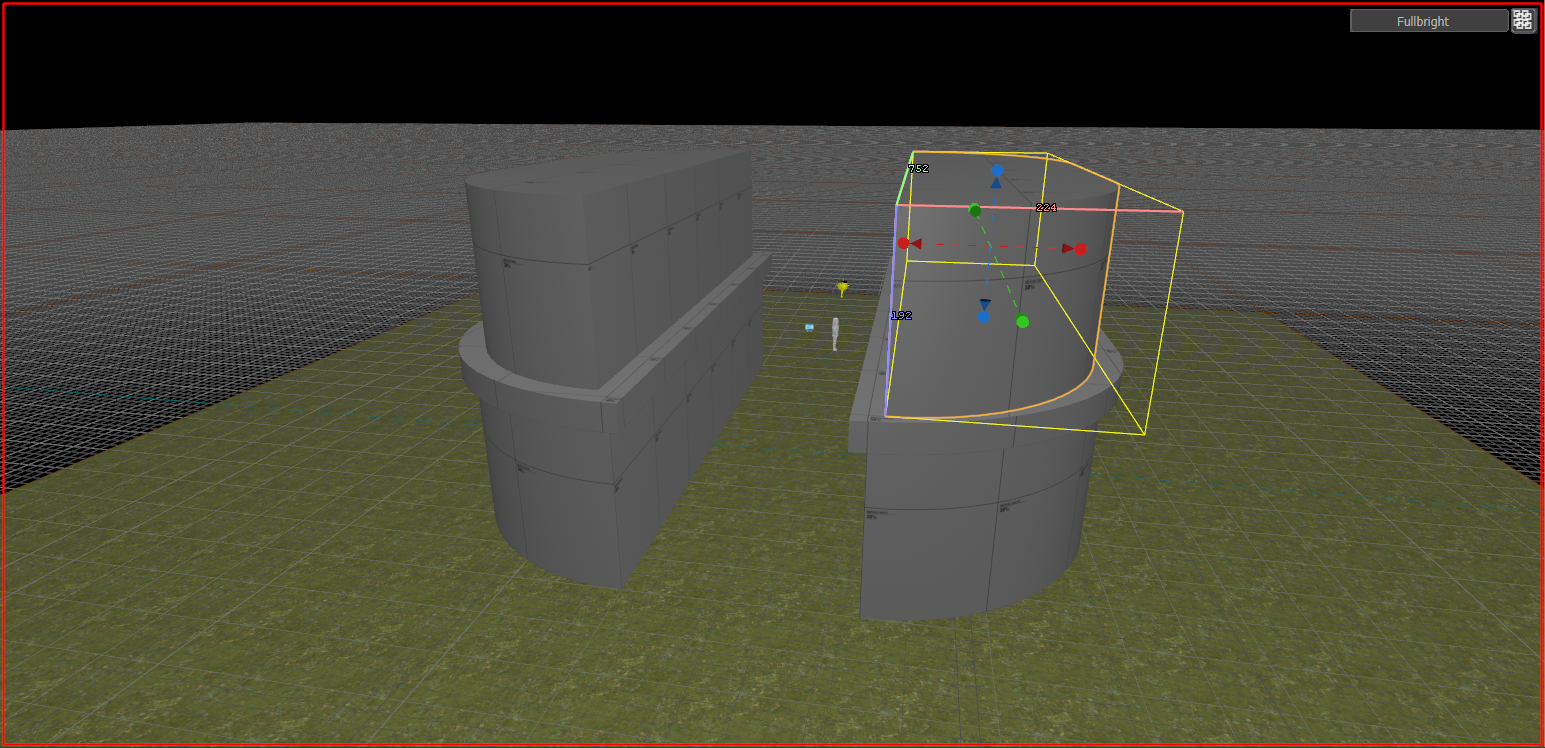
Step 8:
While in Objects Selection Mode ( 5 ) select both foundations and use the Selection Tool ( ⇧ shift + s ) to make them taller by dragging the arrow facing upwards. Let's make them 192 units tall.
Step 9:
Using the Move Tool ( t ) and while holding ⇧ shift, move both foundations up to clone them.
We will be using these clones to create the concrete slabs that separate the two foundations.
Step 10:
While in Objects Selection Mode ( 5 ) select both slabs and use the Selection Tool ( ⇧ shift + s ) to make them shorter by dragging the arrow facing downwards, let's do 16 units tall. Oh wait, our grid size doesn't let us do that, fortunately using [ we can decrease the Grid Size shown at the bottom right. Now we're able to make the slabs that short.
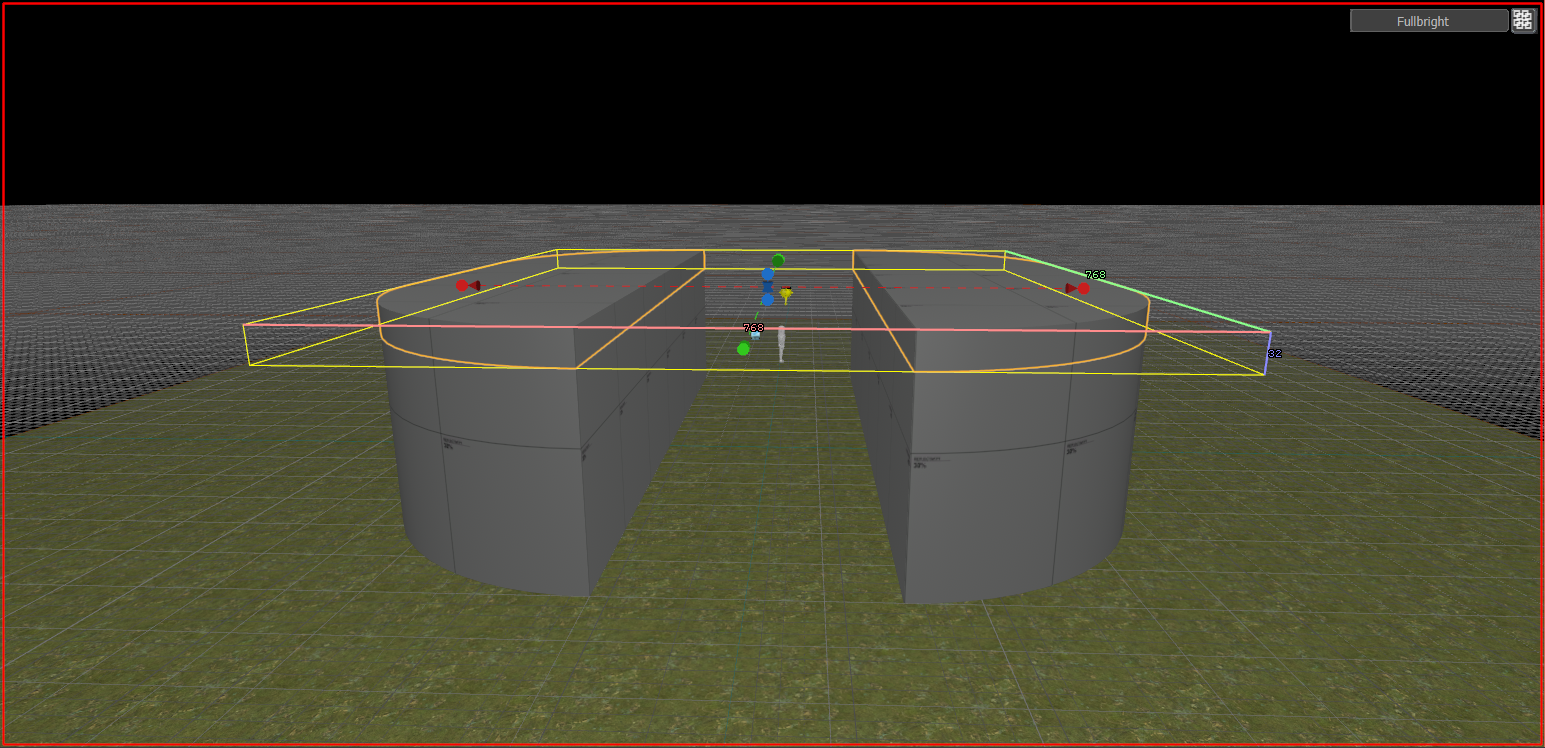
Let's use the Front 2D Viewport ( f3 ) to help us position, place the slabs on top of the bottom foundations with the Move Tool ( t ).
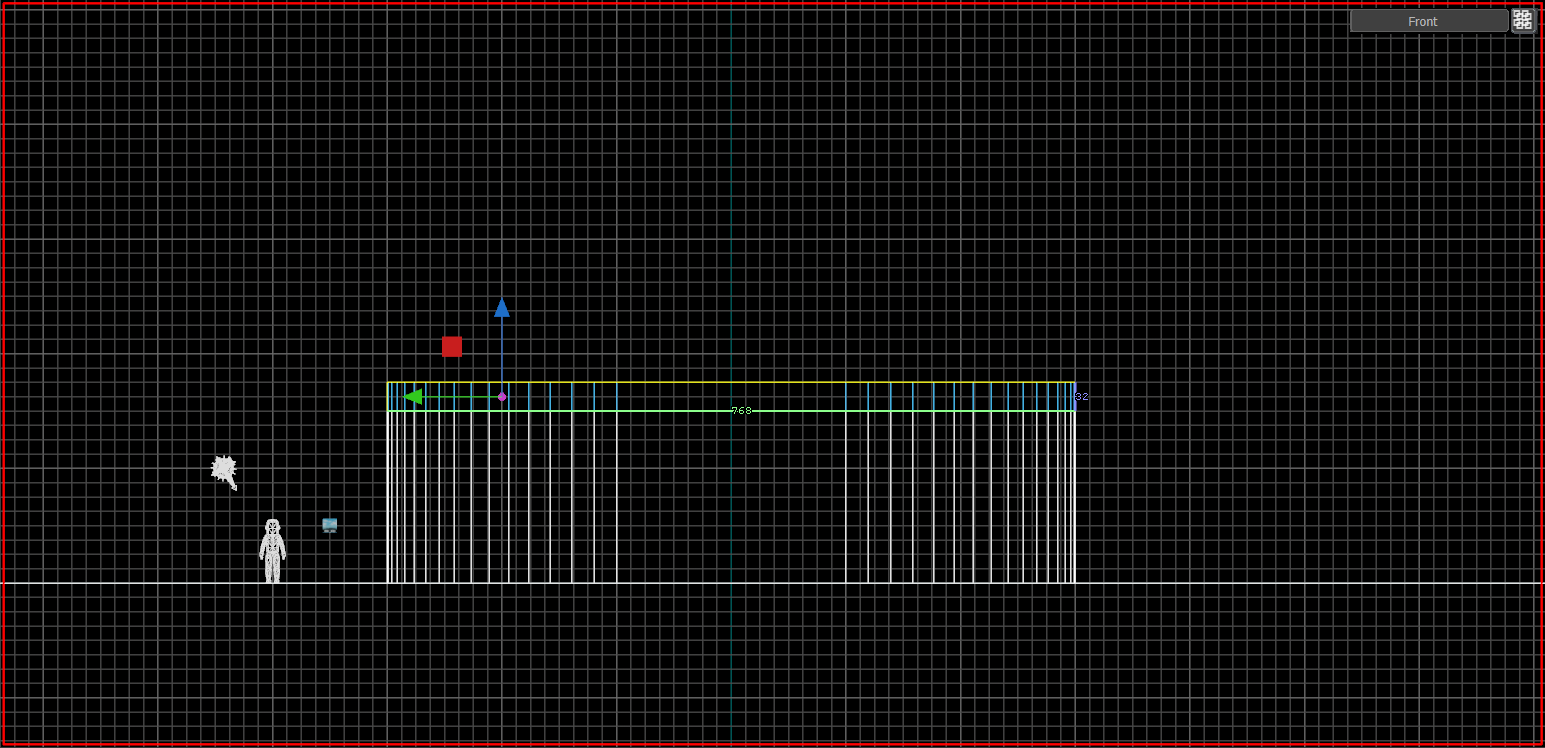
While selecting one slab at a time, make them slightly larger by about a single Grid Snap per side (Assuming you're still on a Grid Size of 16) to create an overhang. I recommend using the Top-Down 2D Viewport ( f2 ) for this.
Step 11:
Using the Move Tool ( t ) and while holding ⇧ shift, move the bottom foundations up to clone them. Resize these new top foundations one-by-one to make them shorter and just a bit thinner on each side to accentuate the concrete slab's overhang.
While in Faces Selection Mode ( 3 ) select the inner 2 faces of the top foundations and Delete ( del ) them.
These brick foundations will have a wide arch that connects them.
Step 12:
With the Block Tool ( ⇧ shift + b ), create a cylinder with 32 faces that is as wide as the top foundation's height (In my case they are 192 units).
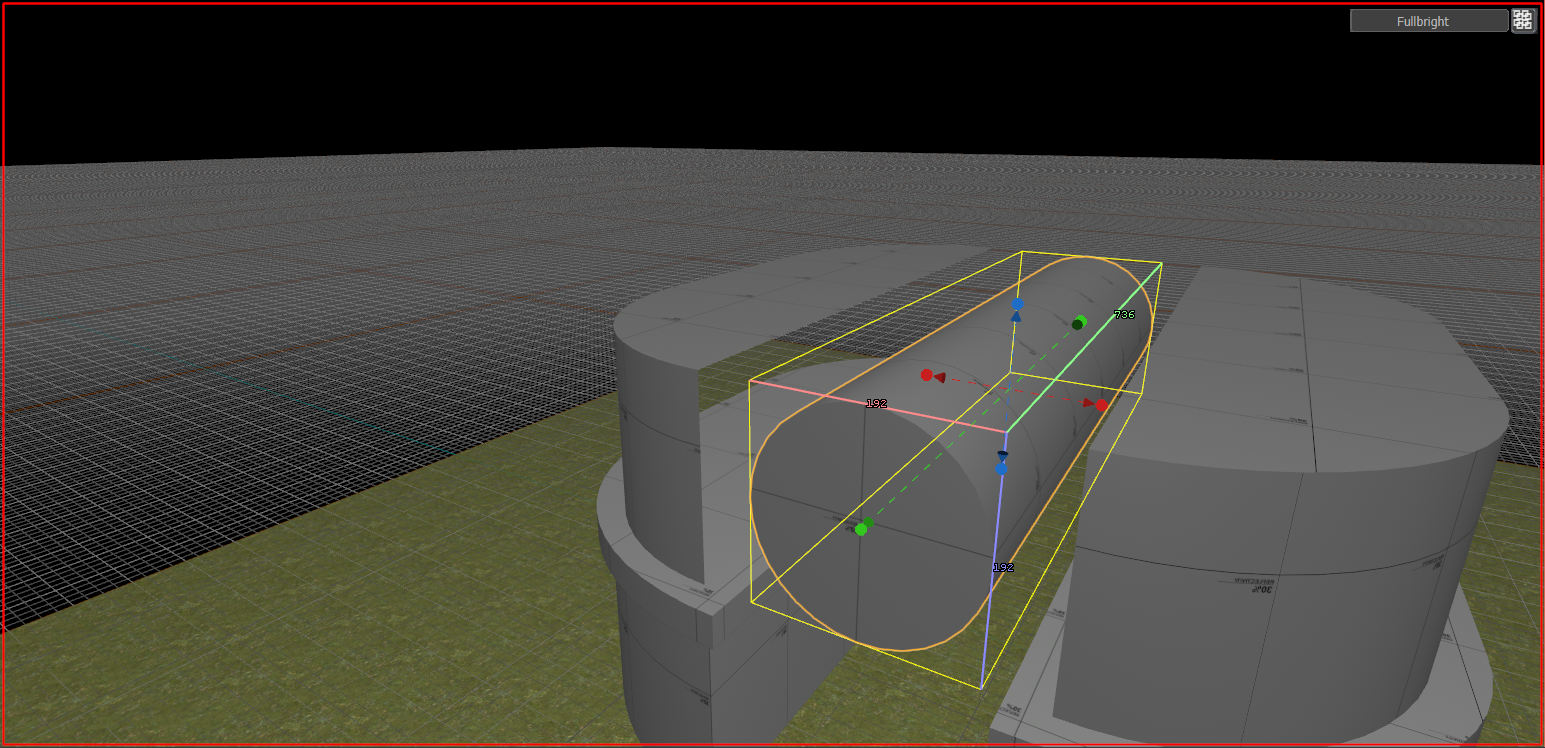
With the help of the 2D Viewport, Rotate ( r ) the cylinder 90° and place it exactly in the center of the two top foundations.
Using the Selection Tool ( ⇧ shift + s ) resize the cylinder to be exactly as deep as the top foundations.
Step 13:
While using the 2D Viewport and the Faces Selection Mode ( 3 ), select the bottom half of the cylinder and Delete ( del ) it.
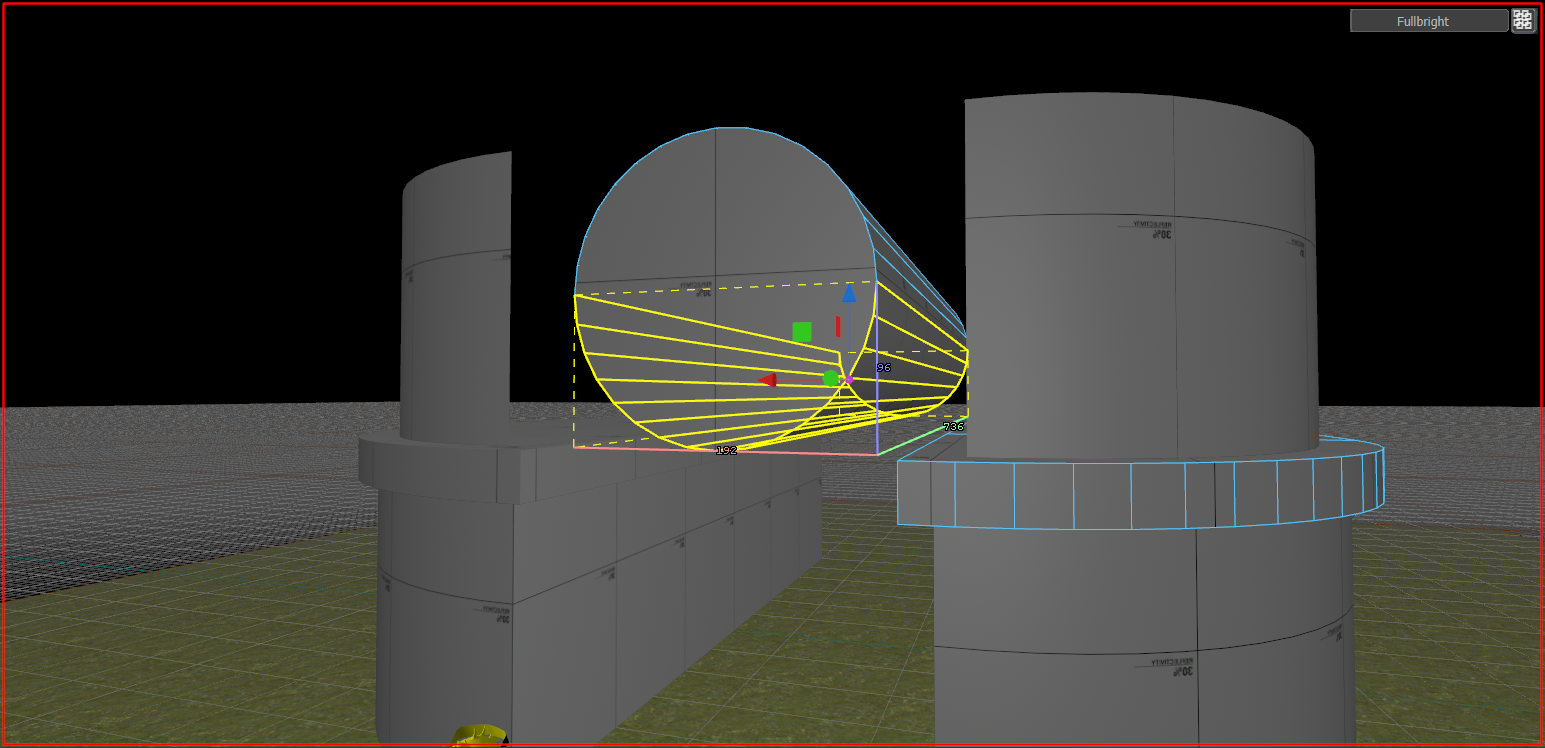
Delete ( del ) the front and back faces as well.
Step 14:
While in Objects Selection Mode ( 5 ) select the half cylinder Flip Faces ( f ).
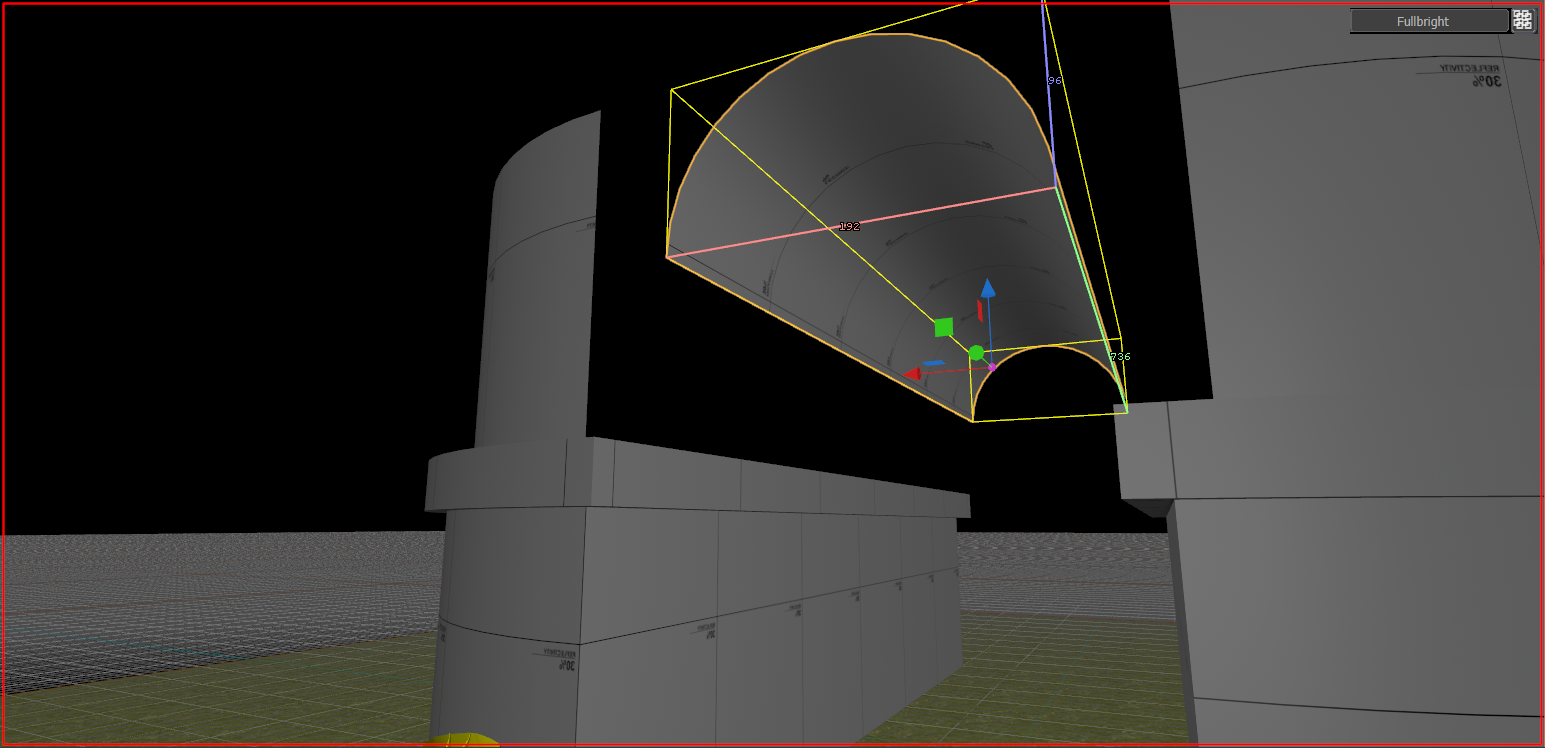
Step 15:
Using the Clipping Tool ( ⇧ shift + x ), cut the object in half and with the help of the 2D Viewport Move ( t ) them close to the top foundations and on the concrete slabs just like in the picture.
I once again recommend a Grid size of 16 for this.
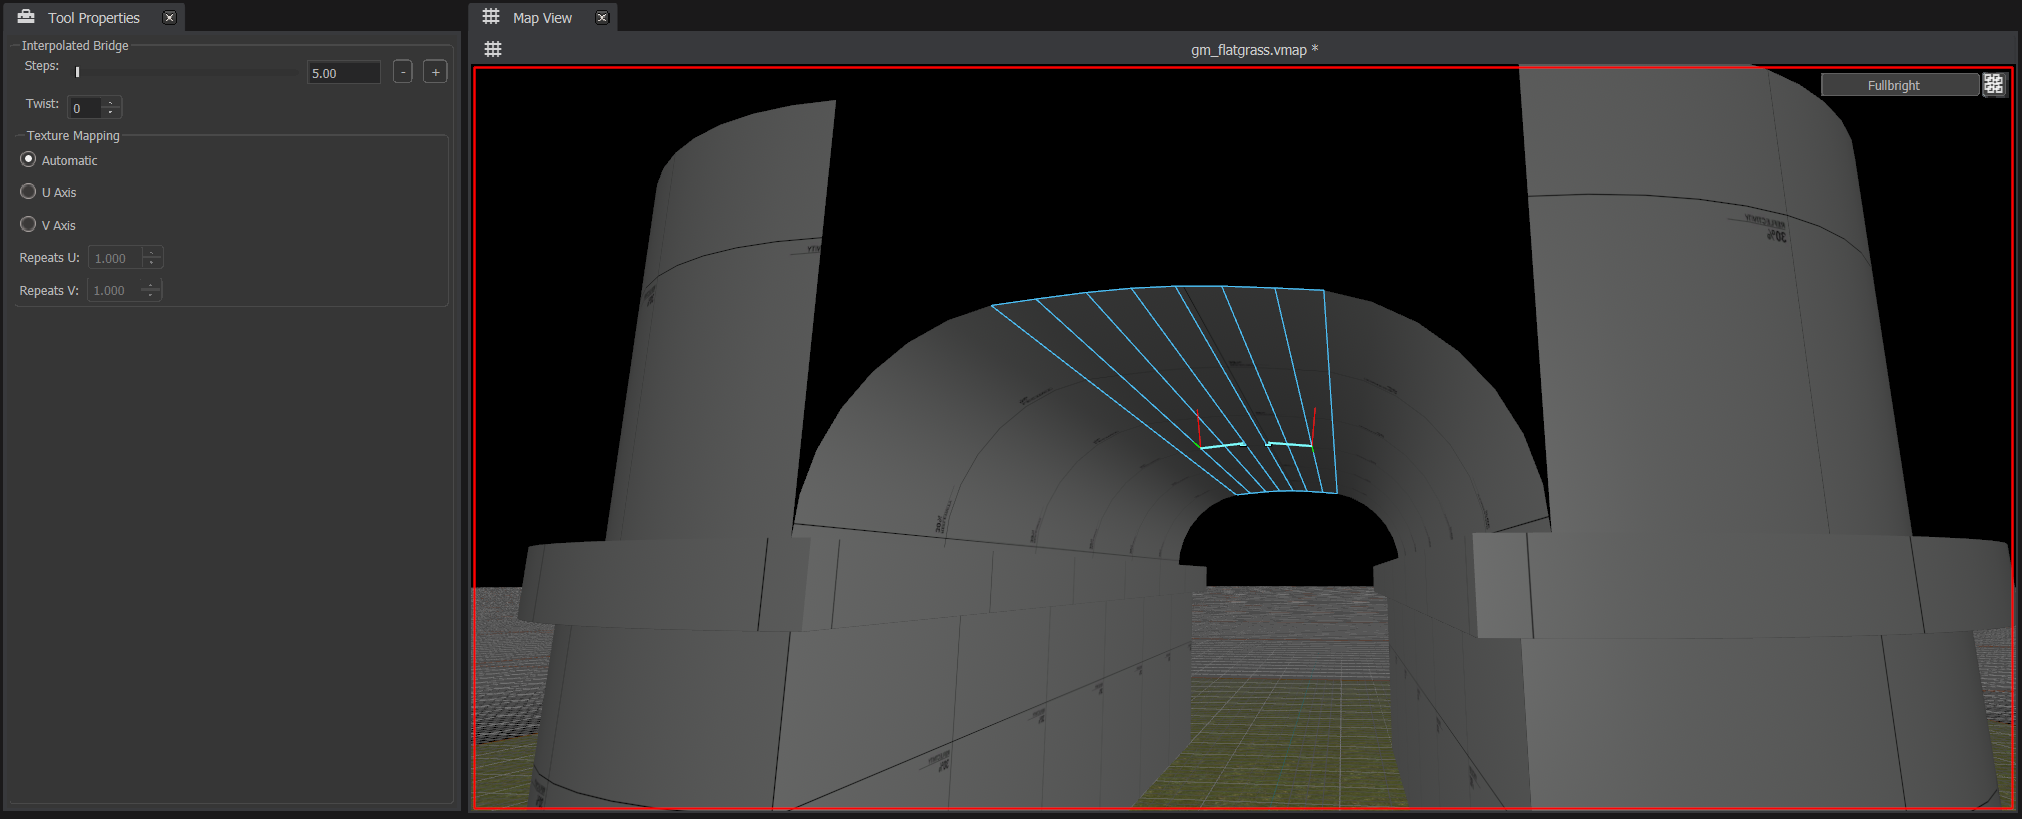
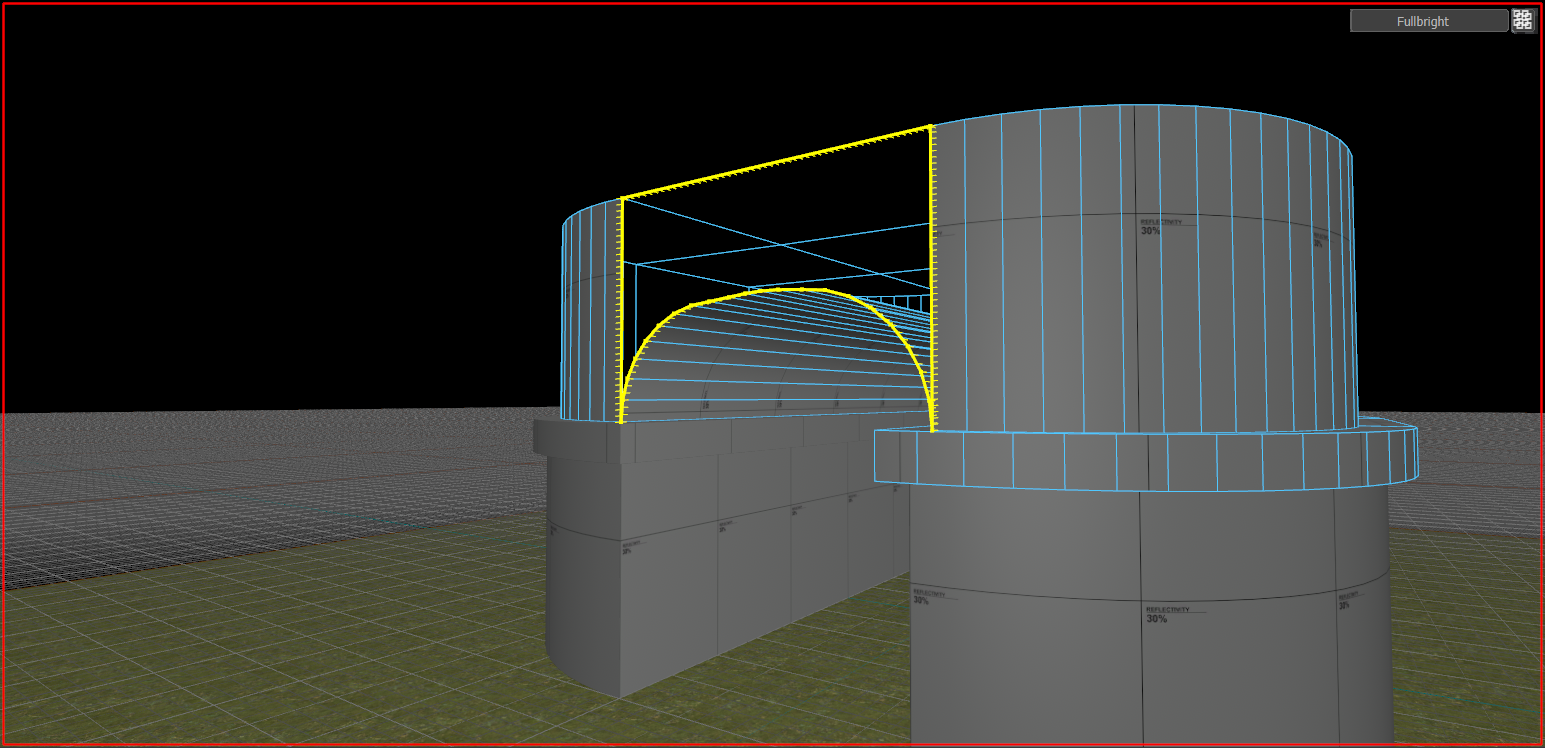
Step 16:
In Edges Selection Mode ( 2 ), select the arc's top opposing edges and Interpolated Bridge ( alt + b ) them. To keep Mesh Complexity down, let's use a step count of 5.
Step 17:
In Edges Selection Mode ( 2 ), select the top foundation's upper edges and Bridge ( b ) them together.
In Objects Selection Mode ( 5 ), select the top foundation and the arcs and Merge ( m ) the meshes together. (Reminder: Hold ⇧ shift to select multiple objects)
Step 18:
While in Edges Selection Mode, select one of the edges belonging to the missing face and Select Loop ( l ) or Double-Click to include all of them.
Fill Hole ( p ) to create the missing face and repeat on the other side.

Step 19:
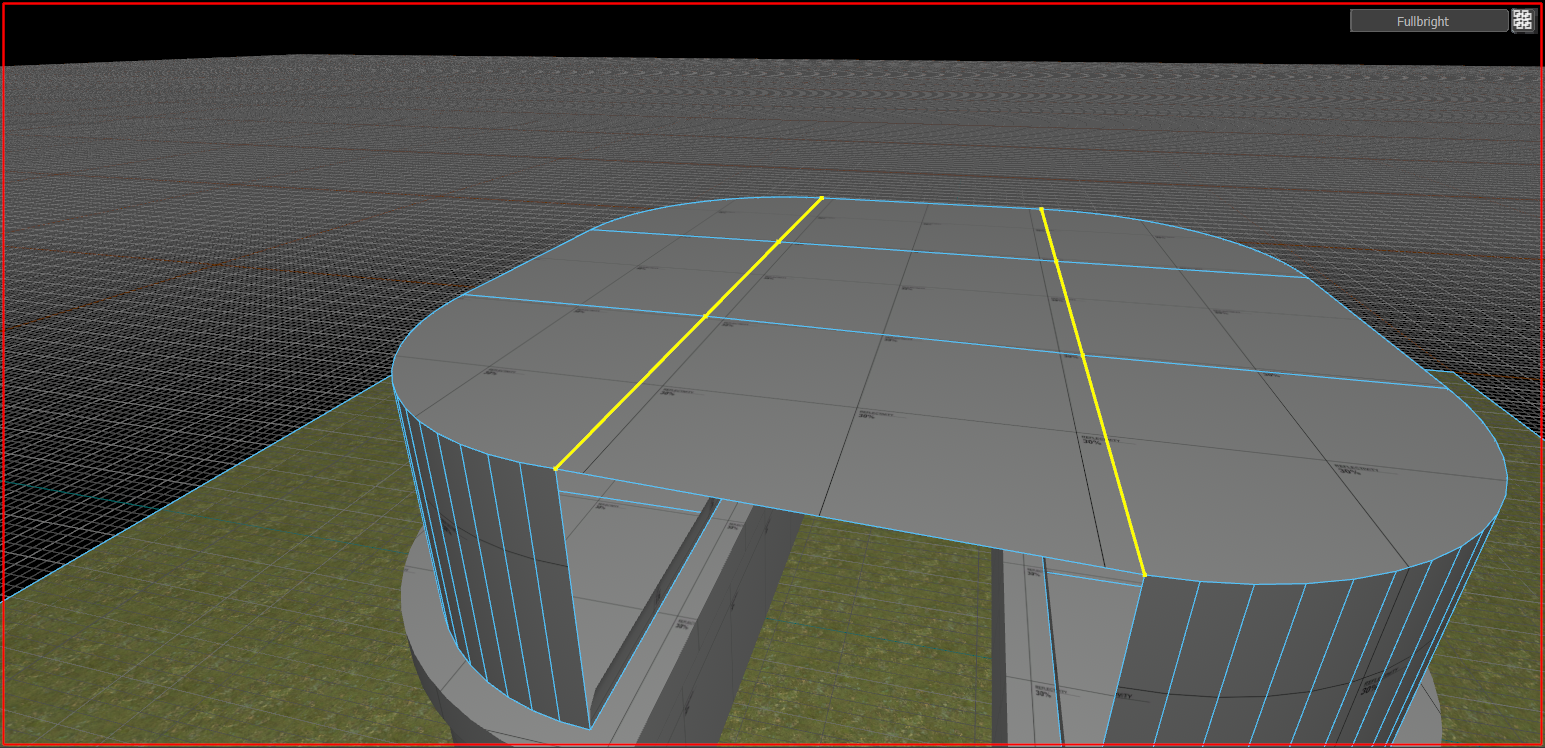
Let's give the top a bit of an overhang aswell. First, head into face mode and select every top face. Then, in Resize ( e ) hold ⇧ shift and drag the red box out a grid snap (16 Units), then let go and do the same for the green box. Now, go into Transform and once again hold ⇧ shift and in drag it upwards a grid snap (16 Units).
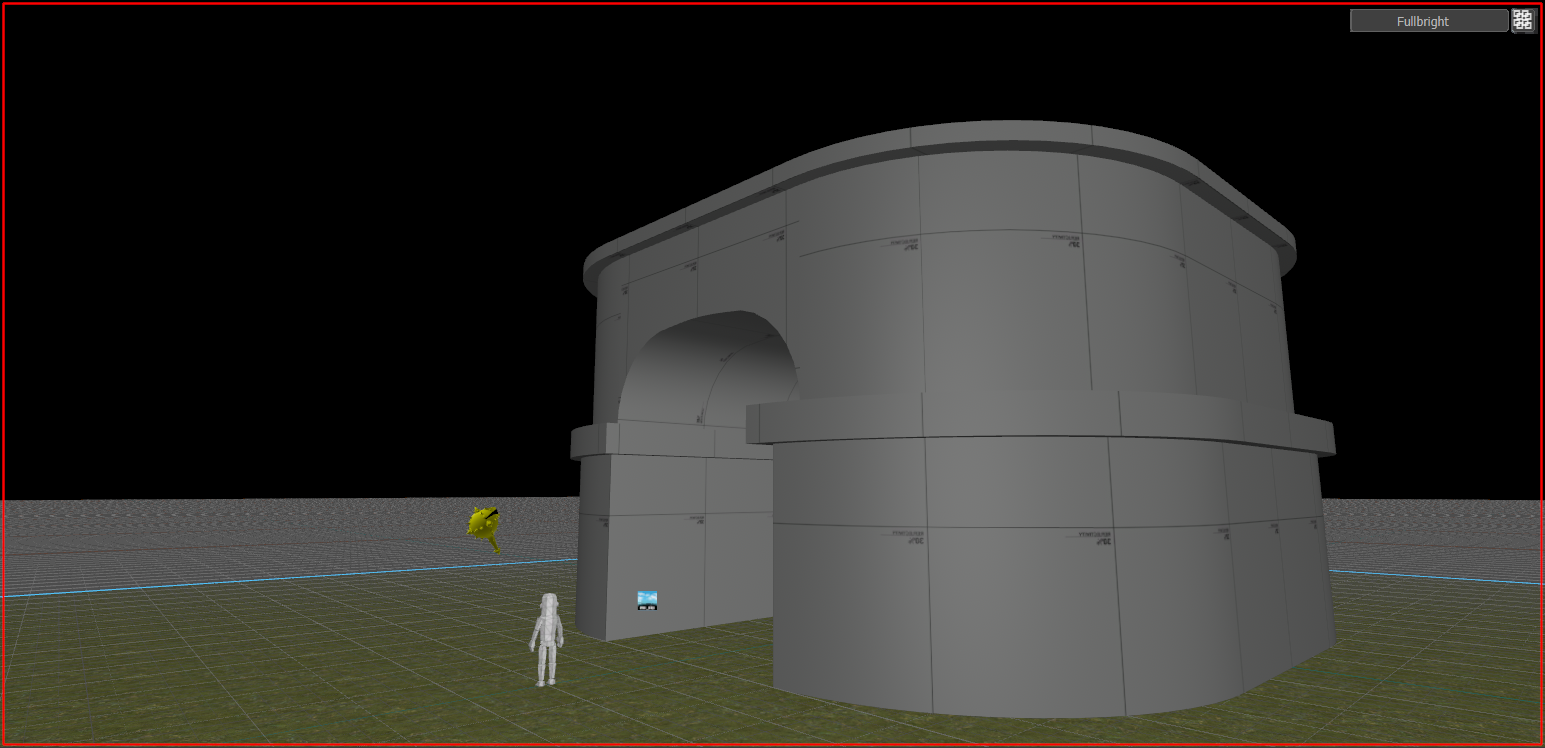
Step 20:
I'm sure you're thinking "this is looking a bit strange", and you're right! It does seem a bit small doesn't it? Mistakes will happen, this is natural, but let's not delete the entire thing, we can fix it pretty easy.
Select all the meshes in Objects Mode 5 and then using Select we can just drag it out. Let's use a Grid size of 256 here and drag each side out by a grid snap. Now, let's go back down to a *Grid size of 64 and drag it down one grid snap. Our new width and length should be 1024x1024.
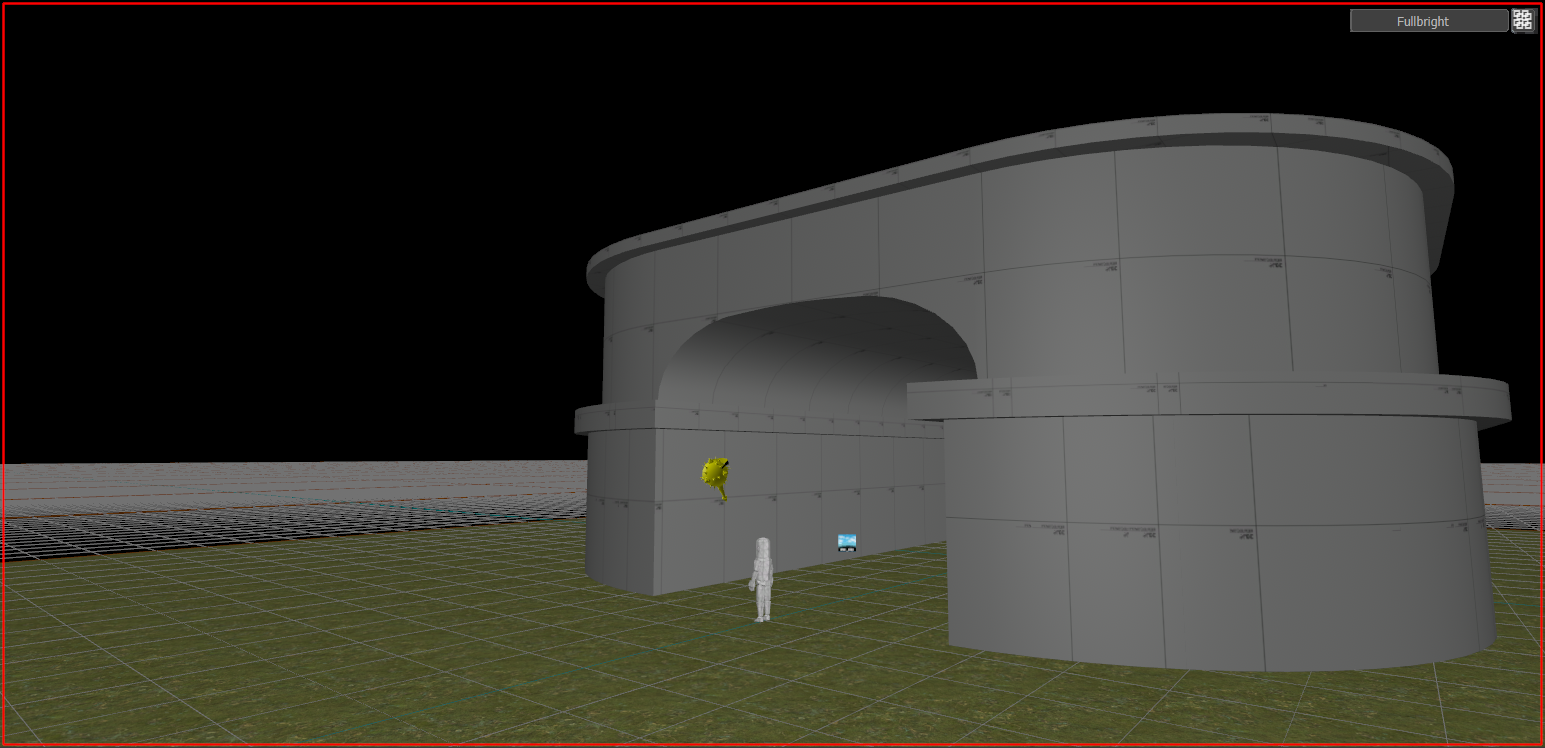
Not so strange anymore is it? And you didn't even have to redo the tutorial!
Step 21:
Beautiful! Let's publish i- Not so fast s&bro. We're forgetting some materials. Let's grab a Brick and Concrete texture from the Asset Browser, and apply them. Let's use brick_wall_b for our "Pillars" and concrete_damaged for our "Slabs". In Face Mode 3 select all of the relevant faces then apply the material using ⇧ shift+t.
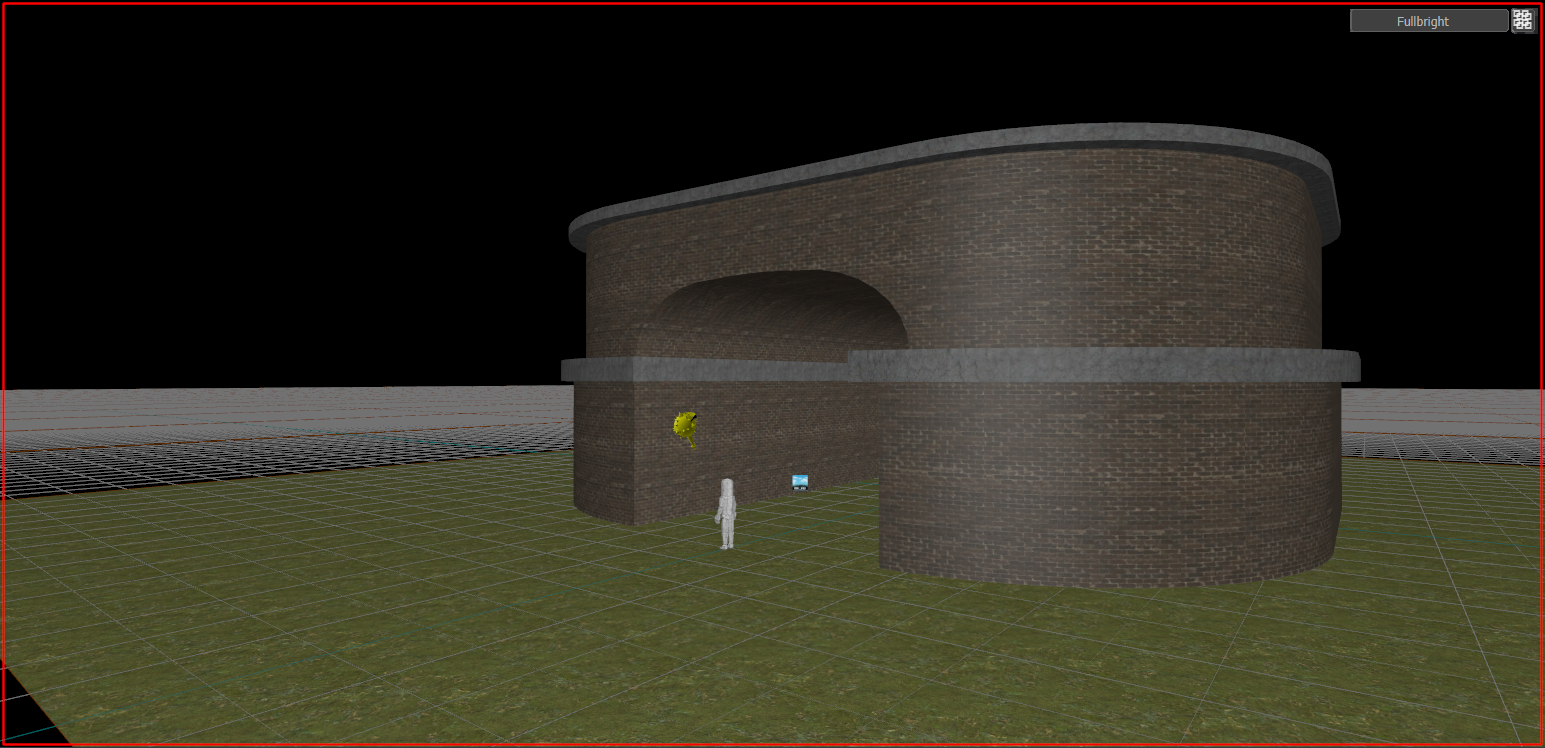
Now we can do a Fast Compile and check out the map using one of the methods listed in Getting Started With Hammer.
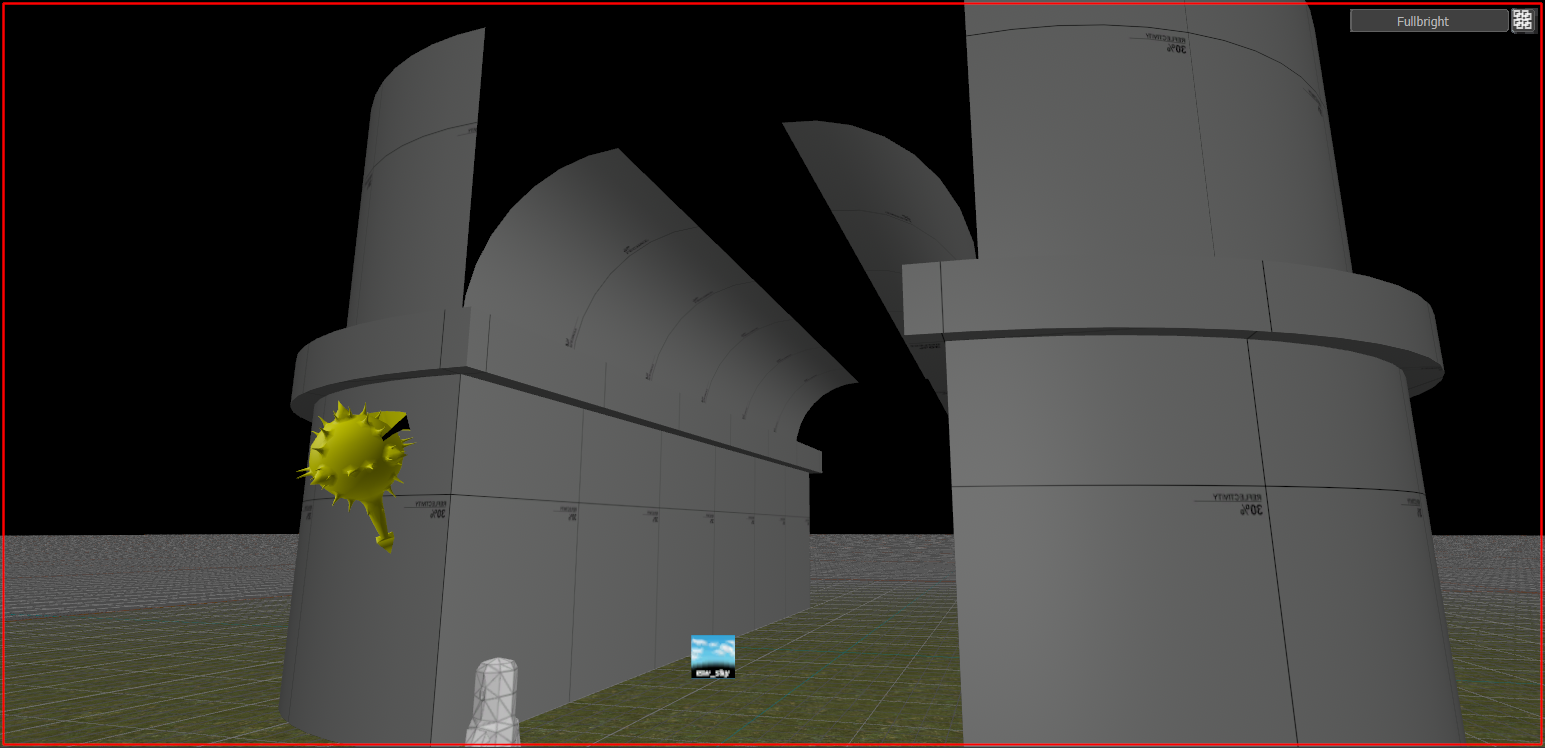
Result
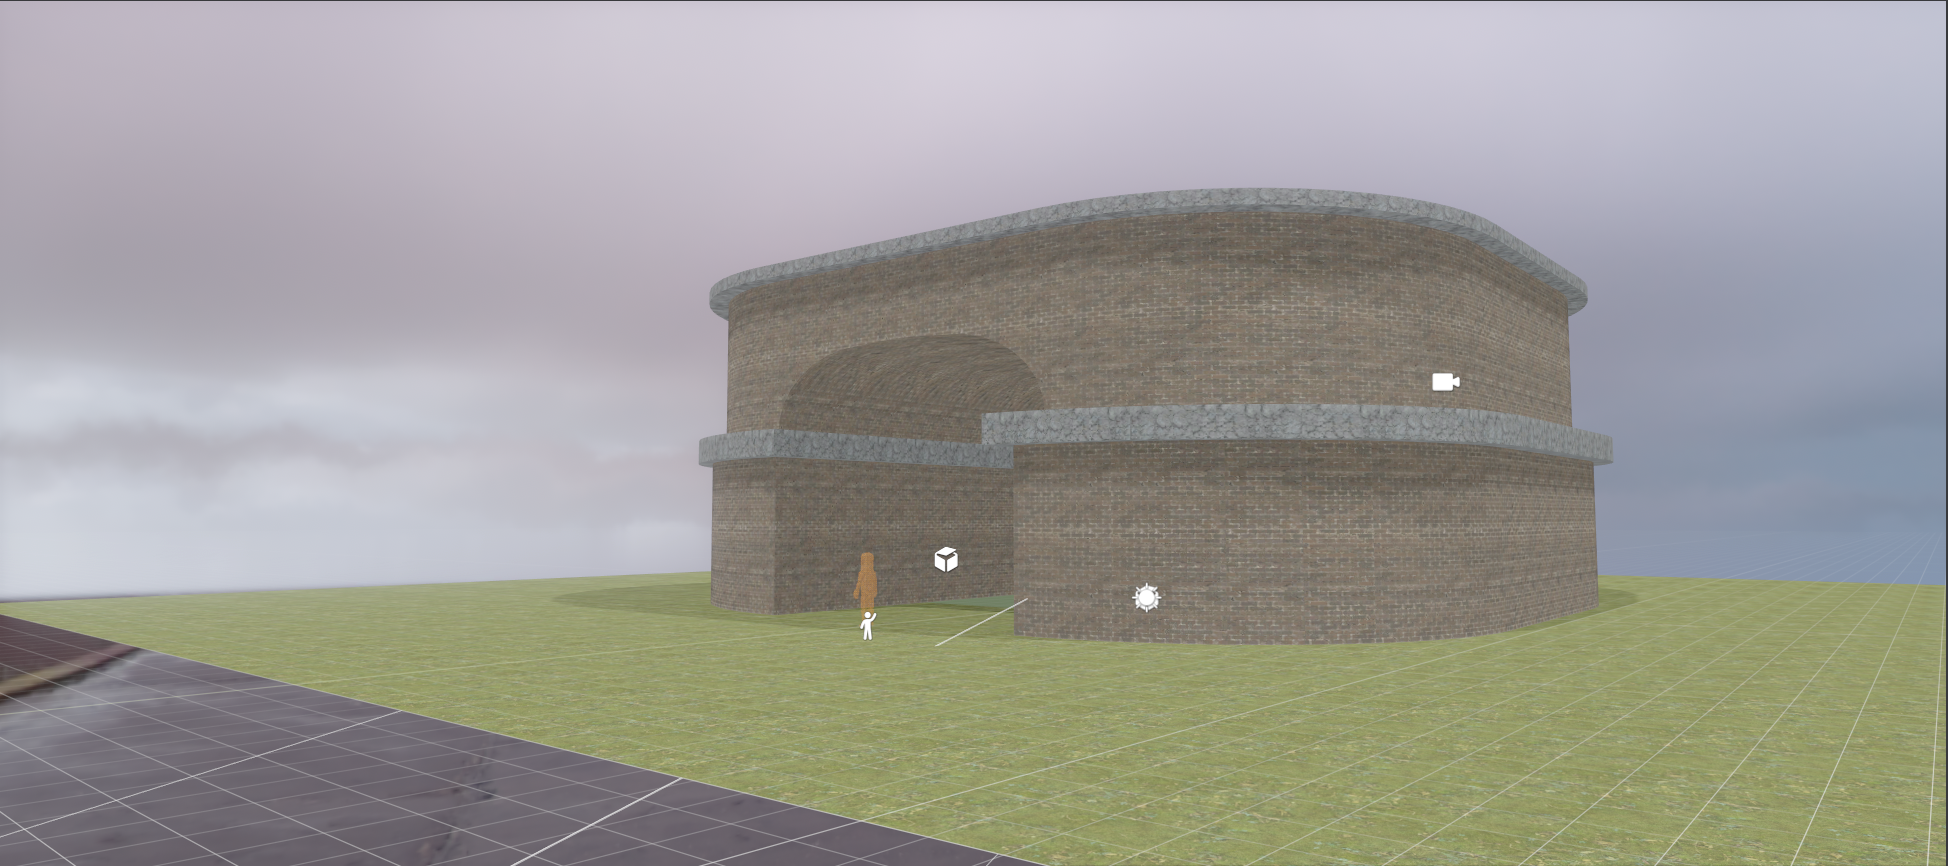
Flatgrass may have seen better days, but this knowledge should help you get started in your mapping journey. For even more great information, I (personally) recommend Eagle One's Hammer Crash Course in Mapping Resources.
 Garry's Mod
 Rust
Rust
 Steamworks
 Wiki Help
 S&box
S&box