Tilesets

What is a Tileset
Tilesets allow you to create individual pieces of a larger build and define how they fit together. Using tilesets allows you to work with very simple geometry and let hammer replace it with more the complex version of it.
Creating a basic tileset
Step 1 : Create an Empty Map.
Create your map and add _tileset to the end. This will allow you to search for it easier as well as all other tilesets.
For demonstration purposes we will be creating a 512x512 Road network, so we will name it: roadnetwork_512_tileset
Step 2: Creating an empty tileset
To create a tileset hover over the Tiles tab and select the Create tile set .
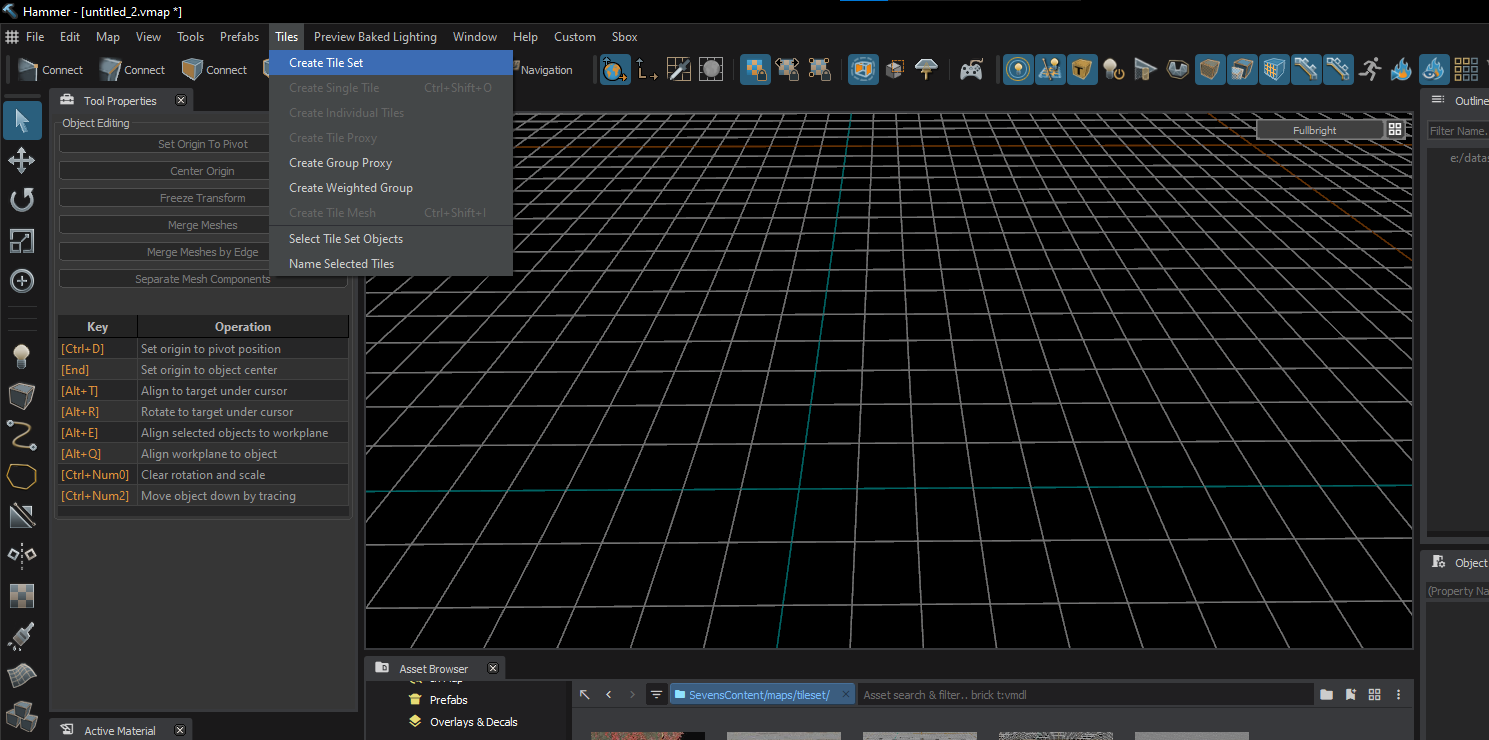
After clicking a object should appear in your outliner named "UnnamedTileSet - Tileset".
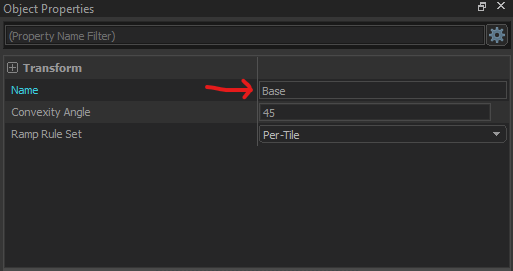
Step 3: Renaming
Tilesets are required to be named Base.
Select the tileset in the outliner or Object Properties and rename it.
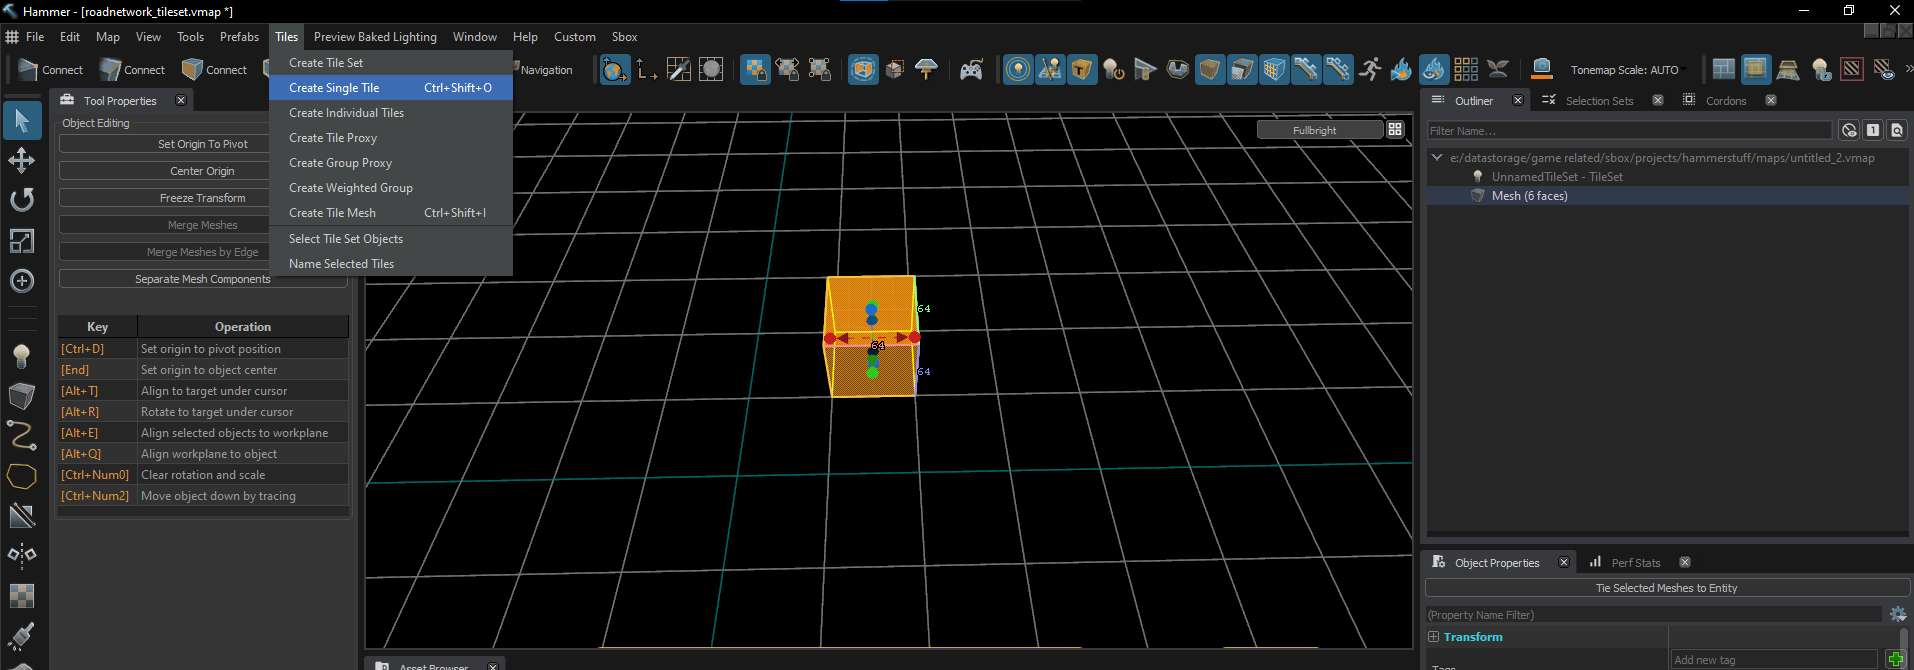
Step 4: Setting up a Tile
start off by creating a placeholder mesh, this can be anything and will be deleted once we have our tile object
Once you have a mesh down, selected it using the Mesh or Objects tool.
Click on * Tiles -> Create Single Tile*
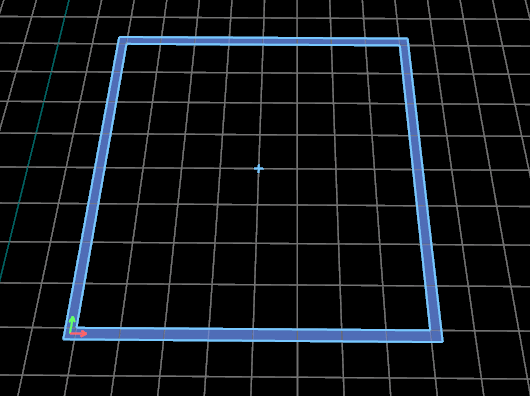
You should now have a blue outline surrounding this square
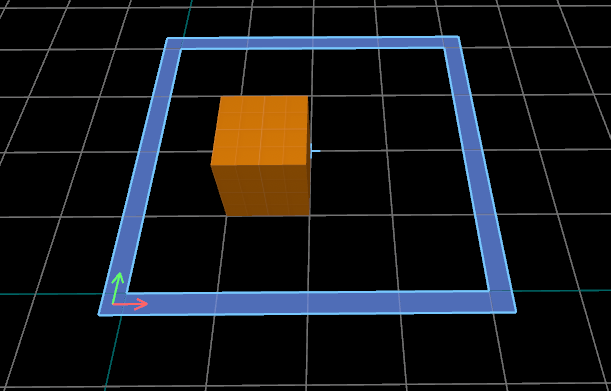
The inside of this blue outline is your Tile, Every tile four sides: Top, Bottom, Left, Right. The green arrow points to the Top and the red points to the Right.
These sides will determine how the tiles are placed on the mesh so keep them in mind when designing your geometry.
IMPORTANT STEP: Hierarchy is important to tilesets, the tile you just created is not apart of the tileset, drag the tile object in the outliner and drop it on the tileset.
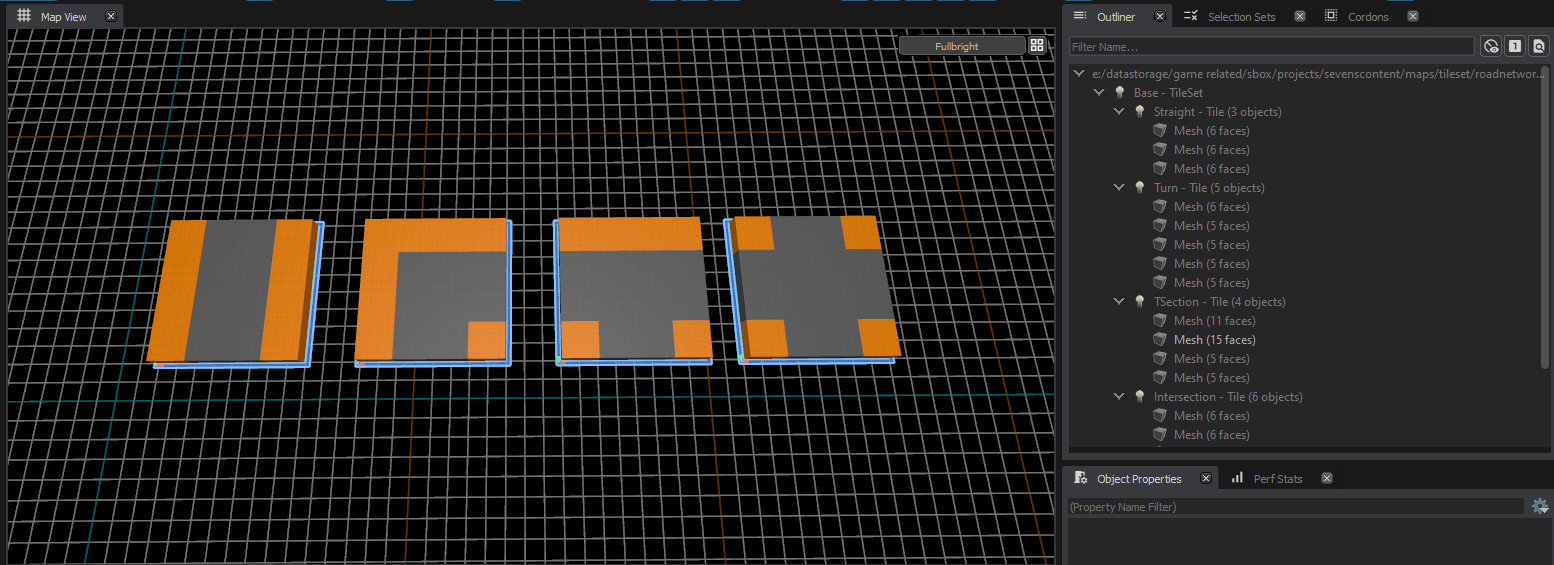
it should look like:

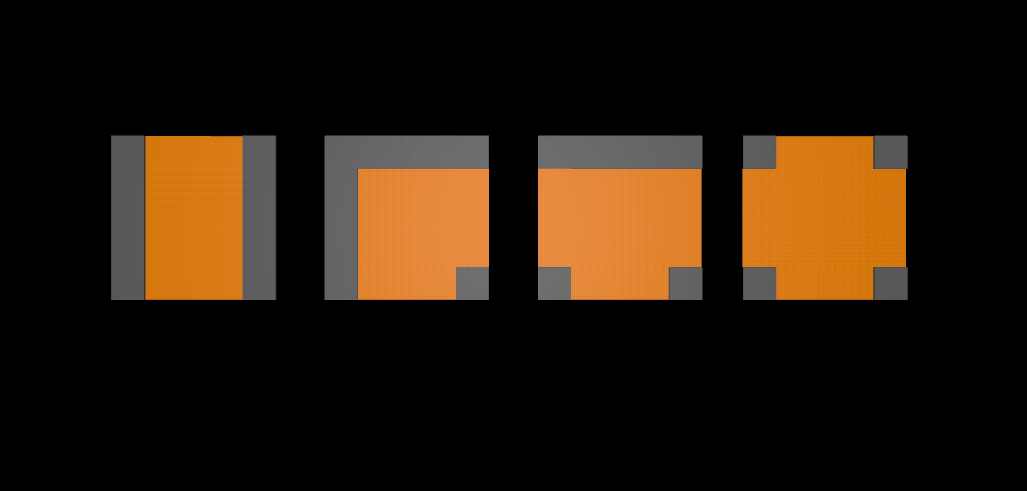
Because we are creating a road network there are 4 types of tiles we need: Straight, Turn, T-Section, Intersection.
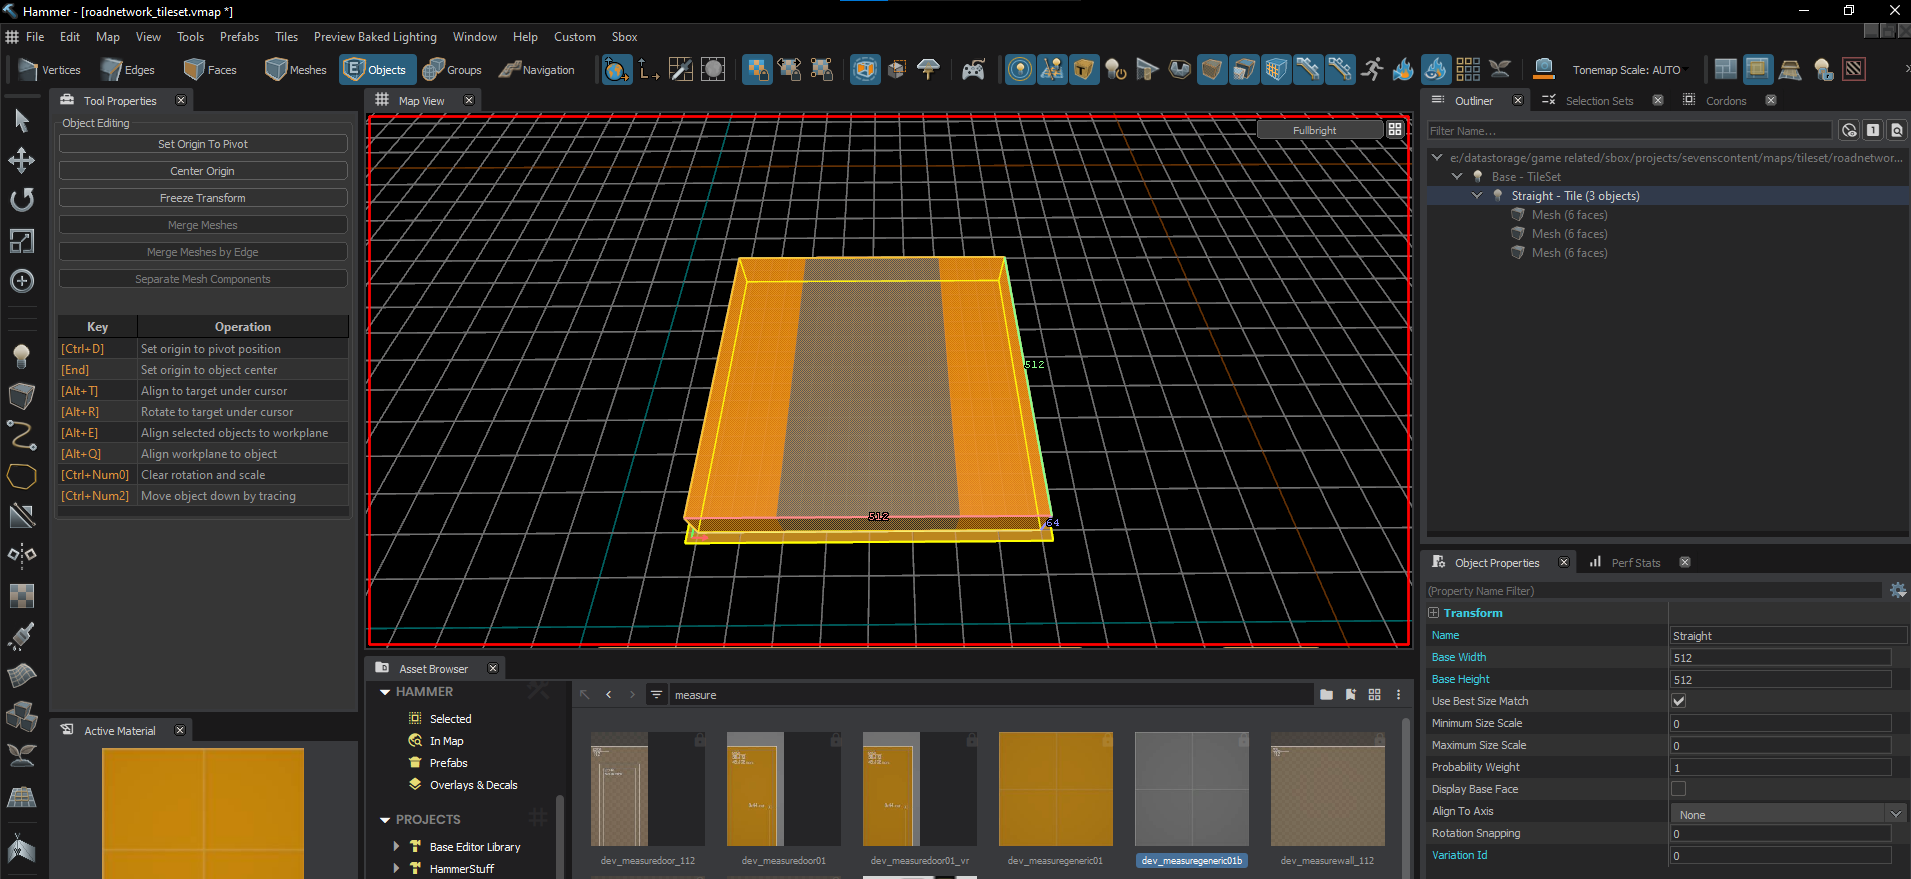
Before we start creating these mesh's though we should increase the size of our tiles so we can have wider roads.
click on the tile in Object Mode and check the Object Properties.
We will explain the rest of these later but for now focus on Base Height and Base Width. These two make up the size of your tile.
We will set both Width and Height to 512
Now can create our first road segment, again making sure any meshs we add, we make children of the tile object.
Then we can Repeat these step 3 more times for every other piece of the road
Setting up the Rules
Now that you have your tiles created its time to establish the rules on how the connect.
Open up the Object Properties for your Tileset. This is done by double clicking on it in the outliner, or selecting it and pressing alt+e
Once open select the "Tile Set Properties" Tab

for the sake of simplicity we wont worry about angles quite yet and instead focus on connectivity
Select the "Add Mesh Property" button along the bottom
Then choose "Mesh_edge_connectivity"
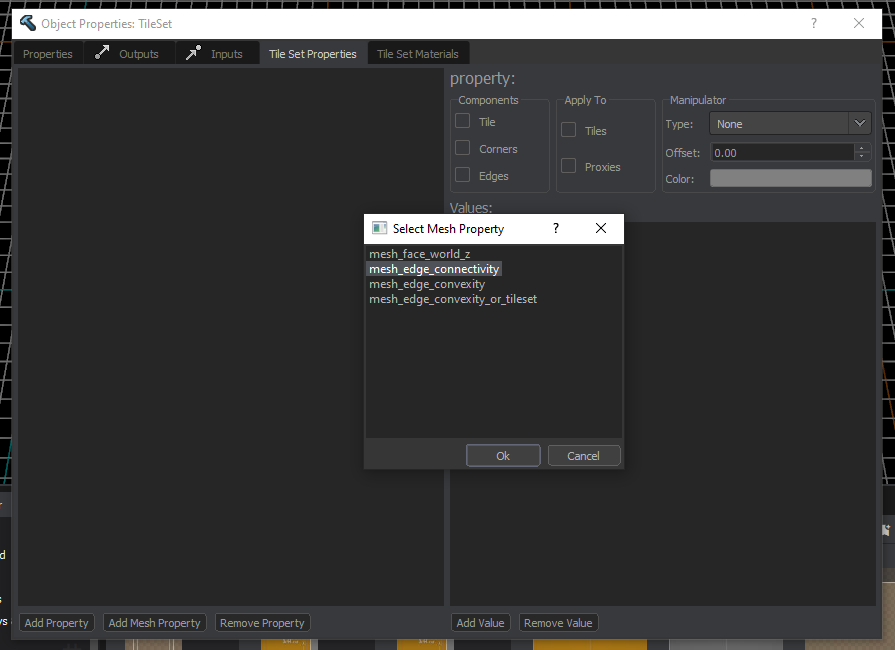
for now, leave everything as default and close the object properties window.
While in Object Mode, Select one of your tiles ( Not the geometry the tile itself ) You should notice the property we just added to our tileset is now available within the tiles.

Mesh Edge Connectivity gives us 5 values to choose from:
- open
- closed
- not open
- note closed
- * - Match Any
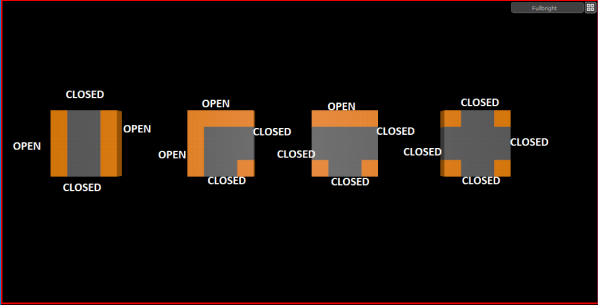
These are the rules that define how the tile will connect to other tiles, "Open" means that edge of the mesh is open aka nothing is there, "Closed" means that edge of the mesh is closed aka theres another tile connected at that side.
Looking at the green and red indicators on the tile assign which sides of the tile should be connected to other tiles ("Closed") or not connected to other tiles ("Open")
For our road network example this is how we setup the rules:
and thats it! Make sure to save, and now we start using it!
Step 5: Using your Tileset
once you have a tileset saved. Open up a new map, this can be whatever you want or an existing map, anything works.
Create a plane that is the same size as what you set your base height and width to earlier.
We created out tileset to a size of 512x512 so that will be my plane size
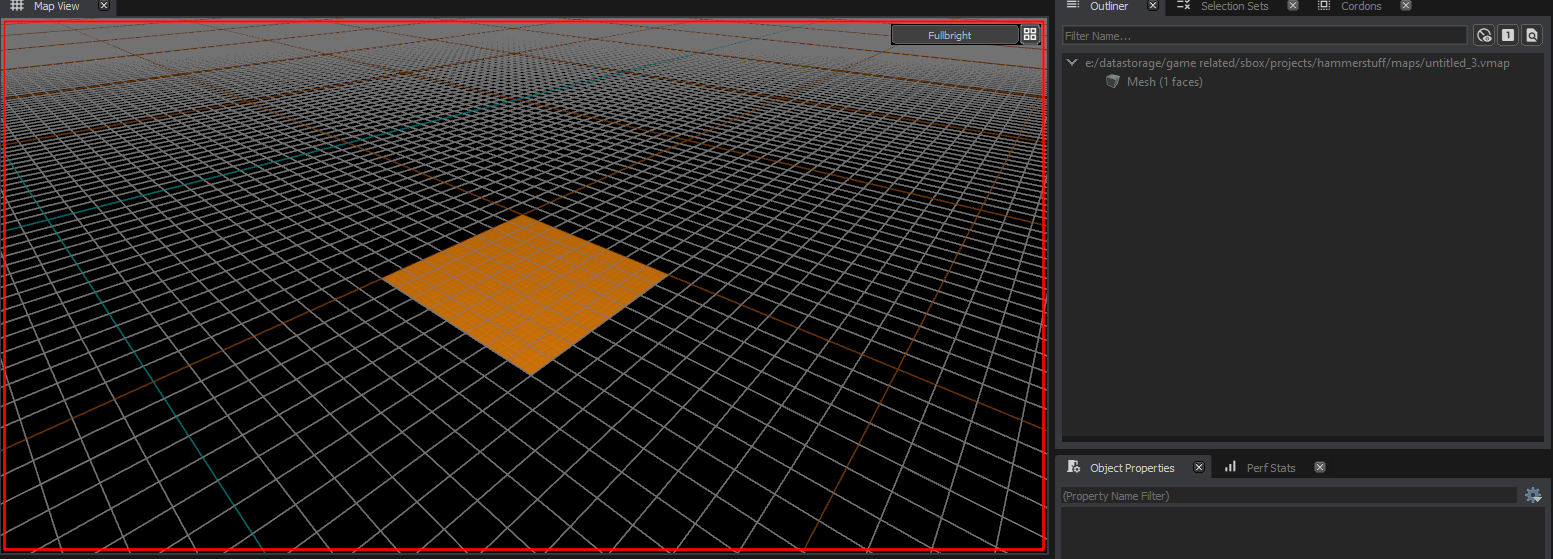
while in Mesh Mode select your plane, then select Tiles -> Create Tile Mesh (or ctrl + ⇧ shift + i)
you should notice in your outline your mesh has now become a tilemesh
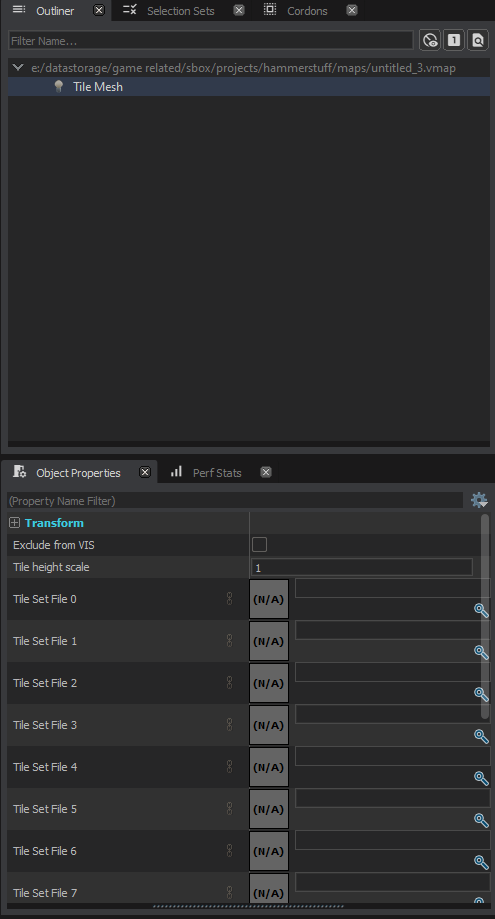
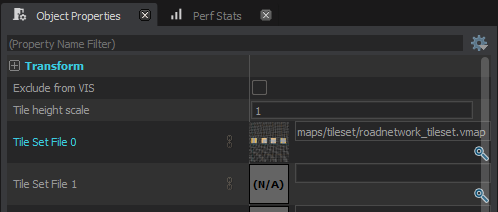
in the object properties, set the "Tile Set File 0" to the tileset we just created, you can press the blue magnify glass to open a browser.
Now with edge mode enable select the edge you want to extend, hold shift, and drag it out.
Congrats you now have a simple but working tileset!
If you want to test your understanding see if you can create a segment for end pieces of the mesh.
- because we didn't create a tile with rules that fit those squares, the initial square requires all 4 sides to be open, when creating our tileset we never made a tile that had all 4 sides open meaning no tile could work there leaving the base geometry. same with the second square.
 Garry's Mod
 Rust
Rust
 Steamworks
 Wiki Help
 S&box
S&box