LODs
Introduction
LODs (level of detail) are simplified versions of a 3D model that are used to improve performance. They are created by reducing the number of vertices in the original model while maintaining its shape as much as possible.
The process is repeated with stronger simplification each time to create a series of LODs at different levels of detail. These LODs are then used at different distances from the camera to improve performance without sacrificing visual quality.
Preparing LODs
Creating LODs greatly depends on the modelling software you use - it's recommended that you google the name of your modelling software + "LODs" in order to get the most relevant guide for you.
LODs may look unimpressive after a few iterations, but from far away it will be nearly impossible to tell.
You can also set up LODs to exclude smaller separable parts of the model that would never be visible from a long distance away, if decimating the geometry further is no longer viable.
Adding your LODs in ModelDoc
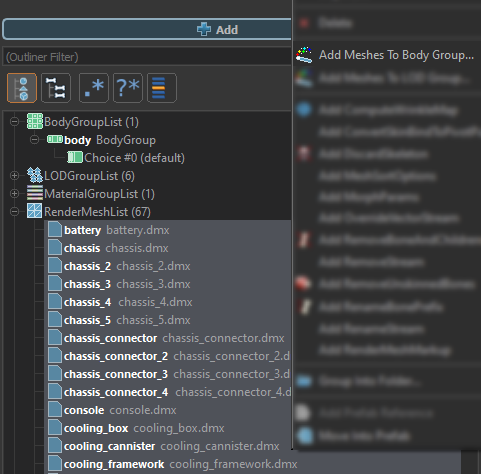
Import the meshes of your model, including their LODs, into the ModelDoc node tree.
It is generally a good idea to also associate all of your meshes and LODs with a default, or several bodygroups of your choice. This can also be automated by selecting the meshes in the node tree and right clicking:
Once the meshes, and their LOD counterparts, are bodygrouped accordingly, it is time to add LODGroups in ModelDoc:

LODGroup simply refers to a single LOD group, so add or duplicate as many as you need.
LODGroupAll is a unique group that contains meshes that should always be displayed, no matter the distance. This is useful for parts of the model that do not have LODs made for them, and thus should always be visible all the same at any distance.
Meshes that are never included into any LODGroup will also never be visible!
LODGroups are sorted in the tree, according to their switch threshold: this is a measurement of distance that dictates at whichever distance away that the model should interchange into the LODGroup in question.
This distance can also be snapshotted directly within the ModelDoc viewport, via a button at the top of the node's property list.
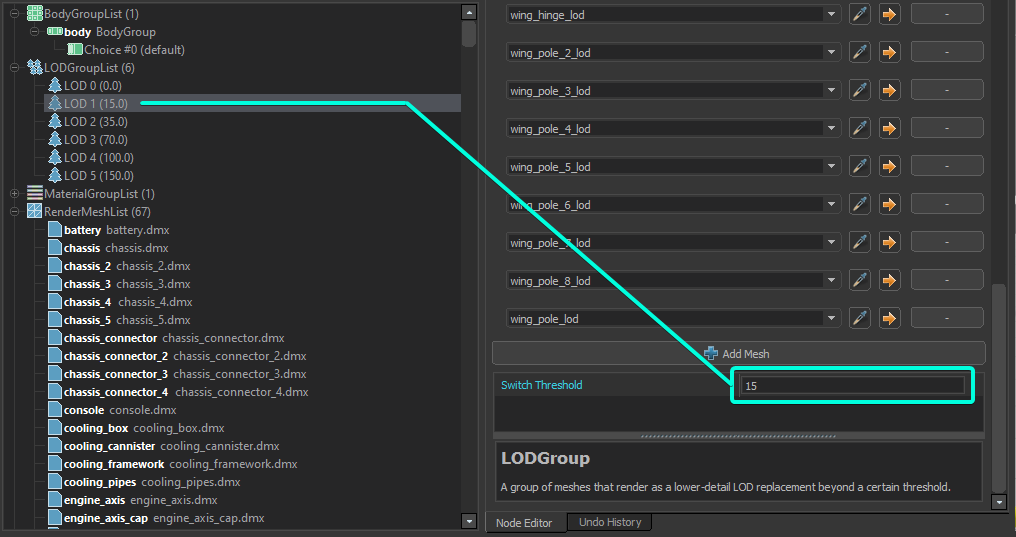
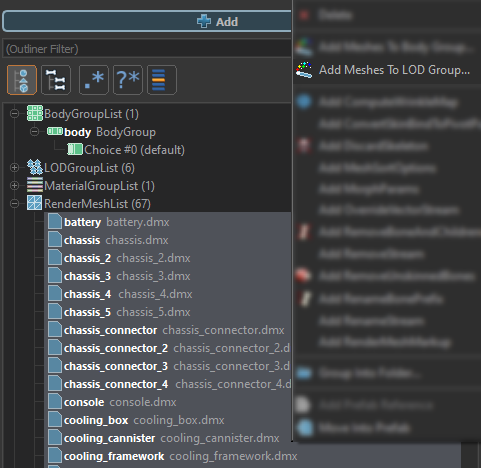
The groups will be named accordingly, but to quickly add the corresponding meshes into each one, you can refer to the previous context menu and use the same automation technique. All second-rate LODs correspond to group LOD 2 and so on:
Example
| Part name → | LODGroup |
|---|---|
| part.dmx | LOD 0 |
| part_lod.dmx | LOD 1 |
| part_lod2.dmx | LOD 2 |
| ... | ... |
Troubleshooting
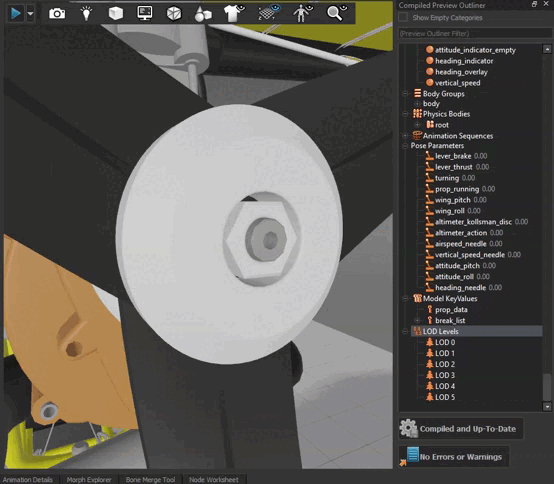
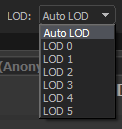
Once the meshes and their LODs are distributed and the LODGroups are given switch thresholds, the model can be compiled and you can immediately test the LOD functionality. Either via the Compiled Preview Outliner or via the LOD box on the upper bar.
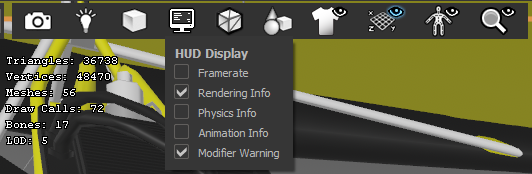
You can also toggle Rendering Info in the viewport to get instantaneous feedback on the currently active LOD group.
 Garry's Mod
 Rust
Rust
 Steamworks
 Wiki Help
 S&box
S&box