Demos
Demo Basics
Below is a list of the basic commands to get started with recording and playing demo files.
Recording
Use the command record <demoname> to start recording a demo file.
You can also use the command demo.recorder to toggle a recorder UI - best used when bound to a key.
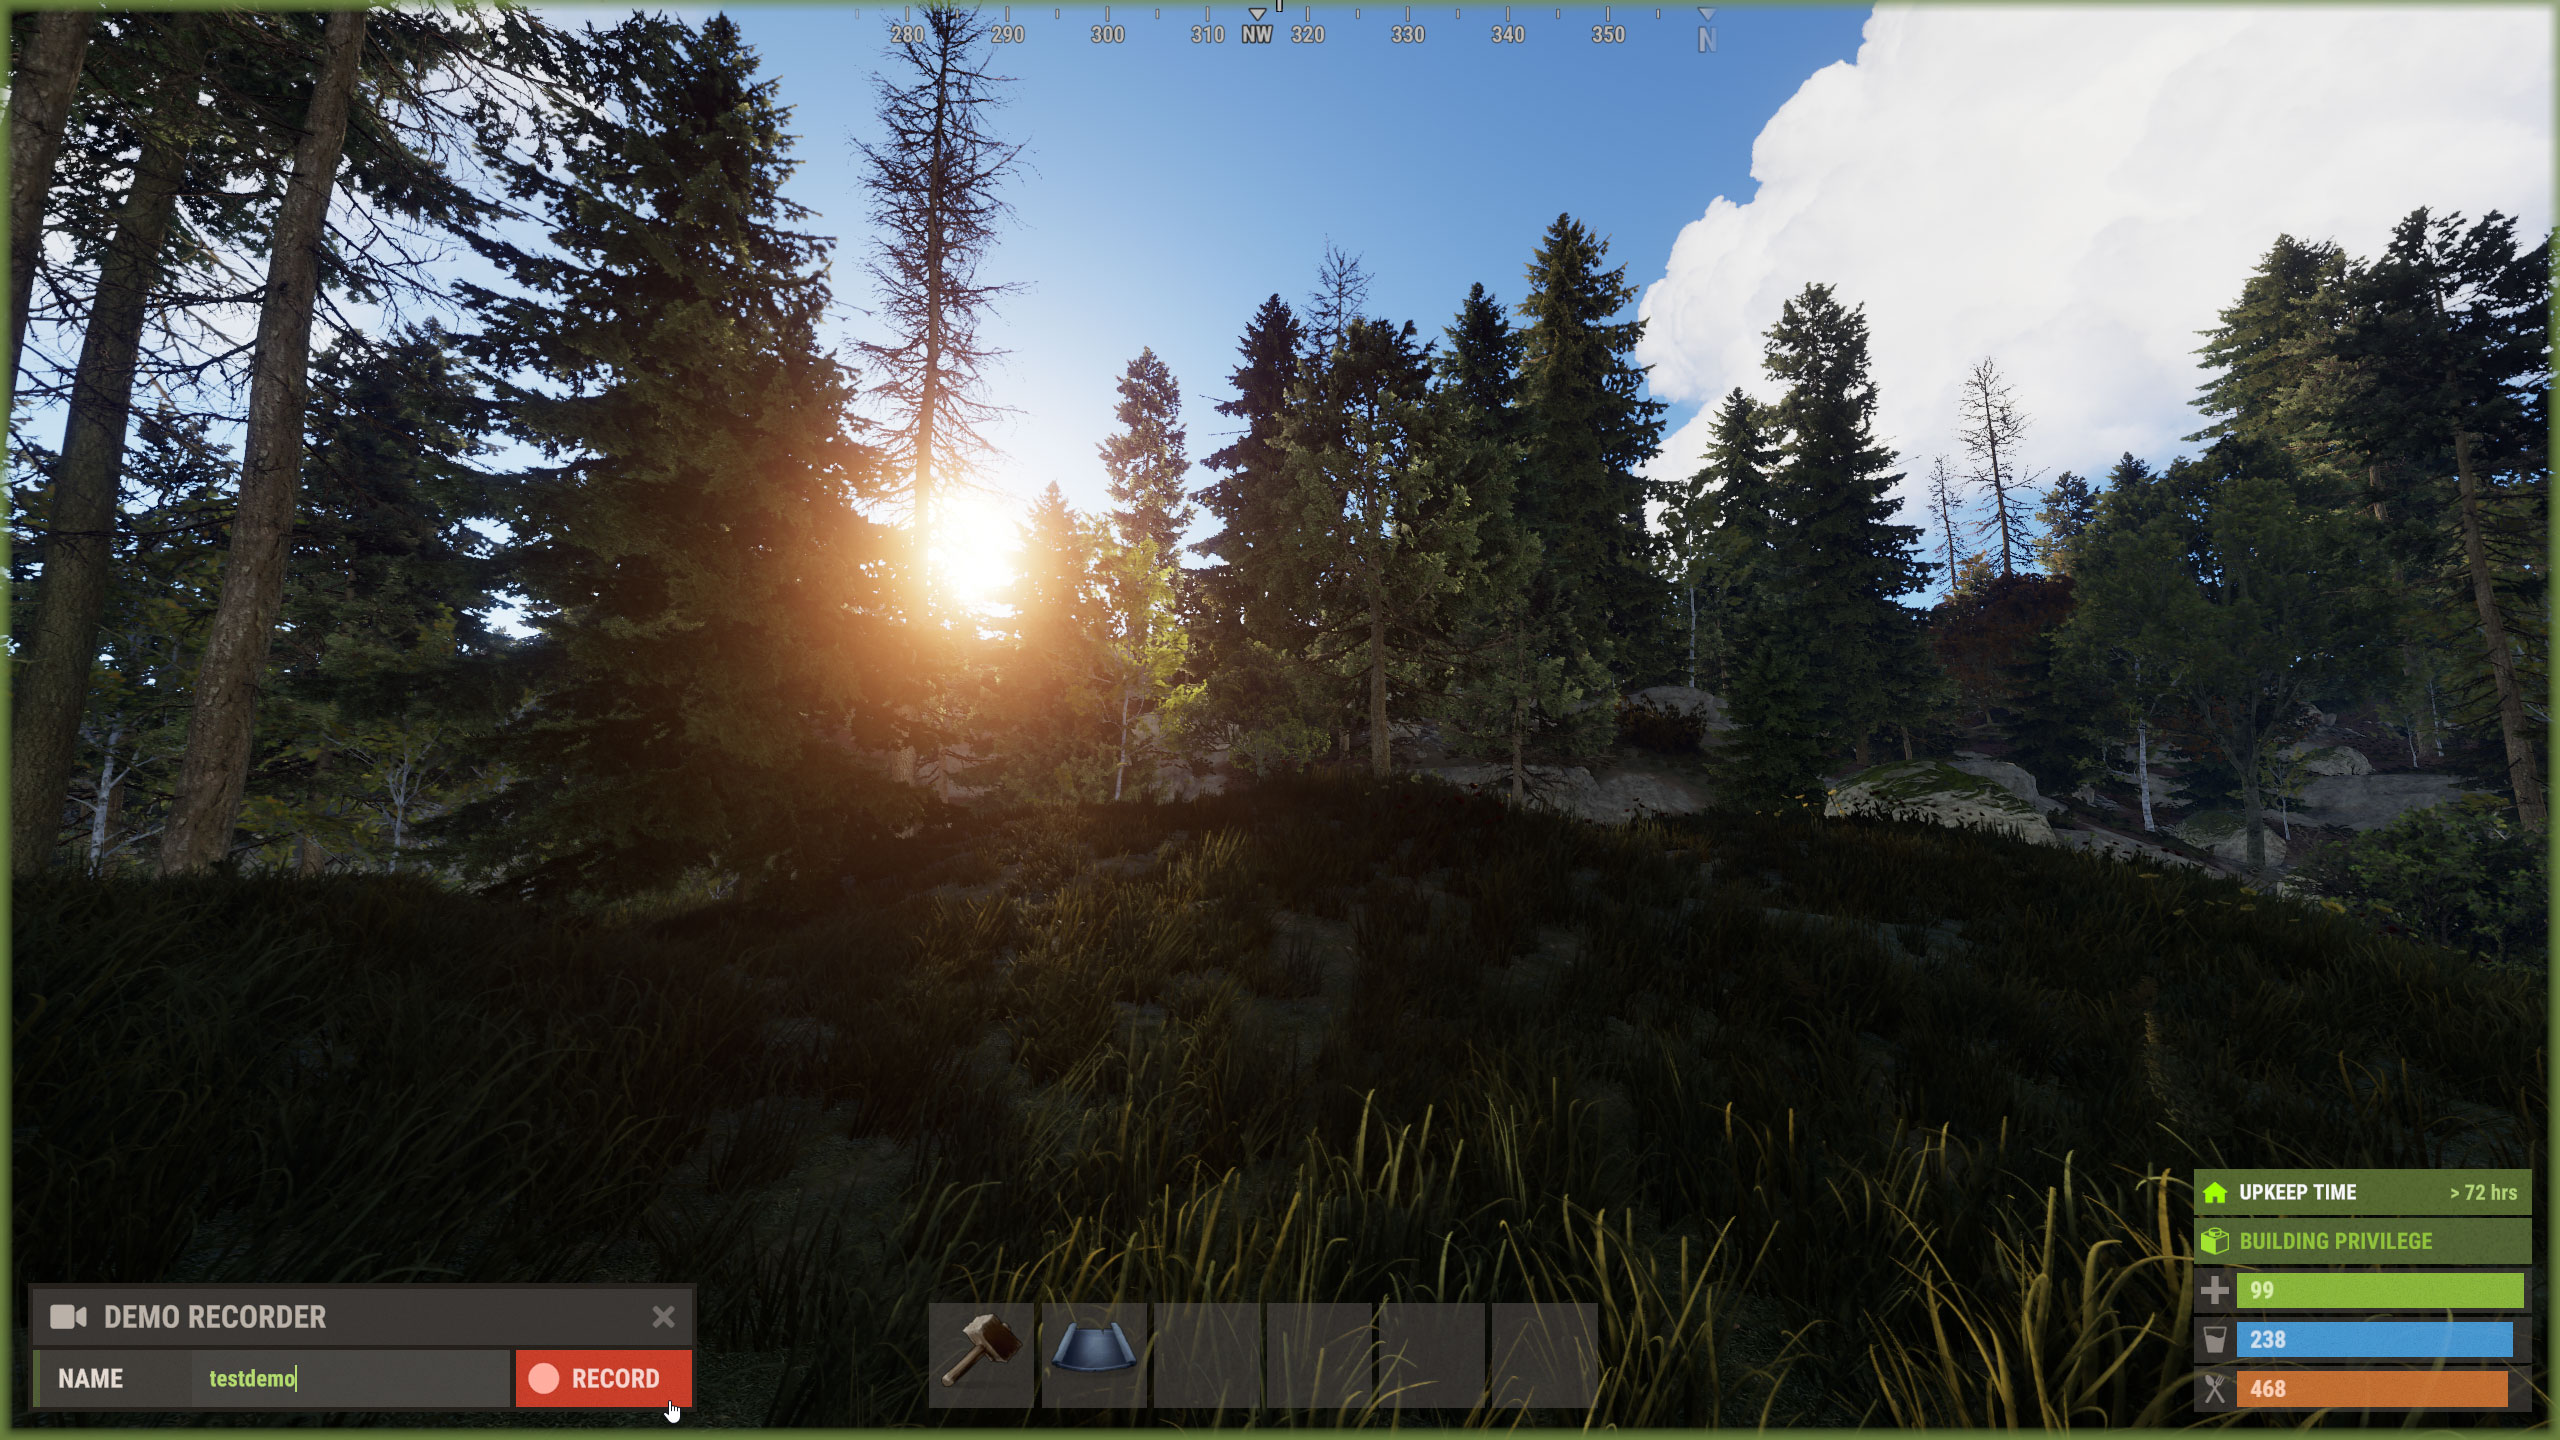
Your mouse focus will be given to the recorder UI once it is displayed. You can immediately start typing a demo name then click the 'record' button or press the enter key to start the demo recording.
Use demo.recorder again whilst recording to return focus to the UI.
If necessary, you can also hide the recorder UI by using the demo.togglehud command.
Full Server Demos
Full server demos are intended so that a server can record every action of all players. You can enable full server demos by using the command demo.full_server_demo.
While full server demos are enabled, there are a few options for customization. To adjust how much the server can record before deleting files, you can use the command demo.server_demo_disk_space_gb <size in gigabytes>.
You can also use demo.upload_url <url> to automatically upload your demos to a website.
Playing
Use the command demo.play <demoname> to load and play a previously recorded demo file.
Stopping
Use the command stop in console to exit from a demo playback.
Once the demo has stopped, you will return back to the Rust main menu.
File Location
Demo files (.dem) are recorded to the 'demos' folder located in your Rust root game directory.
Playback Commands
Below are a few commands available for altering the playback of a demo file.
Timescale
demo.timescale <speed> - Adjust playback speed of the currently loaded demo file.
Default / realtime speed is 1.0. Use 0 for the speed to pause demo playback.
Jump Time
demo.jump <time> - Jump to a specific time in the demo (in seconds).
For example, demo.jump 120 will jump to the 2 minute mark in the demo file.
Default is 0, if you want to restart your demo at the beginning then demo.jump or demo.jump 0 will do the trick.
Skip Time
demo.skip <time> - Skip time in the demo forwards or backwards (in seconds).
For example, a negative time amount such as demo.skip -5 will skip the demo 5 seconds backwards in time.
Pause
demo.pause - Pause demo.
Resume
demo.resume - resume paused demo.
Player Names
demo.playernames - Prints a list of all the players recorded in the demo, including their Steam ID 64 number.
Particularly useful when using playerseed commands to modify the appearance of players in the demo.
Demo HUD
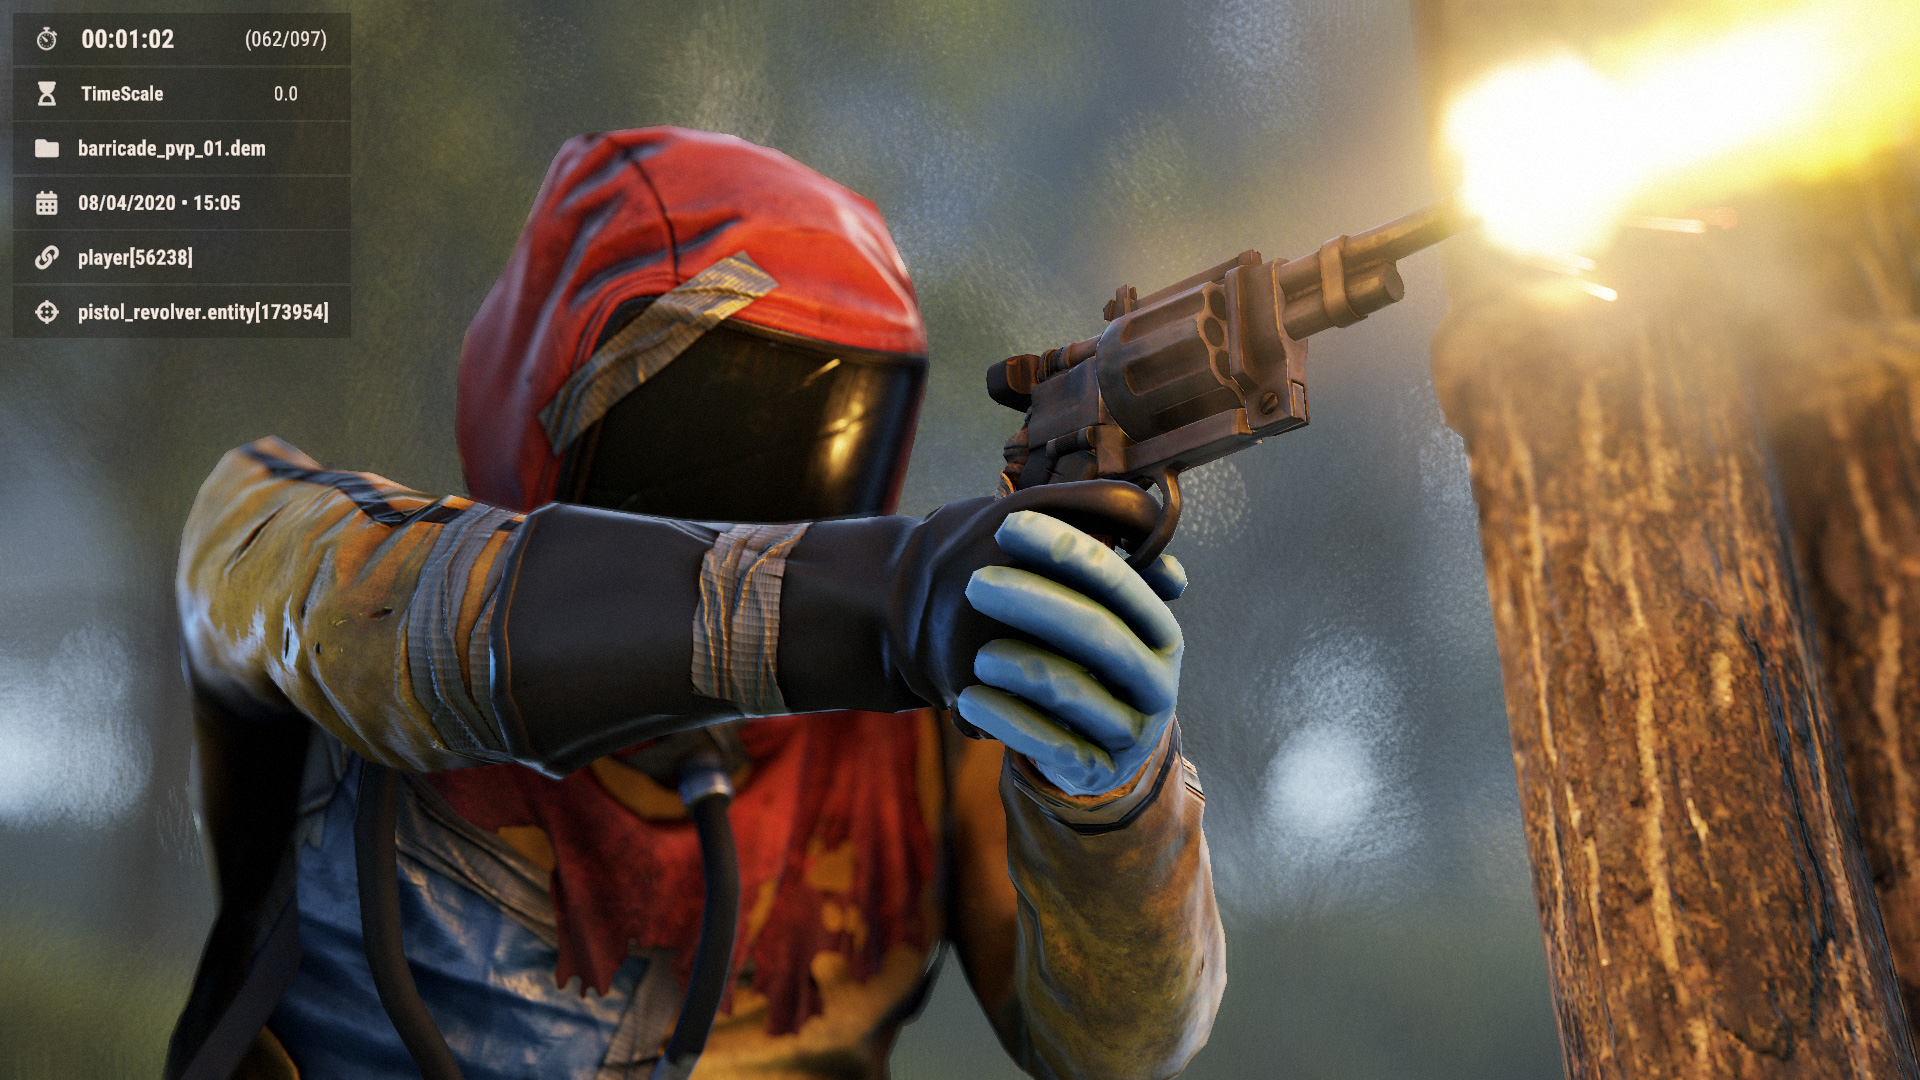
Use the following commands to display the demo HUD:
demo.hud <0/1> - Enable/disable the demo HUD.
demo.togglehud - Toggle to enable/disable the demo HUD; best used when bound to a key.
The demo HUD displays the following information:
- Timecode (hours:minutes:seconds) + seconds counter (current second/total seconds)
- Timescale of current demo; prints the value of the timescale command
- Demo filename within game directory
- Date and time of demo recording
- Parented entity name + ID (if any) as indicated by a chain-link icon
- DOF focus target entity name + ID (if any) as indicated by a target icon
- Shot manager; to control the new demo shot system
Demo Browser
View a list of all your saved demos by clicking the demo playback icon on the main menu's top-right section. From here you can play and delete demos as well as open the local directory where they're saved.
The demo browser list currently prints out fields with the following information:
- Demo filename
- Date and time of demo recording
- Length of demo recording
These fields can be sorted in ascending or descending order by clicking the column's field name.
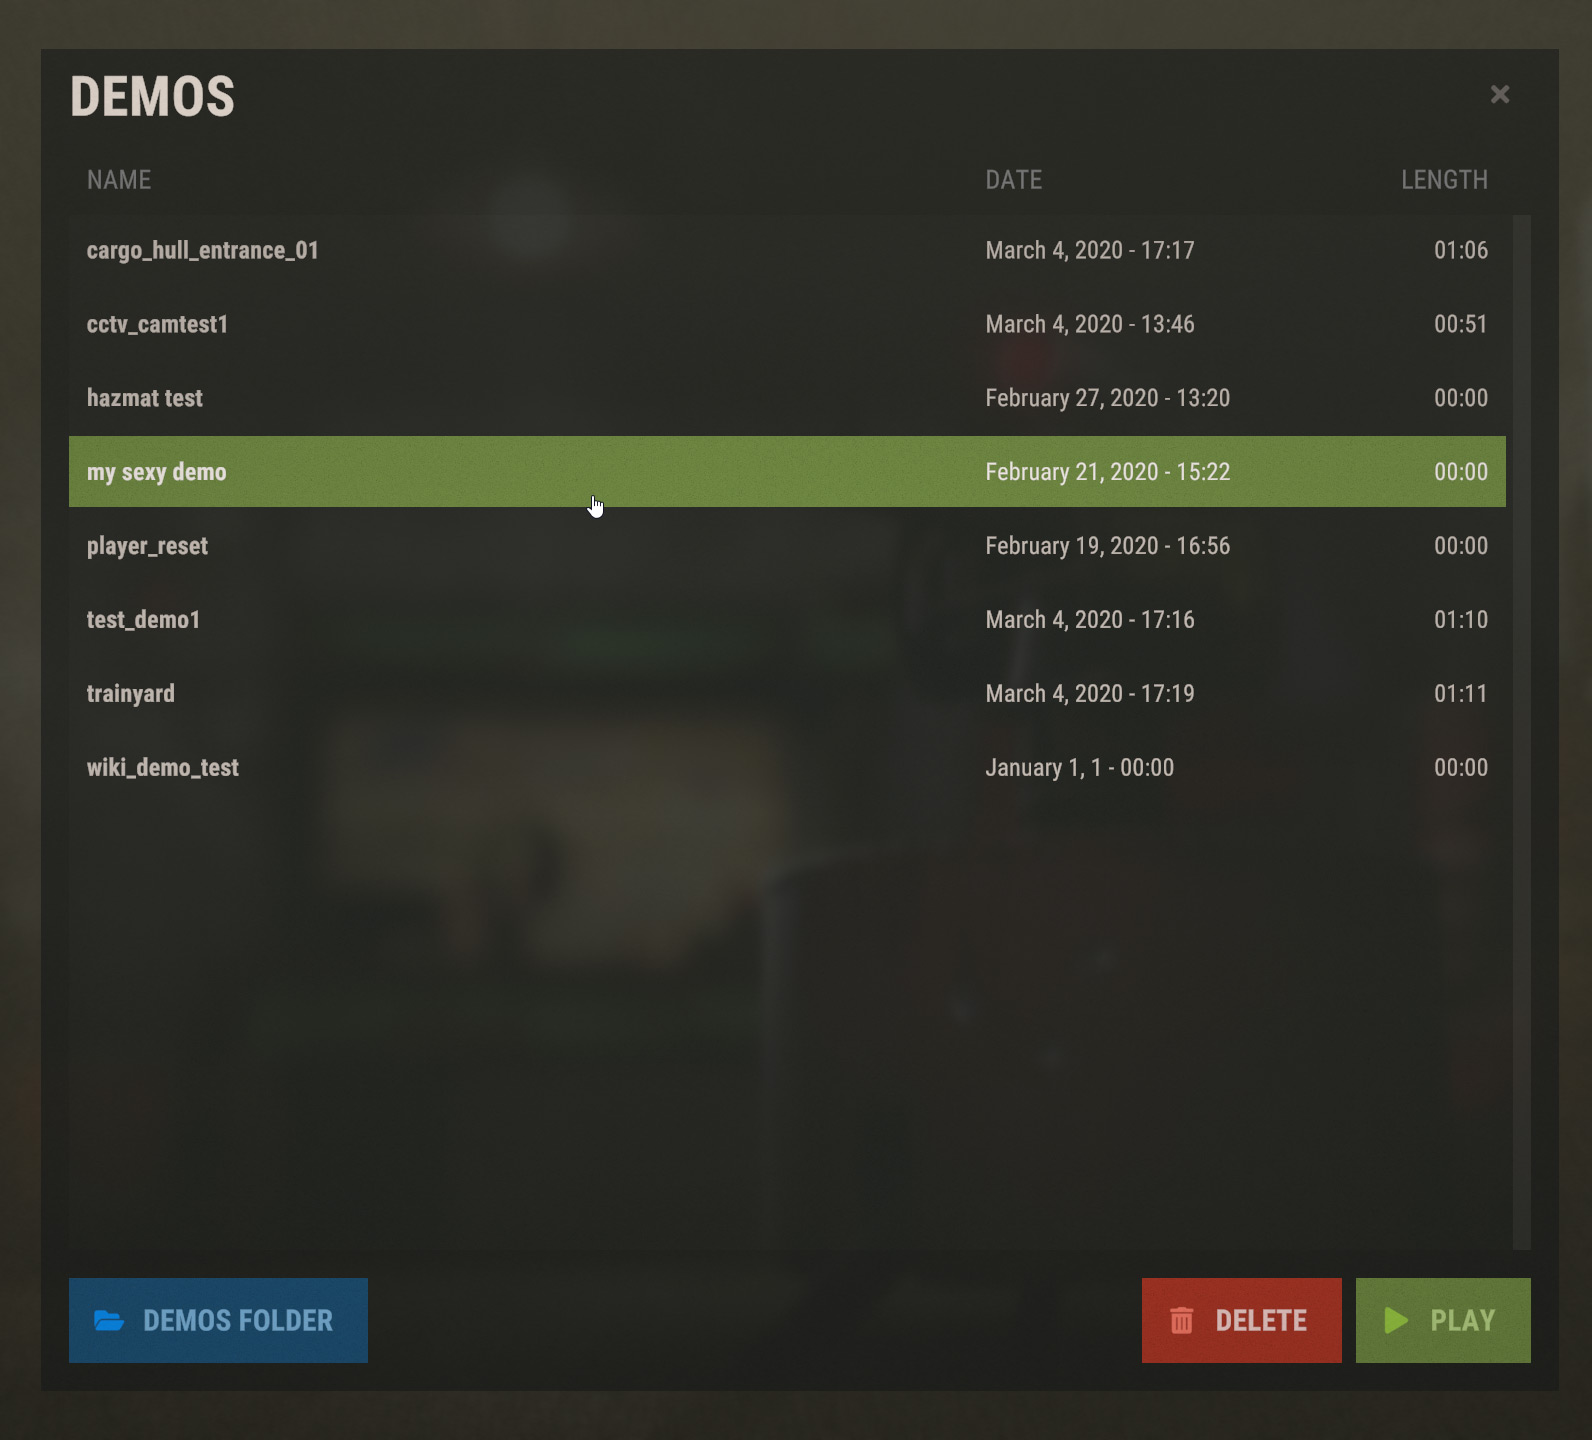
The browser is also only accessible via the main menu if you have .dem files stored in your game's demo folder directory.
Demo Shot System
You can now create and manage 'shots' within demos, which are individual recordings of camera motion as well as properties such as FOV and DOF. These shots can then be played back in sync with the demo scene. Once you load a demo, you will see the shot manager UI in the bottom right corner of the screen.
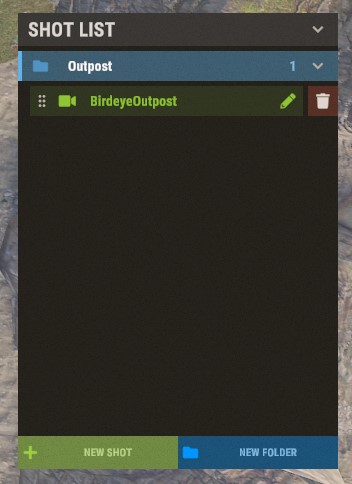
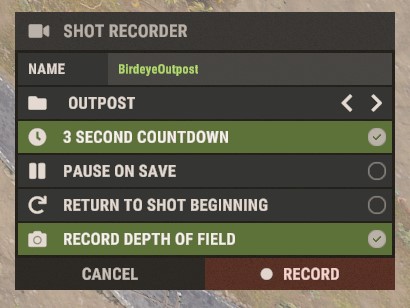
To create a shot, simply press the “New Shot” button, give it a name, and then hit record. Your live camera movement will now be recorded. To end a shot recording, press the esc key, then 'cancel' to go back to the shot list. For added management, shots can be sorted into folders, moved between folders, renamed, and deleted, all from the in-game interface. Folders can also be renamed or deleted by right-clicking on them in the shot list.
Other Demo Commands
Below are some other commands useful for demo playback.
NVG Toggle
togglenvg <1/0> - Toggles night vision goggles camera effect during demo playback.
Use a cycle convar to allow it to be toggled on and off with a single keybind:
bind <key> ~togglenvg 1;togglenvg 0
Camera Save Points
Debug camera save point commands (including autosave and autoload) can be used during demo playback.
Player Seeds
The playerseed and shuffleplayerseed commands can be used during demo playback to change the appearance of a specific player featured in the demo recording.
Time & Weather
The admin time and weather commands are useful for modifying the weather and time conditions of a demo recording, particularly useful when you are after a certain mood or time of day but want to maintain the captured performances of your demo.
Quality Options
Take a look at the various additional quality options on the 'other commands' page which can help improve the rendering distance and appearance of shots in demos.
 Garry's Mod
 Rust
Rust
 Steamworks
 Wiki Help