MIDI Binding
Introduction
MIDI binding is a set of admin-only commands which can be used to bind MIDI notes to convars in Rust.
These MIDI bind functions can also be used during demo playback for cinematic-related commands.
MIDI Hardware vs Software
The first consideration is whether you want to use a MIDI hardware setup or a software solution.
If you want to use a MIDI hardware device such as a MIDI keyboard or controller, you can simply plug the device into your machine via USB and begin setting up convars.
If instead you want to use MIDI software, for example a MIDI controller app on a smartphone/tablet or an Elgato Stream Deck, you will need to set up a virtual MIDI port on your system. Learn more by reading the MIDI software setup section of this page.
Getting Started
Before you can start binding MIDI inputs to convars, there are a few initial steps you will need to take.
Enable MIDI Convars
Use the command midiconvar.enabled 1 to enable MIDI convar reading and writing in Rust.
This setting will be saved to your user configuration and recalled on restart.
Debug Mode
To verify that Rust is listening to messages sent from your MIDI device, use the command midiconvar.debugmode 1
Once enabled, start pressing down on keys or moving knobs/sliders on the MIDI device connected to your system. The console will print out the note numbers and knob values from your MIDI device in real-time.
This command is useful for quickly identifying the note/knob number for specific keys and controls on your MIDI device, as well as the channel number for the note values. You can then use this info to setup your MIDI convar binds.
Convar Setup
There are two main MIDI functions which can be assigned to convars in Rust:
- Key Presses
- Knobs / Sliders
Before creating any binds, ensure you've enabled MIDI convars in the console first.
Key Press Binds
These are also known as note on/off MIDI behaviours - for example pressing a key on a MIDI keyboard or controller device.
Note ON functions are indicated when a MIDI key/button is pressed down.
Note OFF functions are indicated when a MIDI key/button is released.
To bind these functions in Rust, use the following commands:
NOTE ON
For example: bindkeyon 12 1 "graphics.dof 1" will bind Note 12 on Channel 1 to set Depth of Field to true.
This function means that when Note 12 is pressed on your MIDI device it will enable Depth of Field.
NOTE OFF
For example: bindkeyoff 12 1 "graphics.dof 0" will bind Note 12 on Channel 1 to set Depth of Field to false.
This function means that when Note 12 is released on your MIDI device it will disable Depth of Field.
These two ON and OFF examples together mean that Note 12 will become a 'hold' key - in other words, the Depth of Field effect (specified in the above convar parameter) will only be active whilst the note is being pressed down.
Knob and Slider Binds
These are MIDI behaviours which have a value range between 0 and 1 - for example moving a slider to it's min/max.
For example: bindknob 3 1 graphics.dof_focus_dist 0 50 will bind Knob 3 on Channel 1 to set the Depth of Field focus distance to range between a minimum value of 0 and a maximum of 50.
This function means that turning (or sliding) Knob 3 on your MIDI device will adjust the focus point for the Depth of Field within the range specified.
Additional Commands
Below are some additional commands useful for MIDI convar binding.
Print Binds
midiconvar.printbindings - Prints to console a list of all the MIDI notes and knobs bound to convars.
MIDI binds are stored in the text file convarbindings.txt located in the ‘midi’ folder in your root game directory:
Clear Binds
midiconvar.clearallbindings - Removes all MIDI convar bindings.
MIDI Software Setup
Virtual MIDI Port
To use MIDI software for MIDI convar binds, you will first need to set up a virtual MIDI port on your system.
One example is to use software such as loopMIDI which creates a MIDI loopback port to send MIDI notes through via other applications. Once installed, you simply create a port with a name of your choosing (such as the example port below named "Rust") and let loopMIDI run in the background.
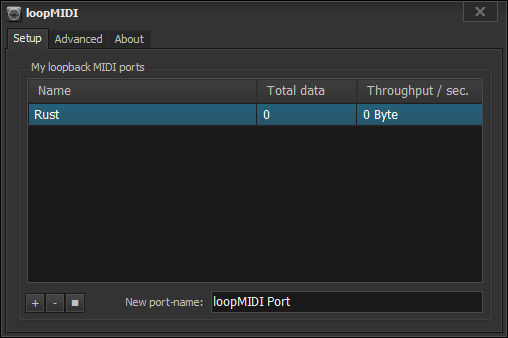
You can now use the custom port you've created to route MIDI notes from a software of your choosing into Rust.
Below are a few software examples which make use of this setup.
Software Examples
Elgato Stream Deck
The Elgato Stream Deck features a MIDI plugin which allows you to add actions such as MIDI note on/off functions to your Stream Deck device. These work perfectly with Rust's MIDI convars and can be used either as single-press or hold types.
Install the plugin from the Stream Deck store by clicking the 'More actions' button on the bottom-right corner of the Stream Deck software, then search for 'MIDI'. Once installed, the plugin will appear in your actions list:
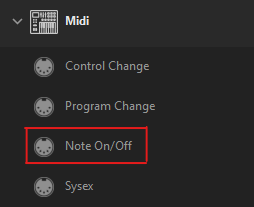
Then add a "Note On/Off" function to your profile and configure as necessary. The properties for Channel and Key (aka Note) will correlate to the convar parameters used in your key binds within Rust.
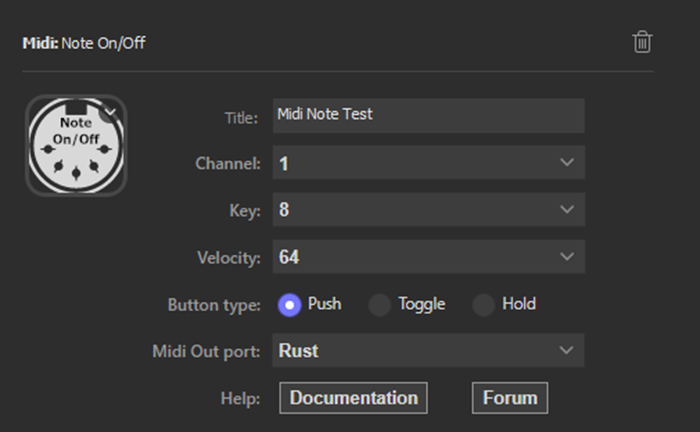
The example above is an action which sends Note 8 to Channel 1 once the button is pressed.
Make sure that the name of the virtual loopback port you've created in loopMIDI is selected in the 'Midi Out port' drop-down menu. Your custom port will only appear whilst loopMIDI is running.
Mobile/Tablet Apps
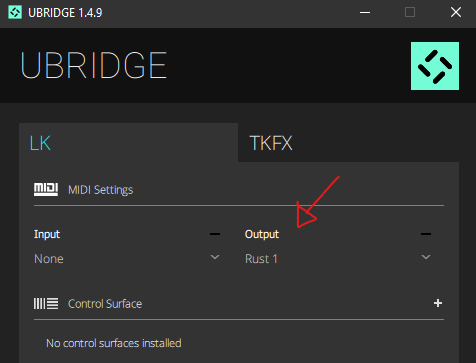
"LK" by Imaginando have a MIDI controller application for iOS and Android which can send MIDI notes to your PC over Wi-Fi. This setup also requires their desktop software called UBRIDGE to communicate between your smartphone/tablet and PC.
You need to ensure that the 'Output' on UBRIDGE is set to the name of the virtual loopback port you've created in loopMIDI.
Then on the LK app, select your computer name from 'Device' drop-down menu at the top and you're all set. Use the MIDI debug mode command in Rust whilst using the app's controllers to see which note and knob numbers they correlate to.
You will then be able to achieve results like this:
FAQ
Who can use MIDI binds?
MIDI convars can only be used by server admins or during demo playback.
Will my MIDI hardware/device work with Rust?
Theoretically, any MIDI device should work with MIDI convar binding in Rust.
If your hardware is not being detected, it's likely the drivers or device itself has not been installed correctly.
My MIDI binds aren't working!
Make sure you have enabled MIDI convars in the console.
You can also double check if your device is sending MIDI messages to Rust by using the debug mode command.
What controller is being used in the video at the top of the page?
The controller featured in this demonstration clip is a Korg nanoKONTROL 2 MIDI controller.
Will I be banned by EAC for using MIDI convars?
No.
 Garry's Mod
 Rust
Rust
 Steamworks
 Wiki Help