Debug Camera
Getting Started
Debug camera is a freecam view which can be used by server administrators and developers.
Enabling Debug Camera
Use the command debugcamera to toggle between the debug camera and player camera. By default the camera will be positioned inside the head of the player triggering the command.
The command is best used when bound to a key - eg. bind p debugcamera
Transform Controls
The controls for the debug camera are fairly straightforward and mostly mimic existing movement keys.
alt - (In demos) Hide/show the mouse cursor and take/give up control of the camera
w a s d - Position the camera
mouse - Adjust the pitch and yaw of the camera (i.e. look around)
q - Raise camera height
e - Lower camera height
space - Slows down the move speed of the camera by half when held down.
⇧ shift - Speeds up the move speed of the camera by double when held down.
right arrow - Roll / rotate camera right or clockwise
left arrow - Roll / rotate camera left or anti-clockwise
ctrl + mouse left / mouse right - Adjust roll / rotation of camera on the fly
up arrow / down arrow - Adjust pitch of the camera angle (i.e. aim up or down)
Field of View
z or + - Zoom in (increase FOV amount)
c or - - Zoom out (decrease FOV amount)
right mouse + mouse up / mouse down - Adjust zoom (FOV amount) on the fly
FOV Command
You can also use the command debugcamera_fov <value> to set the zoom/FOV to a particular value.
Reset Camera
Use the r key to reset the field of view and roll of the debug camera to it's default state.
Lock Camera
Use debugcamera_lock 1 to lock the debug camera in place. This prevents movement and FOV changes being made to the camera.
To unlock the debug camera, use debugcamera_lock 0
Speed Controls
Below are the available commands for controlling speed properties of the debug camera.
Camera Speed
camspeed <amount> - Sets the movement speed of the camera. Default value is 1.
Look Speed
camlookspeed <amount> - Sets the look speed of the camera. Default value is 1.
An amount of 0 will lock the camera angle and prevent mouse movement to aim the camera.
Zoom Speed
camzoomspeed <amount> - Sets the zoom speed of the camera when using FOV controls. Default value is 1.
Lerping
These commands are useful for adding smoothed movement to certain properties of the debug camera.
Camera Lerp
camlerp <amount> - Add lerping (smoothing) to the debug camera's movement. Default value is 1. Lower values such as 0.01 will provide smoother results to movement of the camera.
camlerptilt <0/1> - Enable/disable tilt and roll locomotion for lower lerp values.
Zoom Lerp
camzoomlerp <amount> - Adds lerping to the camera's zoom movement. Default value is 1.
Useful for adding smoother movement to FOV adjustments. Lower values = smoother motion.
Save Points
Use the command debugcamera_save <name> to save the position, angle, fov and roll of the camera.
You can also use the command debugcamera_savetofile <name> to save the camera state as a .cam text file, which is stored in a folder called "camsaves" in the game's root directory.
Load a camera save point or .cam file by using the command debugcamera_load <name>
Auto Save
debugcamera_autosave <0/1> - Automatically save the debug camera state when toggling it.
This will save / retain the position, angle, fov and roll of the camera.
Auto Load
debugcamera_autoload <0/1> - Automatically load the debug camera state when toggling it.
Preserve
debugcamera_preserve <0/1> - Preserve the initial debug camera state through game restarts.
List Save Points
debugcamera_list - Prints out all of the saved camera points; including name, position, rotation and zoom.
The total number of saved camera points is printed at the bottom of the list. A separate section labelled 'files' is listed for all .cam files stored in the "camsaves" directory.
Clear Saves
Use the command debugcamera_clear to remove all camera save points.
Camera Unfreeze
Use the command debugcamera_unfreeze to unfreeze player controls whilst remaining in the debug camera view.
This also currently causes the debug camera to track the movement origin of the player.
Camera Parenting
Use the command bind <key> +debugcamera_targetbind to bind a key of your choosing to toggle camera parenting.
When using debug camera, press your key bind to parent the camera to an entity being looked at. Press the same key to un-parent the camera from the entity and return to normal free-cam.
Orbit Controls
Once parented, move the mouse to orbit the camera around the entity and targeted bone.
up arrow / down arrow keys will orbit the pitch axis of the targeted entity.
ctrl + left arrow / right arrow keys will orbit the yaw axis of the targeted entity.
left arrow / right arrow keys will roll / rotate the camera as normal.
You can also dolly the camera in/out of the targeted entity (aka move closer or further away) by using the following commands:
bind <key> +debugcamera_dollyforwardbind <key> +debugcamera_dollyback
Orbit speed can be specified using the camlookspeed command. Additionally, the camera lerping commands will also affect the smoothness of the orbit's movement.
Here's an example of the debug camera orbiting around a parented player and dollying in/out.
Parent Offset
You can offset the position of the parented camera by using the basic camera transform controls, which can be particuarly useful if you still want to target an entity but re-position the camera's origin.
Use ⇧ shift + r to reset the offset transform and return the debug camera to it's original orbit position.
Bone Targeting
By default, the debug camera will target the root bone of the nominated entity when parenting to it.
Use the command bind <key> +debugcamera_cyclebone to cycle between different bones of an entity. The console will print out the name of the targeted bone each time you use the key bind.
You can also use the command cambone <bonename> to manually parent the debug camera to a specific bone. Using cambone without a specified bone name will return the name of the bone currently targeted.
Bone Rotation
debugcamera_bonerotation <0/1> - Applies the target bone's rotation to the debug camera. Default value is 0.
Here's an example of the debug camera targeting the head bone of a Horse with bone rotation enabled.
Camera Guides
Use the command debugcamera_guide <0-4> to enable different types of camera guide overlays. These are useful for helping frame particular compositions in your videos and images when using the debug camera.
Default value is 0 which disables the guide overlay. You can also assign a custom color to the guide overlay.
Rule of thirds
Use debugcamera_guide 1 to enable a rule of thirds guide for the debug camera.

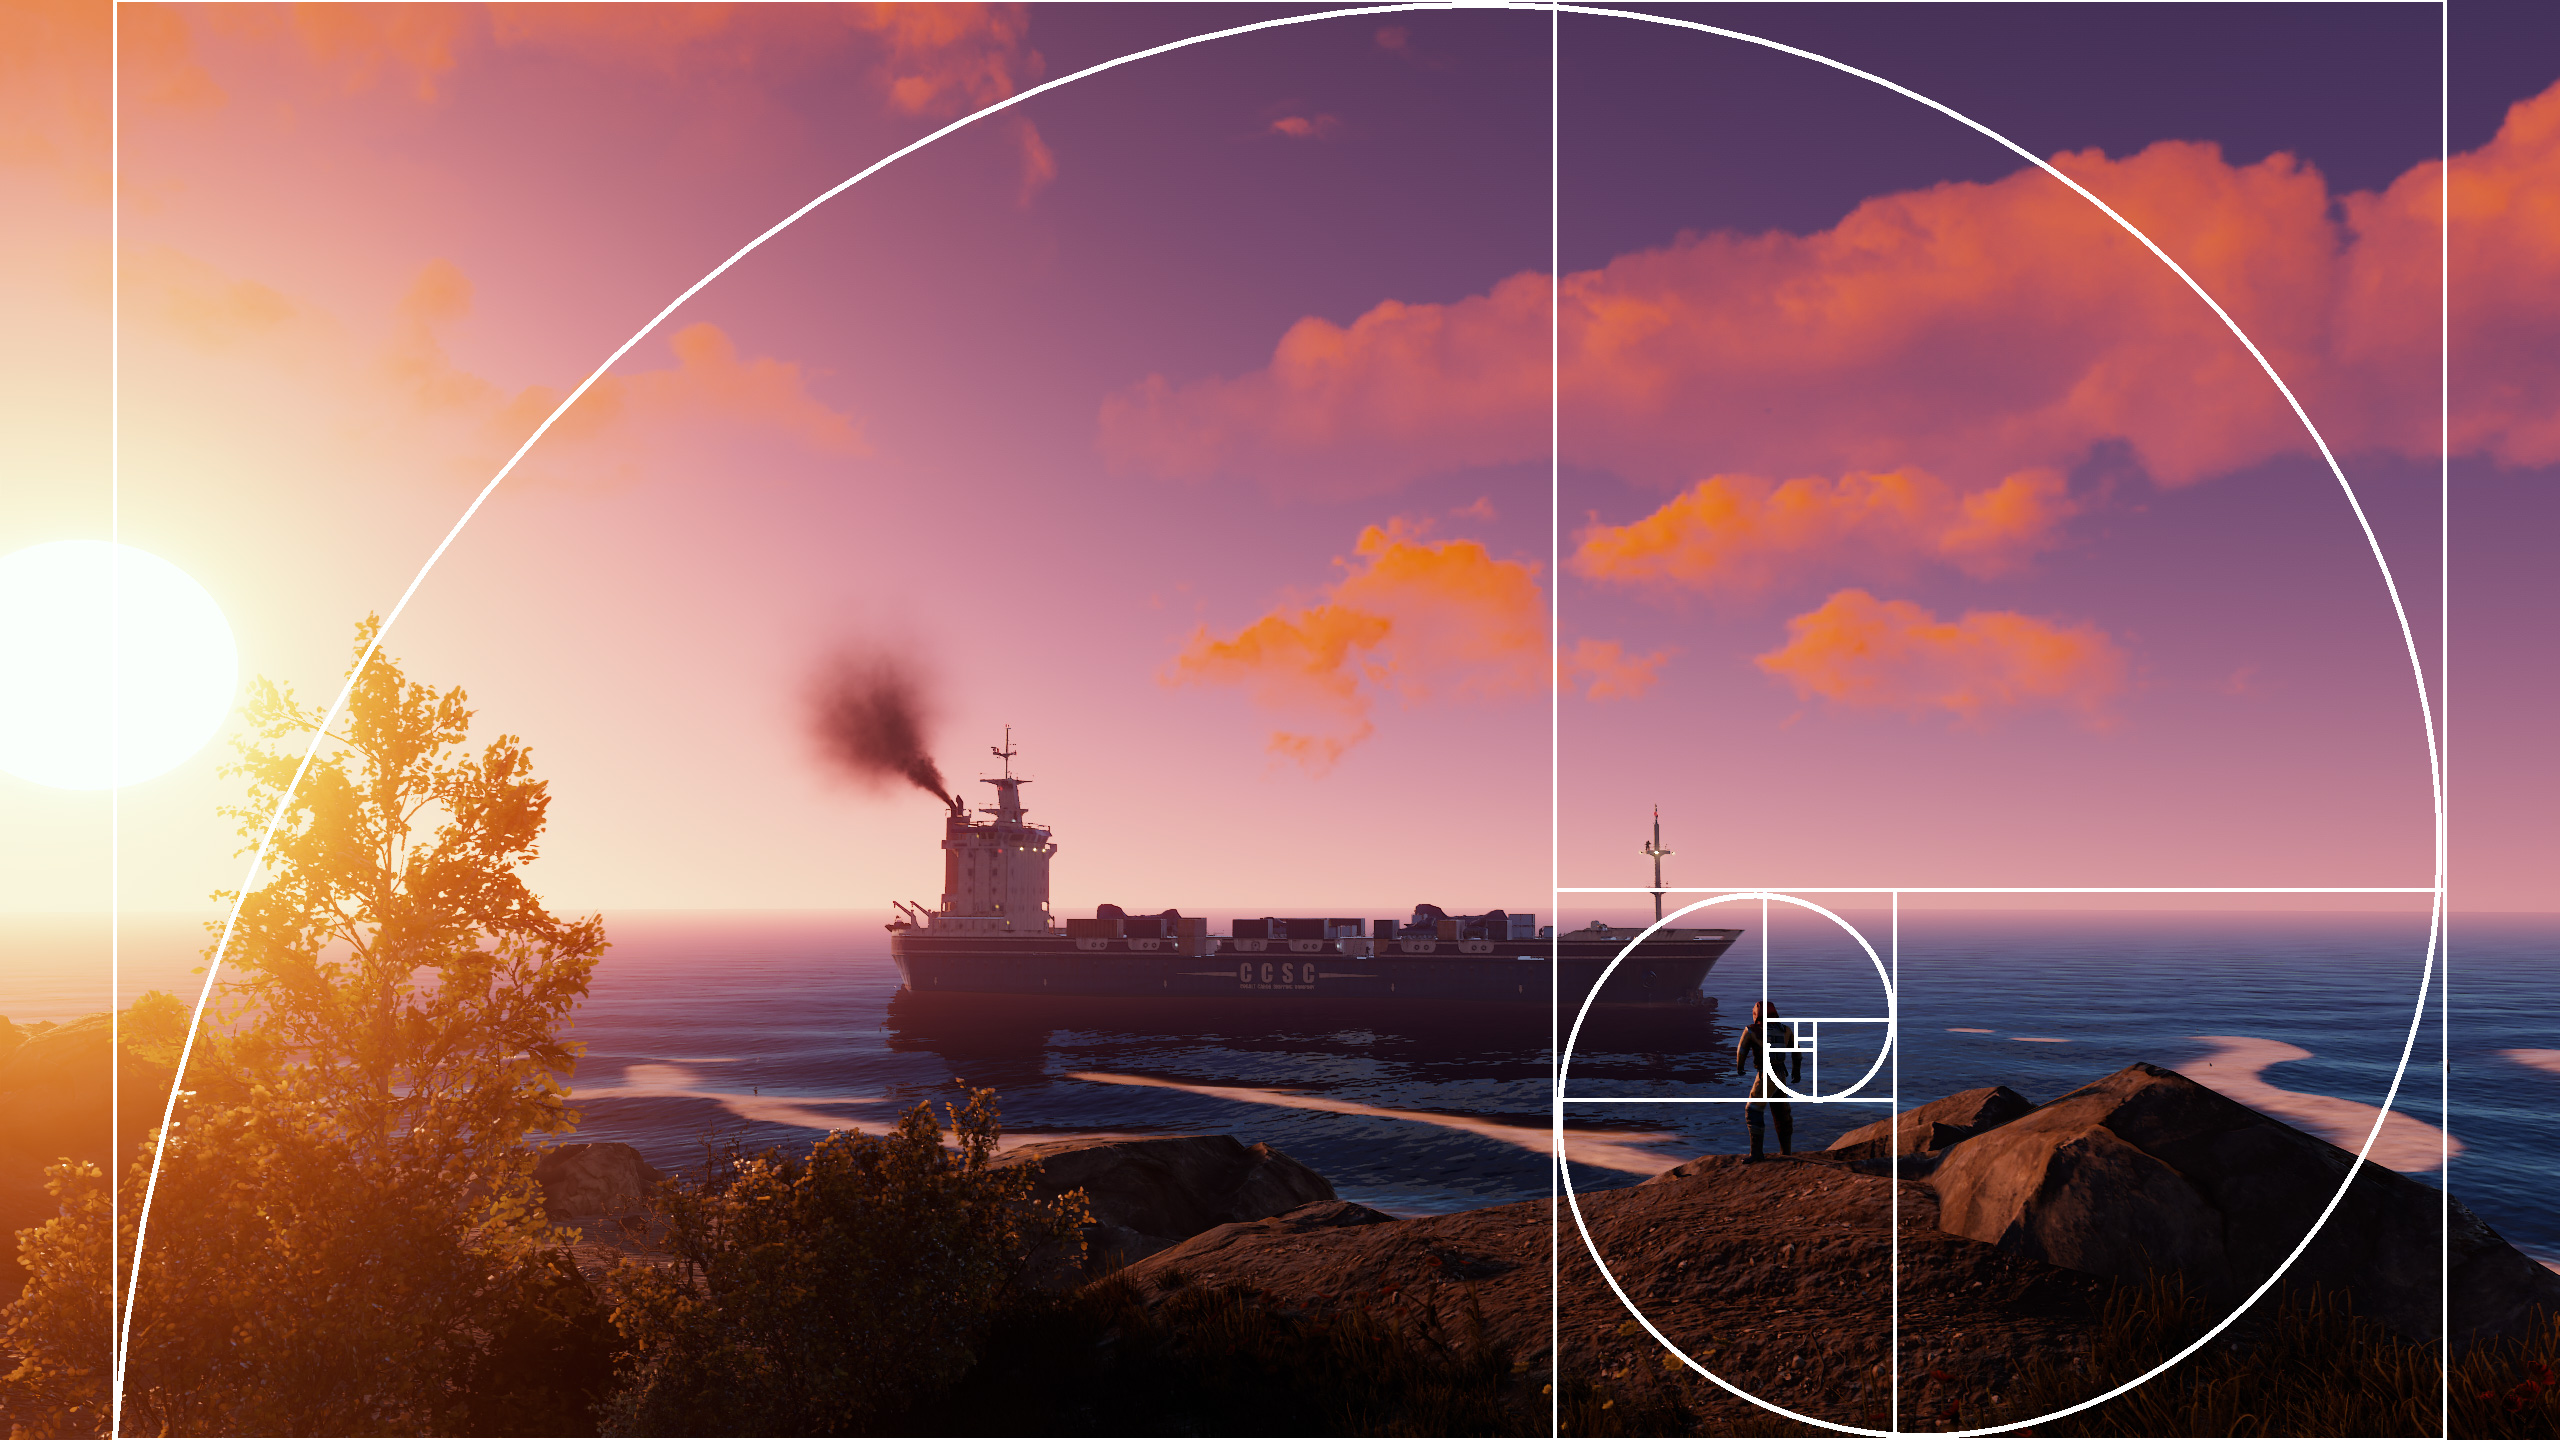
Golden Ratio
Use debugcamera_guide 2 to enable a golden ratio fibonacci guide for the debug camera.
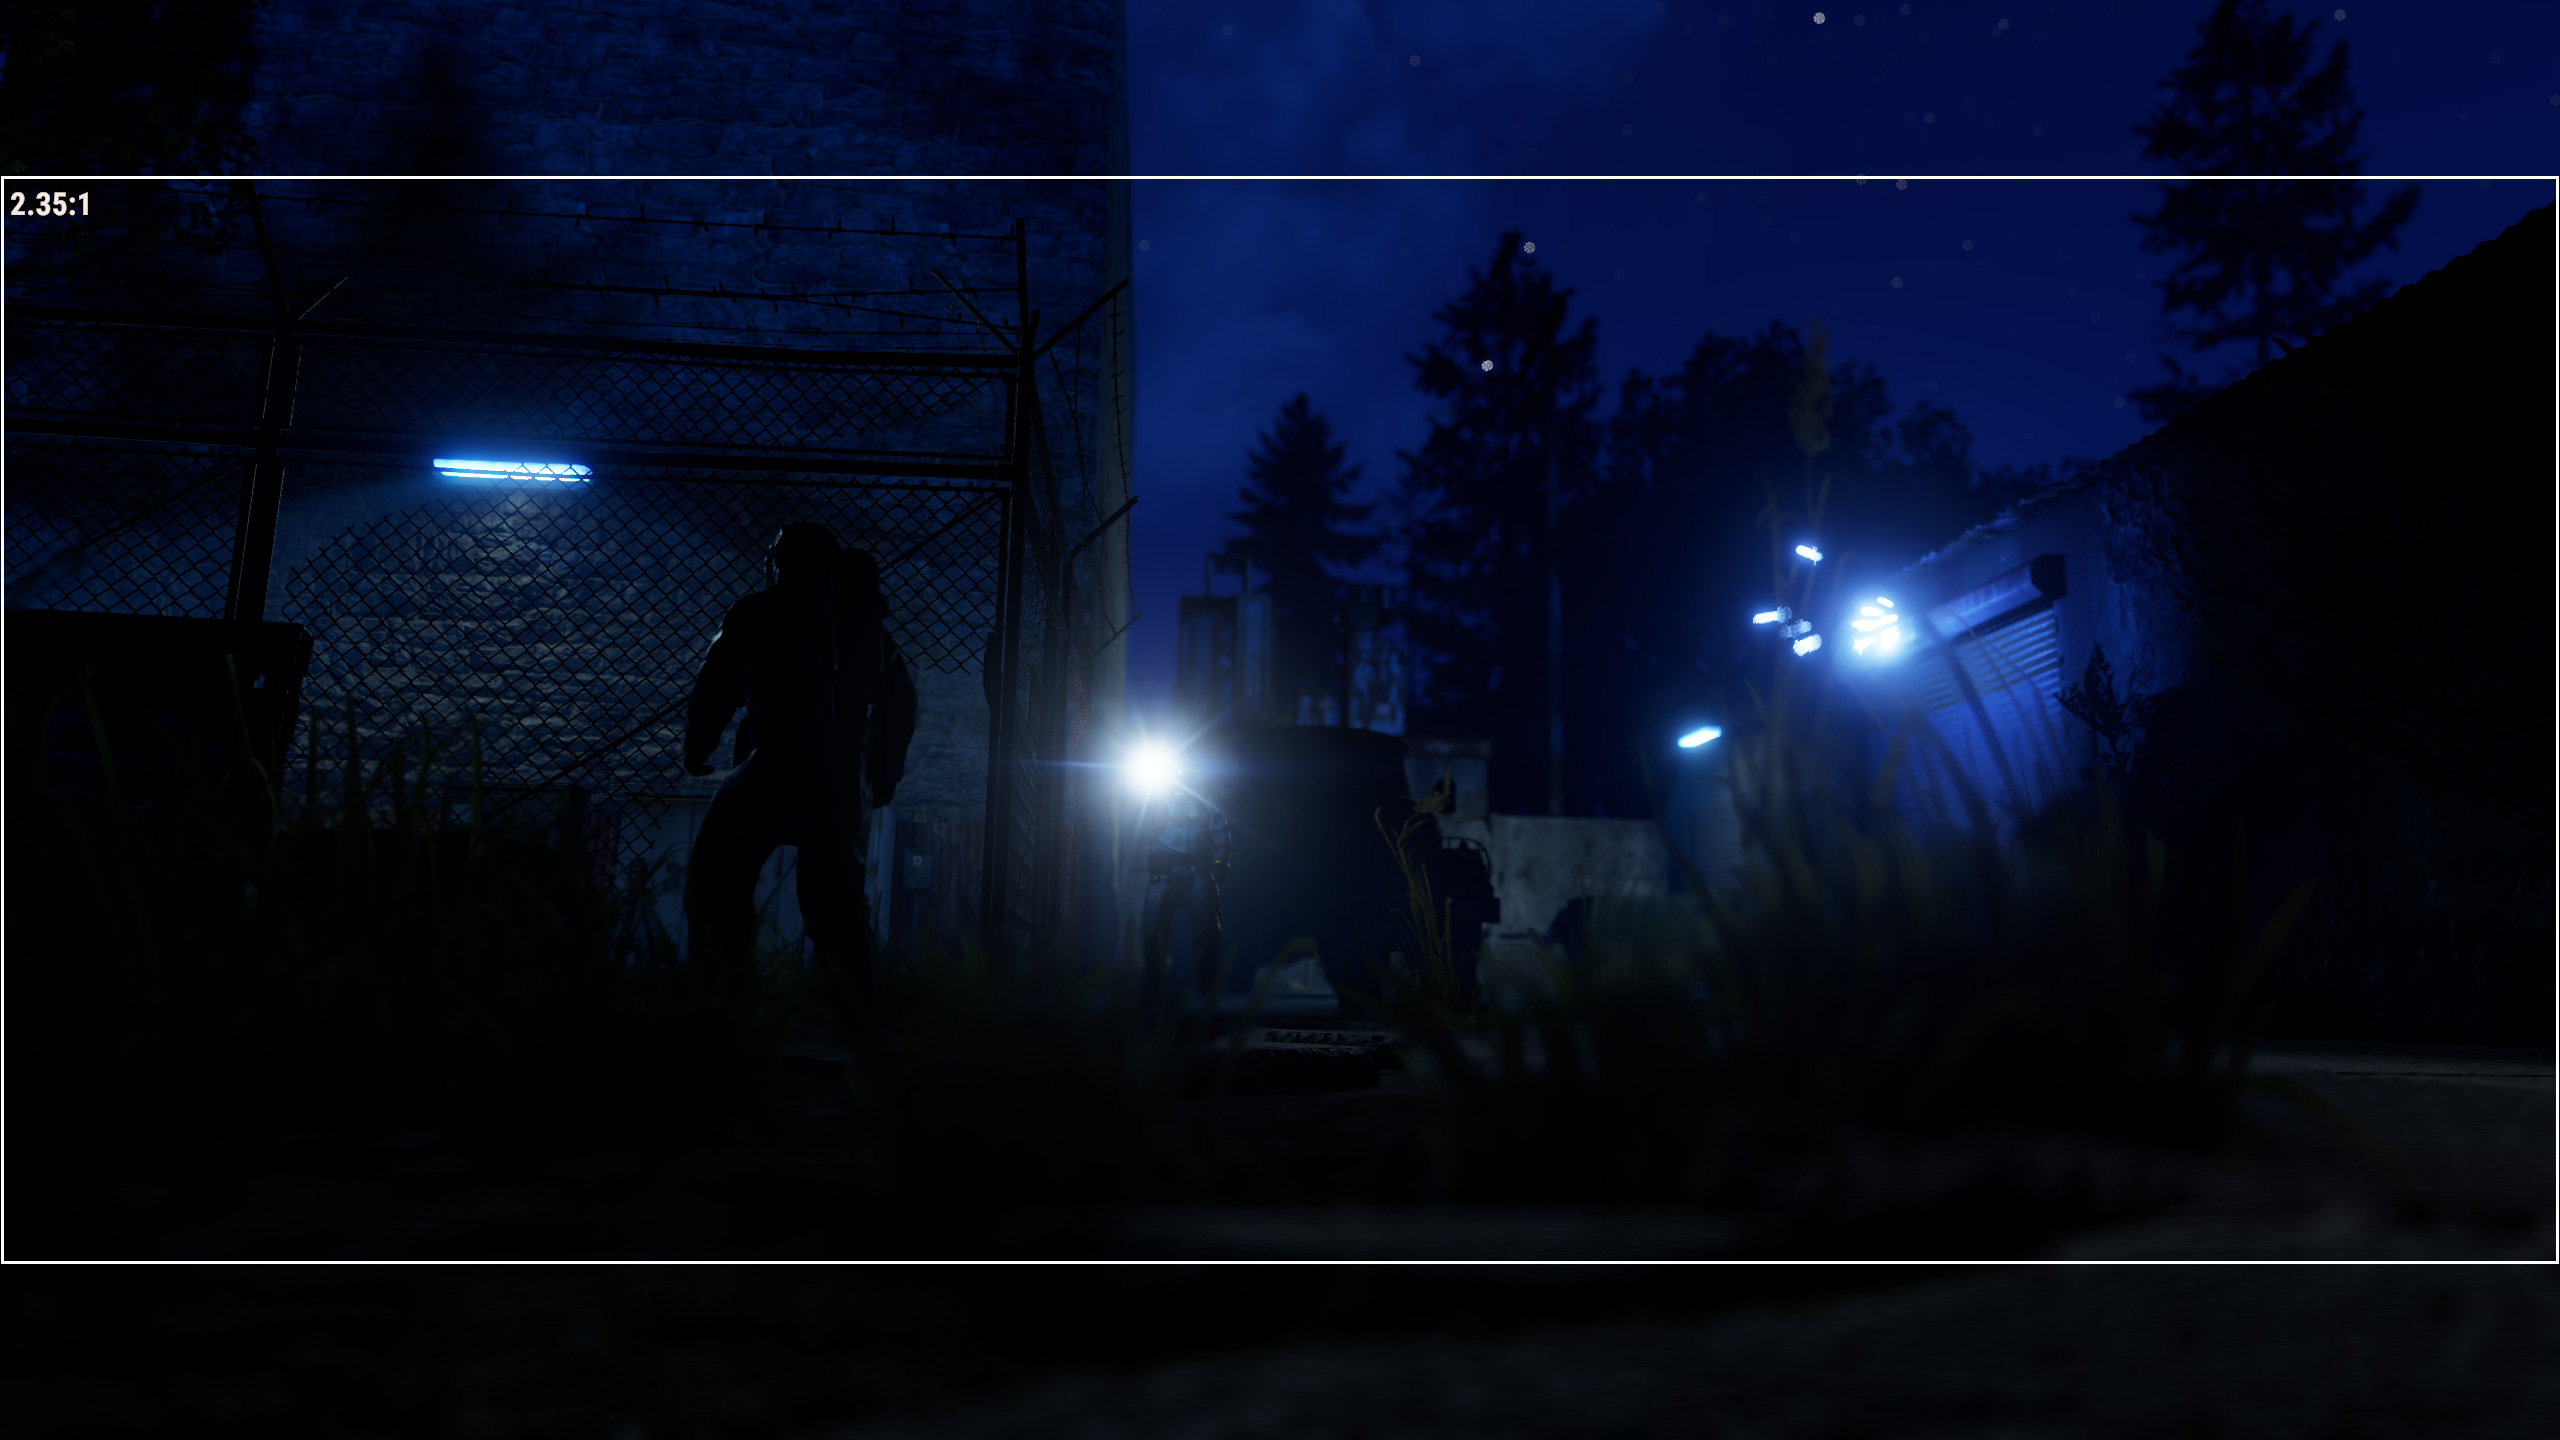
Aspect Ratio
Use debugcamera_guide 3 to enable an aspect ratio guide for the debug camera.
Set a custom aspect ratio by using debugcamera_guide_aspectratio <value> - for example 1 1 will be a square ratio. The aspect ratio being applied is printed in the top-left corner of the guide.
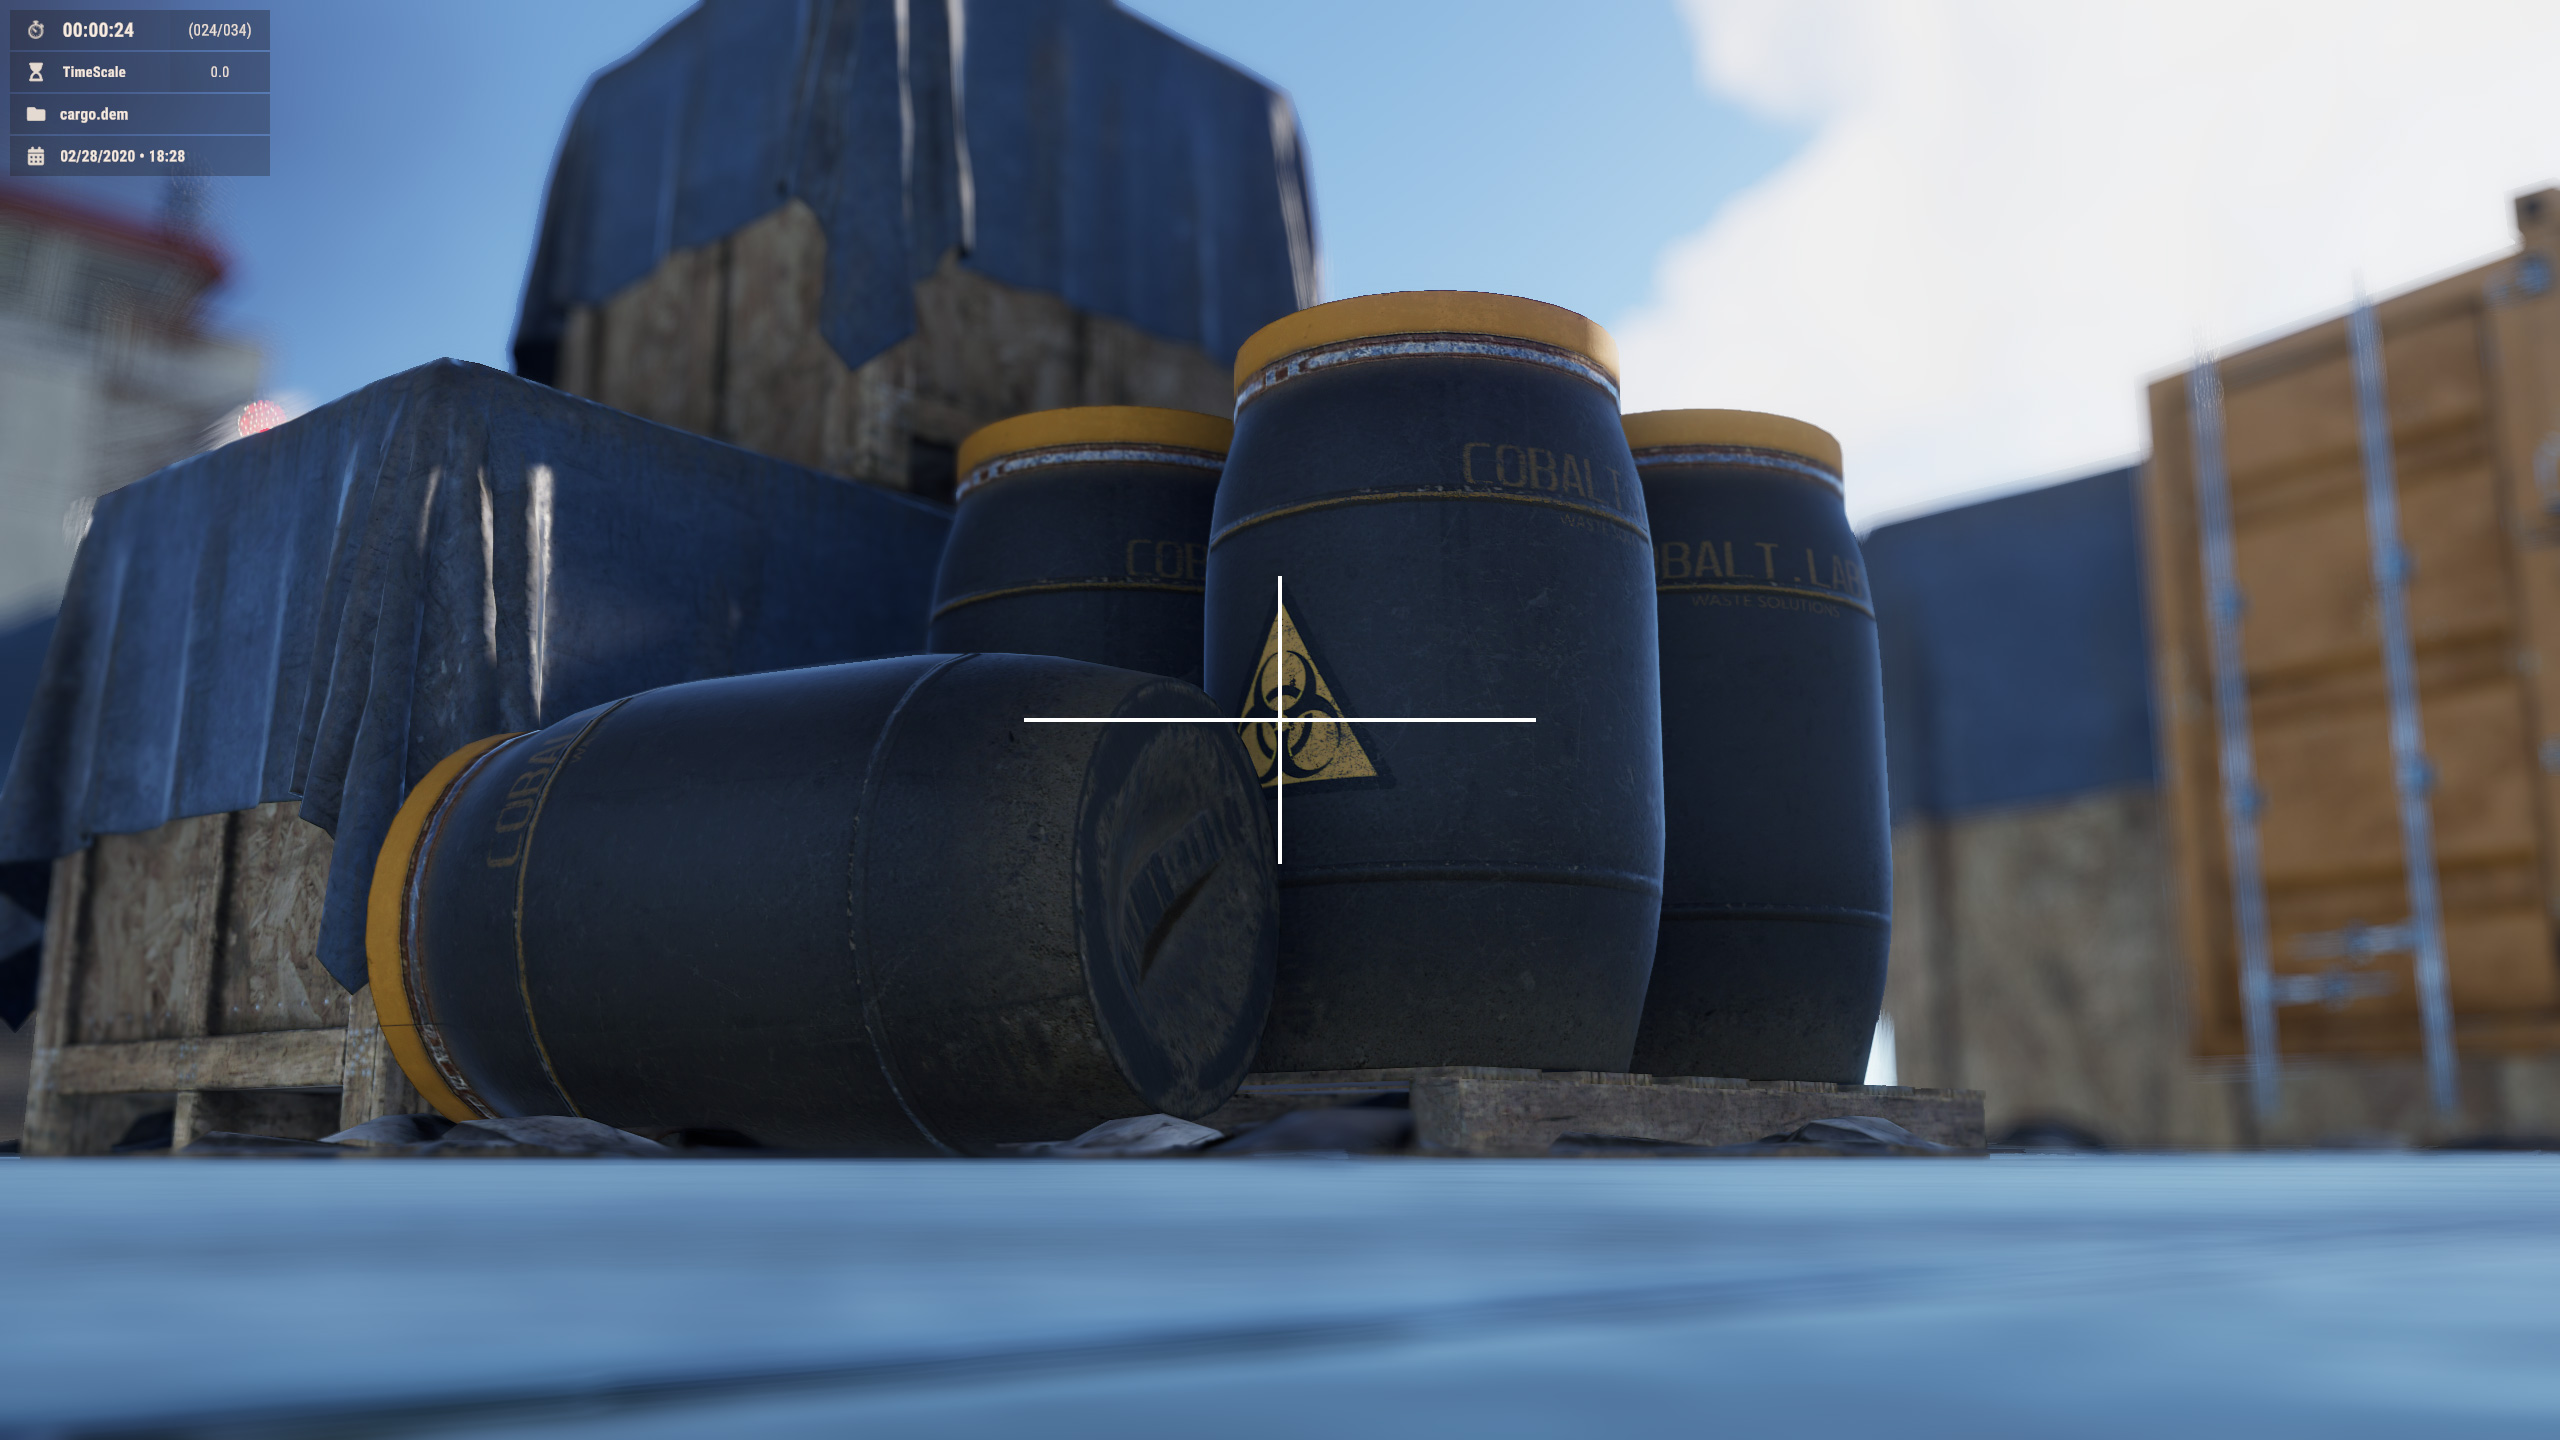
Crosshair
Use debugcamera_guide 4 to enable a crosshair guide for the debug camera.
Guide Color
Use debugcamera_guide_color <value> to set the color of the above guides.
The value parameter is measured in RGBA values.
Physical Camera Mode
The following convars allow the debug camera to use physical camera properties in order to mimic real world measurements, e.g. using common camera sensor types and specific focal lengths. In most cases, using these settings can help make your camera feel more true to life.
If you're familiar with photography, these settings should feel right at home for you.
Enable Physical Camera
Use camphysical 1 to enable physical camera mode for the debug camera. To revert to default camera behaviour, use camphysical 0
Sensor Types
The first step with physical camera properties is to select a sensor size/type.
Use camphysicalsensortypes to print out a list of camera sensor types, followed by an ID number.
Below is a list of the available camera sensors to choose from:
- 8mm
0 - Super 8
1 - 16mm
2 - Super 16
3 - 32mm Perf
4 - 35mm Academy
5 - Super 35
6 - 65mm ALEXA
7 - 70mm
8 - 70mm IMAX
9 - ALEXA LF
10 - ALEXA 35
11
By default the debug camera will use 'Super 35' as the chosen sensor.
Use camphysicalsensor <0-11> to set the debug camera to a different senor type. The number you use in this command corresponds with the ID numbers printed at the end of each sensor name in the sensor types list. For example, if you wanted to select '65mm ALEXA' you would use camphysicalsensor 7
Focal Length
The final step is to choose a focal length for the debug camera's lens.
Use camphysicalfocallength <number> to set the FOV for the debug camera, where <number> is the focal length measured in millimeters (mm)
For example, use camphysicalfocallength 50 to set the focal length to a 50mm equivalent lens.
Camera Info UI
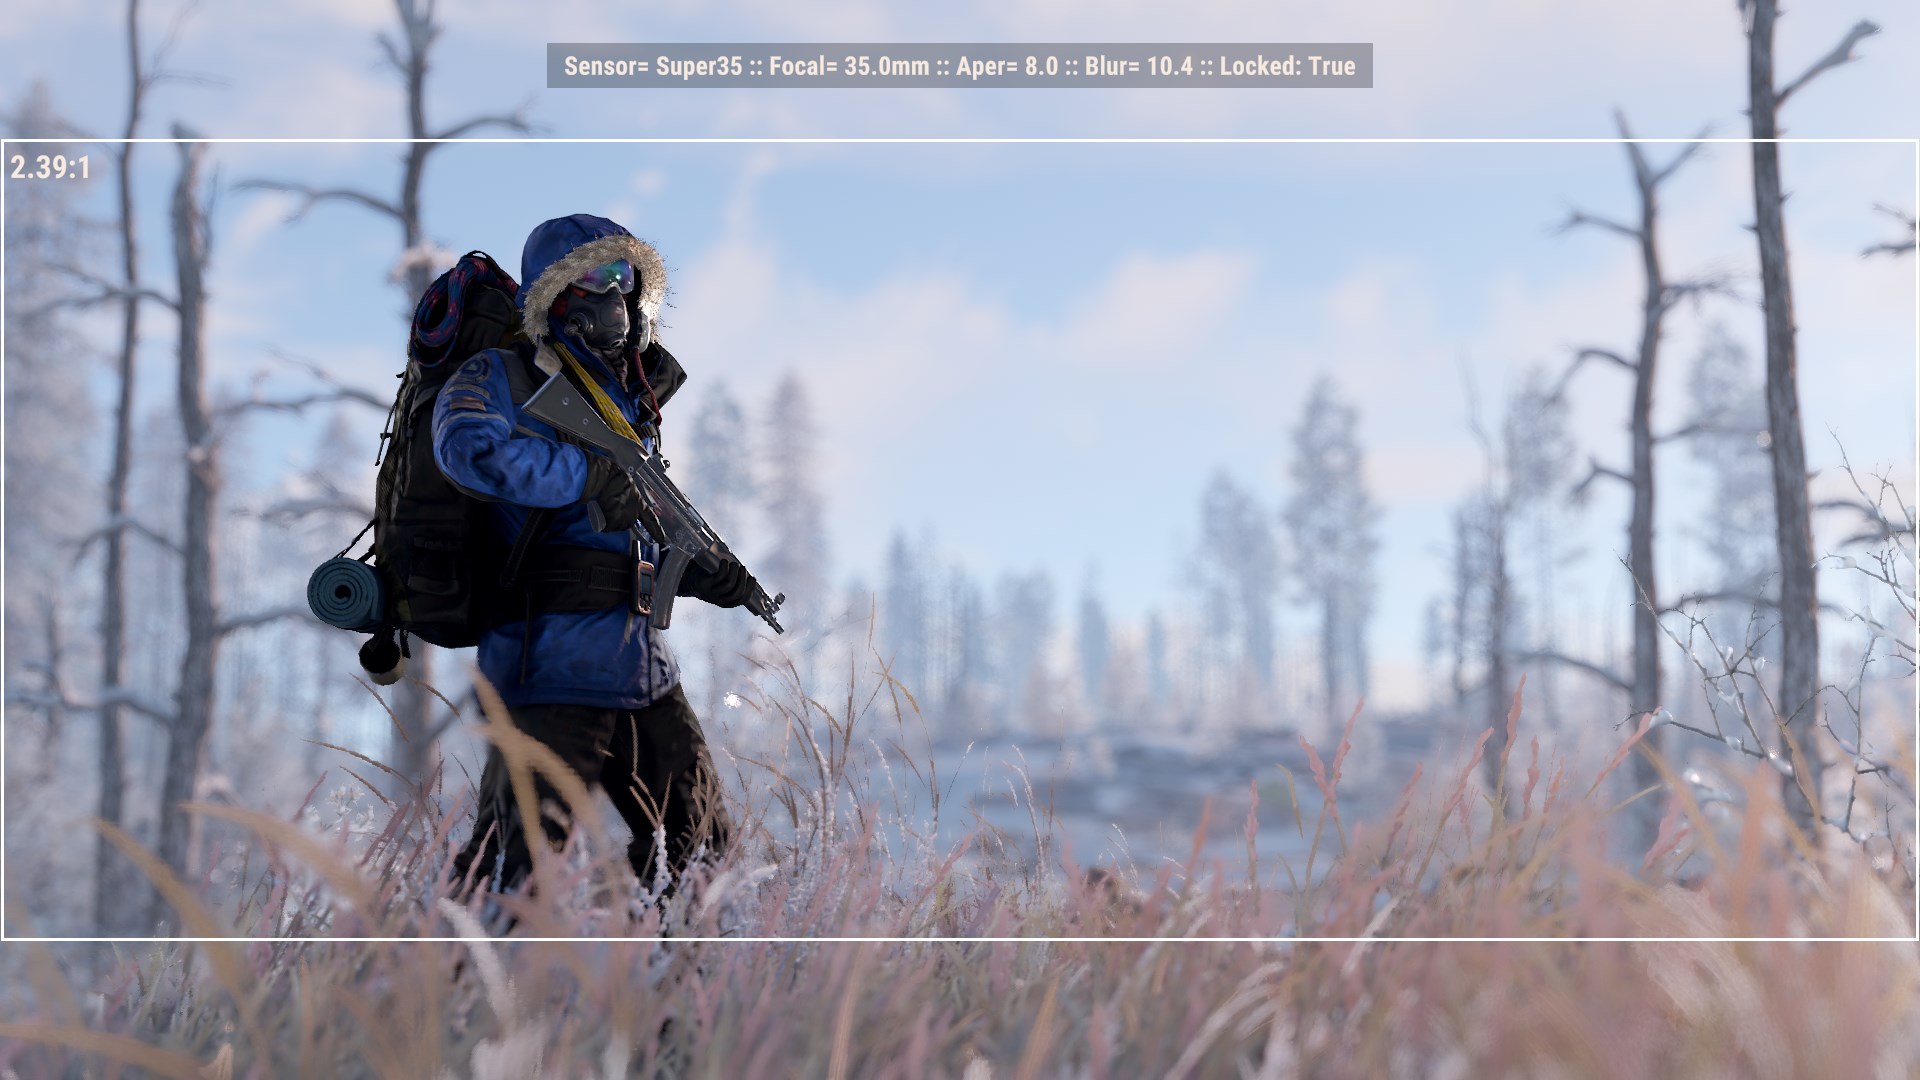
Use showcaminfo 1 to enable UI with camera information whilst in debug camera view.
When enabled, an overlay will be displayed at the top of the screen containing the following information:
- Camera FOV
- Depth of field aperture and blur values
- Camera lock status (debugcamera_lock)
- Sensor type (if physical camera mode is enabled)
- Focal length (if physical camera mode is enabled)
Camera Shake
Use debugcamera_shake <amplitude> <frequency> <duration> to begin a camera shake.
- Amplitude adjusts the intensity of the shake (higher values result in a longer and smoother shake)
- Frequency adjusts the rate at which the shake repeats (higher values result in a quicker more vigorous shake)
- Duration changes both the variables above, with a shorter duration resulting in a heavier, more chaotic shake, whereas a longer duration will stretch the shake to complete over a longer period of time.
Using debugcamera_stopshake will force the shake to end.
 Garry's Mod
 Rust
Rust
 Steamworks
 Wiki Help