Render Reference - Min/Mag Texture Filters
Render Library References
This page is part of the Render Reference, which is a set of pages dedicated to documenting the Render Library.
Other Render References pages include:
- Beams
- Minification and Magnification Texture Filters
- Render Targets
What are Min(ification) and Mag(nification) Filters?
Minification and Magnification filters are a feature of DirectX 9, which the Source Engine (and Garry's Mod, by extension) uses for its graphics rendering.
These two filters handle the very common situation where an image of some kind (a Texture or Material in the Source Engine) needs to be drawn at either a larger or smaller size than its natural size. In either case, there has to be some logic to tell the graphics system how it should stretch (Magnify) or compress (Minify) the image to make it fit the desired size.
In some situations like, for example, a pixel-art game, you may want low resolution pixel-art to be drawn at a much higher resolution on a modern display without the graphics system attempting to smooth the pixels as it stretches them, because smoothing would ruin the pixel-art look of the textures.
In other cases you might have a high resolution image, like a logo, that needs to be minified so that it can be drawn much smaller for something like a business card, or a HUD element without looking like it's missing key details of the design.
While it's not always necessary to make a specific minification or magnification filter choice for everything drawn to the screen, it can make a huge difference in the situations where it is needed.
What Functions are There?
Magnification
- render.PushFilterMag( number TEXFILTER ) - Add magnification filtering with a given filter
- render.PopFilterMag() - Remove the most recent magnification filter
Minification
- render.PushFilterMin( number TEXFILTER ) - Add minification filtering with a given filter
- render.PopFilterMin() - Remove the most recent minification filter
What Filters are There?
There are four (4) filters available via the Texture Filtering (TEXFILTER) enums:
- None - Disables any filtering override.
- Point - This produces a pixelated look. For more detailed info, see this page.
- Linear - This produces a smoothed look. For more detailed info, see this page.
- Anisotropic - This filter smooths textures based in part on their angle relative to the camera. For more detailed info, see this page
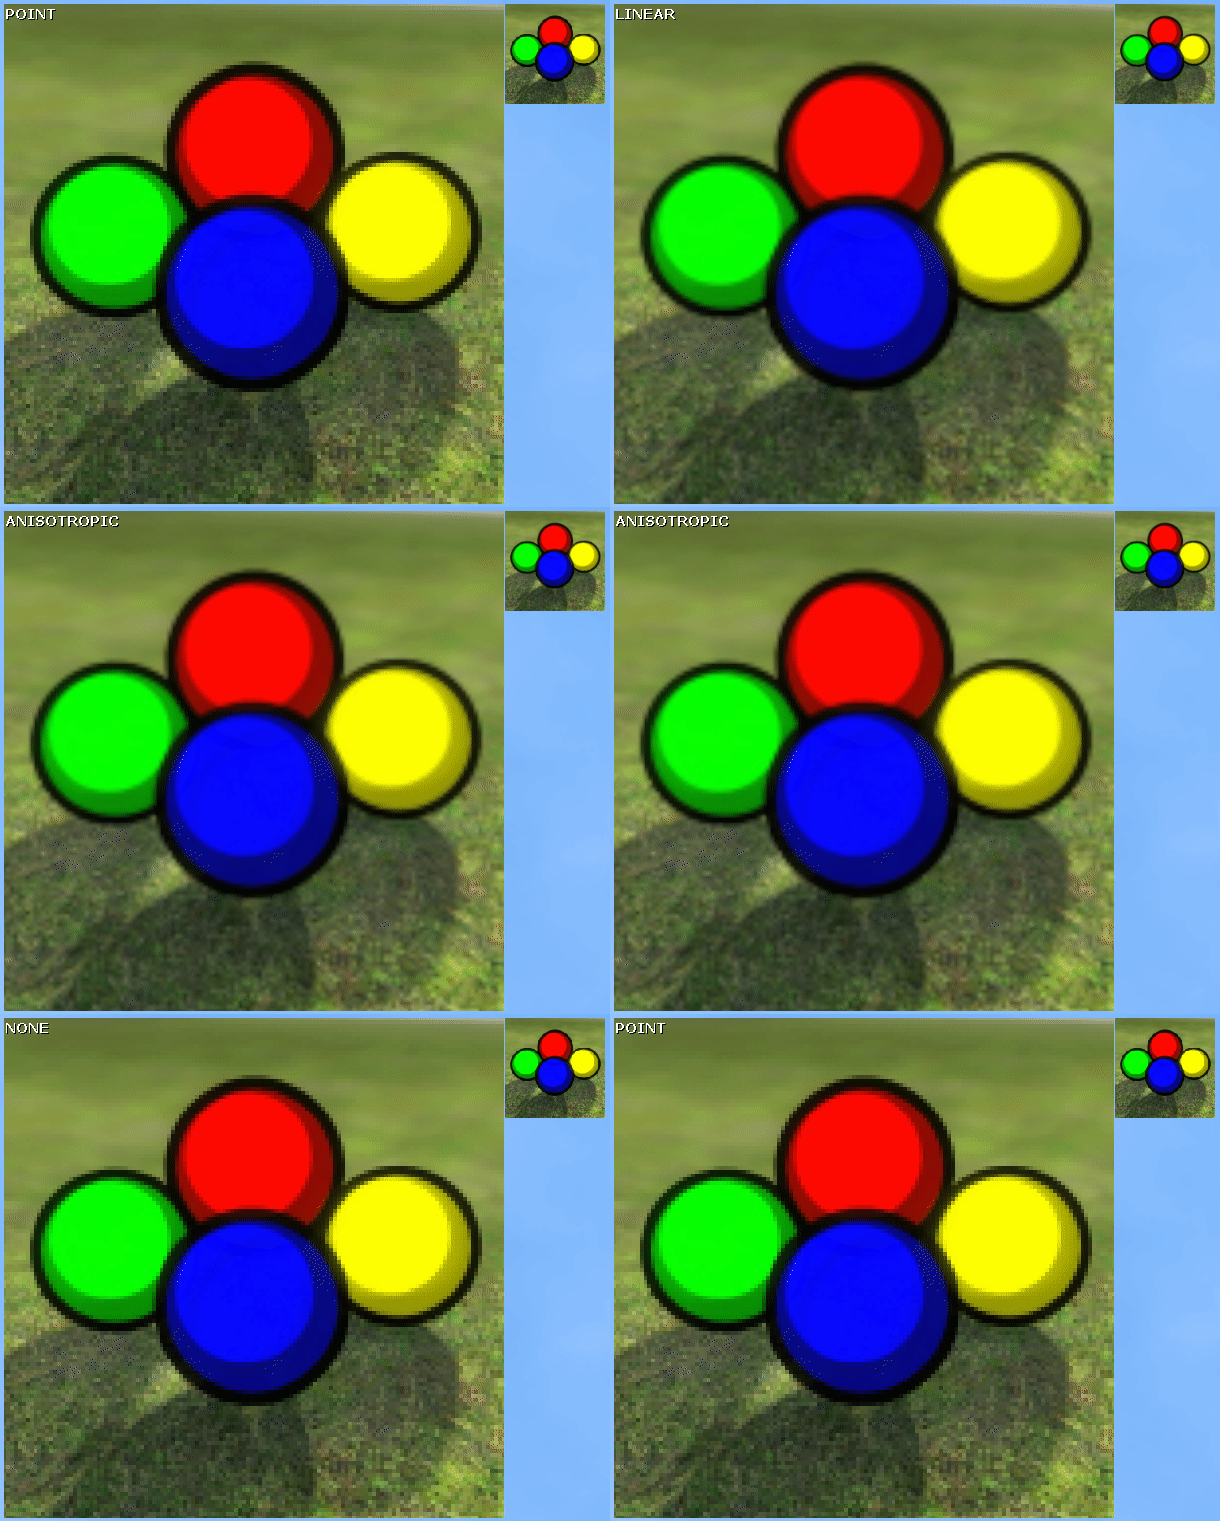
For a demonstration of how each filter looks, see the example output below.
Usage Example
Example
The following example provides a simple demonstration of each filter on both a magnified and minified version of an image.

 Garry's Mod
 Rust
Rust
 Steamworks
 Wiki Help